
SwitchBot Curtain 3: QuietDrift in Home Assistant
What is it with teenagers and curtains? They either don’t bother closing them when it gets dark, or they never open them during the day. SwitchBot have very kindly offered to help me with this little problem. They’ve sent me a pair of the new SwitchBot Curtain 3 robots which are designed to turn almost any type of curtain into a smart curtain.
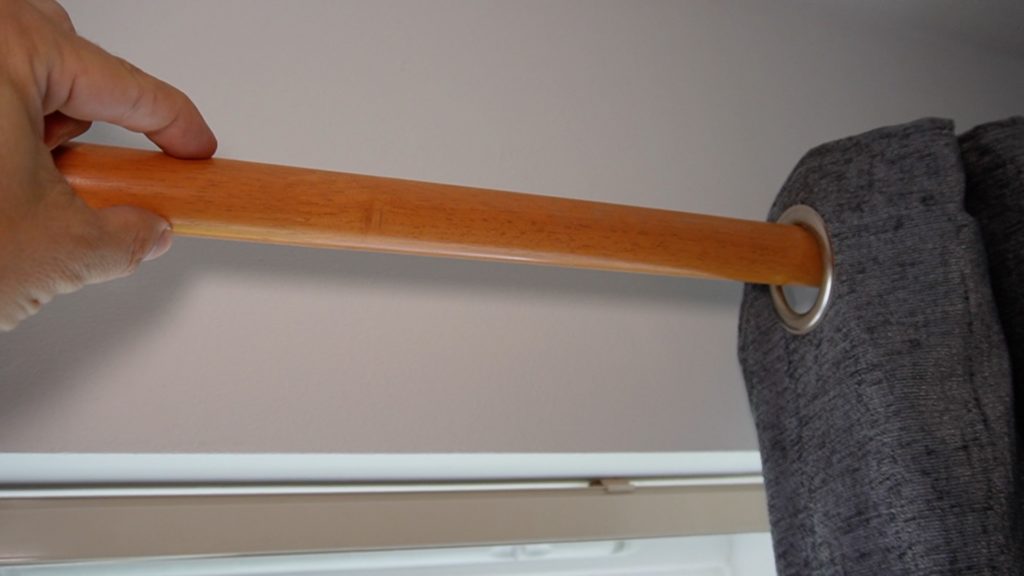
I’m going to be fitting the SwitchBot Curtain 3 to a wooden curtain pole that's about an inch and a half in diameter. The curtains are the grommet type with hole punched into them for the pole to go through. I was a bit concerned at first that I might need to change the pole because if I pull on the curtains then they don’t move freely and easily along it. They just kind of get jammed. But… SwitchBot have thought of this problem and I’ll discuss their solution in a bit.
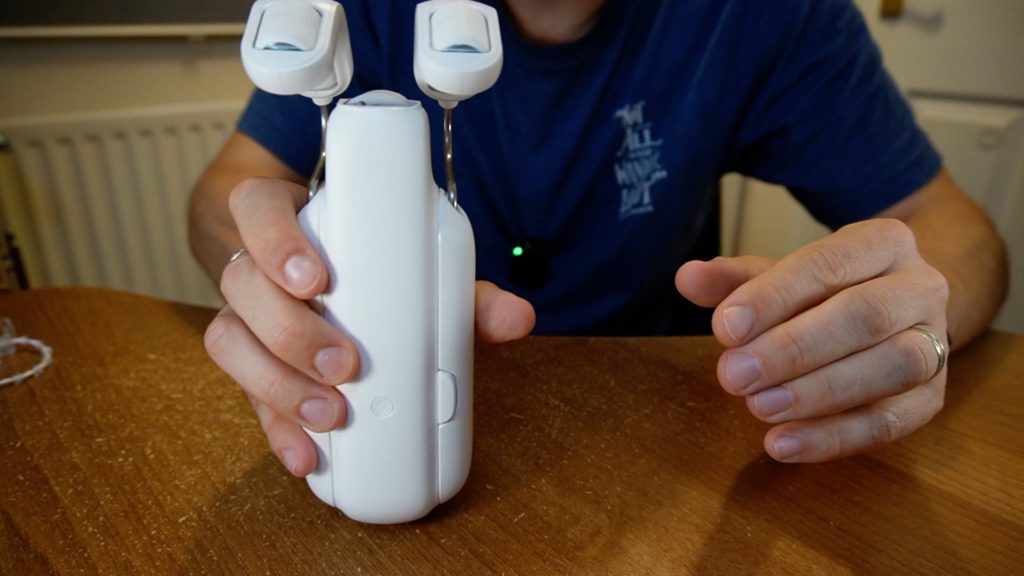
There are two versions of the Curtain 3 depending on the style of curtains. My curtains need the rod version but you can also get a rail version if your curtains sit inside a track. (SwitchBot have a compatibility checker here that you can use to find the correct version for your curtains) The robot’s main body itself is separate to the two arms that attach over the top of the curtain rod and clip on to the side of the main body. It sits behind the folds of the curtain itself, between the curtain and the window so it’s not visible from the room which is great. It works by rolling along the curtain pole, pushing the curtain along it.
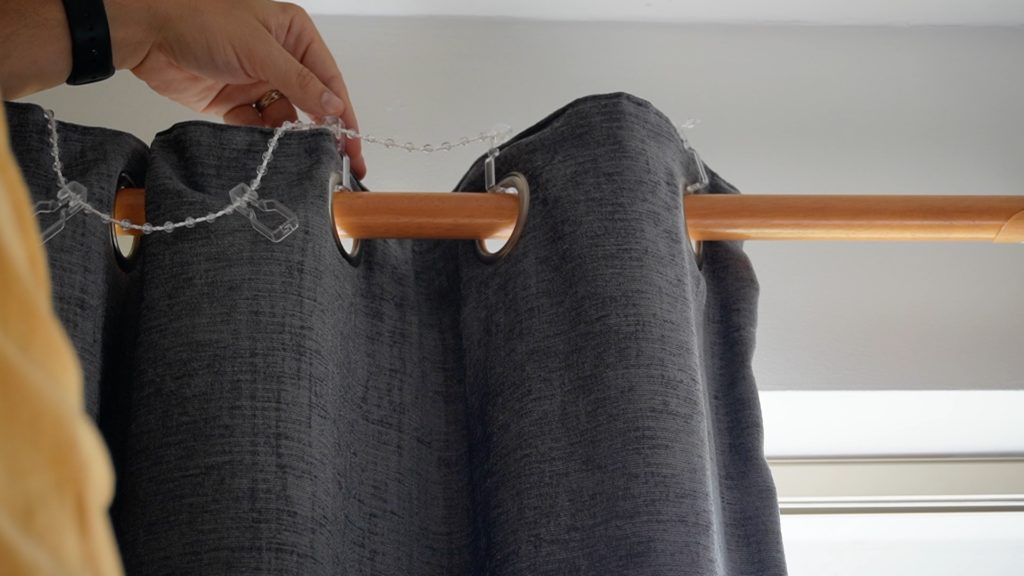
If you have grommet-style curtains, that is the type with holes punched into it like I have, then you need the special "plastic clips on a bead chain" that comes with it. The clips attach over the top of the curtain through the grommets, and if you set the bead spacing just right it keeps each grommet at the correct angle to prevent the curtain from jamming as it is pulled along. It’s really quite a clever bit of engineering.
If you have tabbed curtains then there are adapters you’ll need to fit for those, and if you have an extendable pole then you’ll need to fit the included adapter to your pole too so as the robot can make it over the step.
You’ll also need to stick some provided magnets at the fully closed position for each curtain. They look a bit like blister plasters and are quite thick, so make sure you press them in to position properly. Once you’ve done that, just use the SwitchBot app to install and calibrate them. It’s quite easy to do and the app will basically talk you through the whole process. In the app you can control their position, and if you have a SwitchBot hub then you can also set automations so as they open and close on a schedule or using light levels if you have the optional solar panels. Did I not mention the solar panels?
Ok so you really must get the solar panels that go with them. They are really easy to install - they’ve got a long arm that unfolds so as the panels can sit neatly within the window to get full sunlight. They clip in to the bottom of the SwitchBot Curtain really easily, and they've also got a light sensor in so they know if it’s day or night. To make use of that sensor in automations though you will need a hub, and your best option there is the SwitchBot Hub 2.
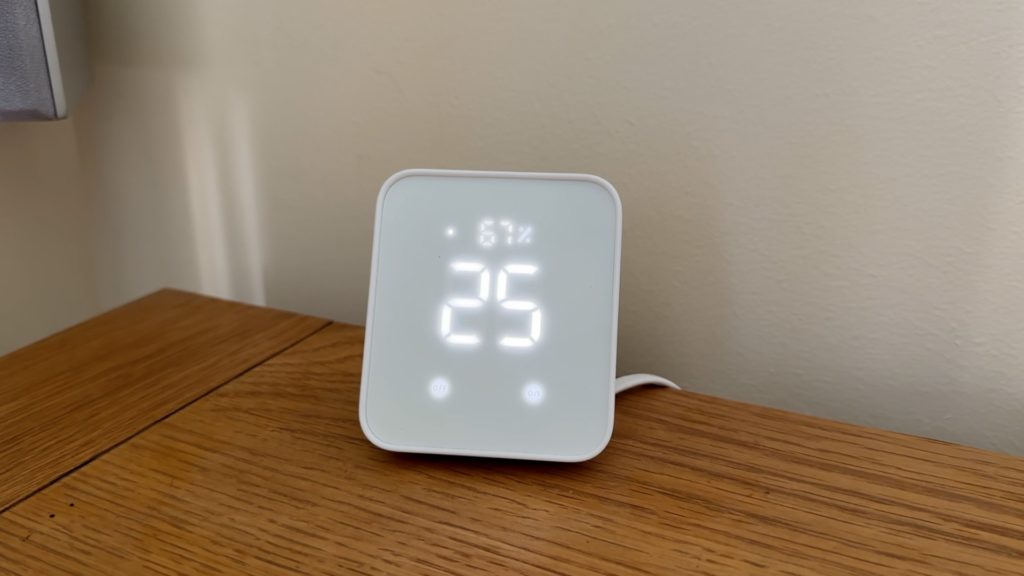
This is their latest hub and it supports Matter which means you can easily link your curtains to something like Home Assistant. Matter really is the easiest way to connect SwitchBot devices to Home Assistant. If you install the Matter add-on and integration, pair your SwitchBot Hub with Home Assistant, then in your SwitchBot app under your Hub settings select your supported devices as Secondary Devices for Matter. Then they just appear in Home Assistant to control.
But all of this so far is really not that much different to the previous SwitchBot Curtain 2. There must be something new about version 3? Well, yes - QuietDrift. This new feature will open and close your curtains almost silently. It does this by moving very slowly. Very, very slowly indeed. (For a full list of new features in v3, there's a comparison article on SwitchBot's web site here)
Now QuietDrift mode will use up a lot more of your battery compared to normal fast mode. So whilst it is brilliant to watch QuietDrift in action, I am struggling to find a reason to use it myself. Let’s say you are automatically opening the curtains in your bedroom in the morning, you might use QuietDrift so as to not wake you up. But your curtains are opening, surely that will wake you up anyway so what’s the point?
But let’s pretend for a minute that you actually have a use-case for QuietDrift - if you are also using Home Assistant and Matter, then you won’t be able to make use of QuietDrift that way. You can use the SwitchBot automations if you like, but if you prefer to use Home Assistant automations then you’ll need to use the SwitchBot API.
Go and check out my SwitchBot API article/video first because you’ll need to get that up and running before my next steps will work.
We need to create four components in Home Assistant. First we need a REST command which when called will do the actual communication with SwitchBot’s API. Secondly we need a sensor to keep track of the curtain’s position. Then we need a Script to manage the calling of the REST command, and finally a Cover template entity to present all of this as a controllable curtain to Home Assistant. Edit your configuration.yaml and add a rest command like this.
rest_command:
  curtain_sbapi_setposition_quiet:
    url: https://api.switch-bot.com/v1.1/devices/DEVICE_ID/commands
    method: POST
    headers:
      Authorization: "{{ states('input_text.switchbot_token') }}"
      sign: "{{ states('sensor.switchbot_sign') }}"
      t: "{{ state_attr('sensor.switchbot_sign','t') }}"
      Content-Type: "application/json"
      nonce: ""
    payload: '{"commandType": "command","command": "setPosition","parameter": "0,1,{{ position }}"}'
If you followed by API video exactly then your token and sign entity names should be good. Don’t forget to make sure that the DEVICE_ID value matches the ID of your paired curtains device, which you’ll find in your All Devices entity data.
Take a closer look at the ‘parameter’ value - the number '1' means that QuietDrift is enabled. If you don’t want to use QuietDrift, change this to ‘ff’. To be honest, if you don’t want to use QuietDrift then you are better off using Matter, but perhaps you have your reasons! Save your configuration and restart Home Assistant to make sure the REST command entity has been created.
Next find your rest sensor configuration, the section where you created your 'all devices' sensor. Add the following new position sensor configuration to it making sure that you change the DEVICE_ID to match again.
rest:
  - resource: https://api.switch-bot.com/v1.1/devices/DEVICE_ID/status
    scan_interval: 300
    headers:
      Authorization: "{{ states('input_text.switchbot_token') }}"
      sign: "{{ states('sensor.switchbot_sign') }}"
      t: "{{ state_attr('sensor.switchbot_sign','t') }}"
      Content-Type: "application/json"
      nonce: ""
    sensor:
      - name: "Curtain Position"
        unique_id: curtain_position
        value_template: "{{ value_json.body.slidePosition }}"
        unit_of_measurement: "%"
Now go and create a Script using the below YAML code. This script calls the REST command with the requested curtain position. It then loops around waiting for 30 seconds each time and updating the curtain position sensor. It does that a few times because it takes so long for the curtains to move using QuietDrift.
alias: Curtains Set Position Quiet
sequence:
  - service: rest_command.curtain_sbapi_setposition_quiet
    data:
      position: "{{ position }}"
  - repeat:
      count: 6
      sequence:
        - delay:
            hours: 0
            minutes: 0
            seconds: 30
            milliseconds: 0
        - service: homeassistant.update_entity
          data: {}
          target:
            entity_id: sensor.curtain_position
mode: single
And finally we create a cover entity to bring all of those components together. The cover entity calls the script and passes in the requested position. Because the SwitchBot API is actually expecting a value which is inverse to that used by Home Assistant, we just do a bit of maths to calculate the correct position value. The cover entity gets the current position from the position sensor we created earlier, but filtering out any values above 95 as 100, and below 5 as 0. Restart everything just to make sure it’s all created and you’ll be good to go! You can use your new cover entity on your dashboard, and even share to HomeKit / Alexa so as you can control it that way.
cover:
  - platform: template
    covers:
      curtains_quiet:
        friendly_name: "Curtains Quiet"
        device_class: curtain
        set_cover_position:
          service: script.curtains_set_position_quiet
          data:
            position: "{{ 100 - position }}"
        position_template: >-
          {% set perc_pos = 100-states('sensor.curtain_position')|int(0) %}
          {% if perc_pos > 95 %}
            100
          {% elif perc_pos < 5 %}
            0
          {% else %}
            {{ perc_pos }}
          {% endif %}
Well, have these solved my initial problem? Mostly, yes they have. I have the curtains set to close automatically in the evening at sunset. They’re basically added to the same automation that all of my blinds and blind tilts are included in. In the mornings though, I still have them in manual opening mode because my daughter wasn’t happy with the idea of being woken up by sunlight like some sort of adolescent vampire. What I can do now though is check whether or not they have been opened without physically entering her room!
As a bonus I also added the curtains to our Away routines, so for a week while we were on holiday the curtains were opening and closing totally automatically to help give the house a more lived-in look.