Glow Smart Meter Display and Home Assistant: Configuration Tutorial

If you’ve seen my channel before then you may have stumbled across my previous videos and articles all about the Hildebrand Glow in-home-display (IHD) for your smart meter and how to connect it to Home Assistant. Well, I’ve had a bit of feedback and decided I could do a better job, so here is the ultimate definitive guide to getting the Glow CAD and display working locally with Home Assistant
- Overview of the CAD/IHD
- Install the File Editor
- Install and Configure Mosquitto / MQTT Broker
- Find Home Assistant's IP Address
- Configure MQTT on the Glow display
- Find the Glow display's MAC address / Device ID
- Configure Home Assistant
- Home Assistant's Energy Dashboard
Overview of the CAD/IHD
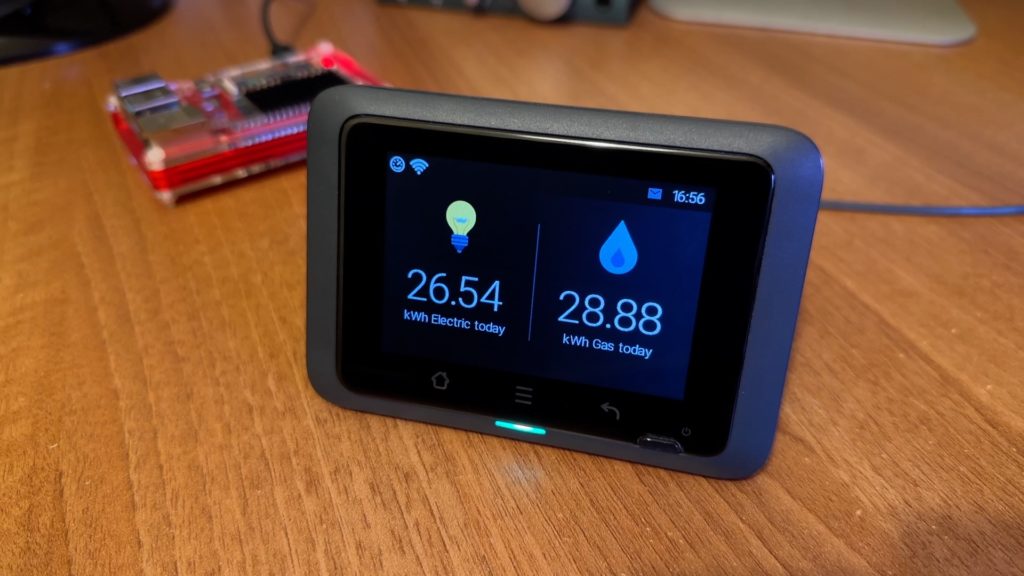
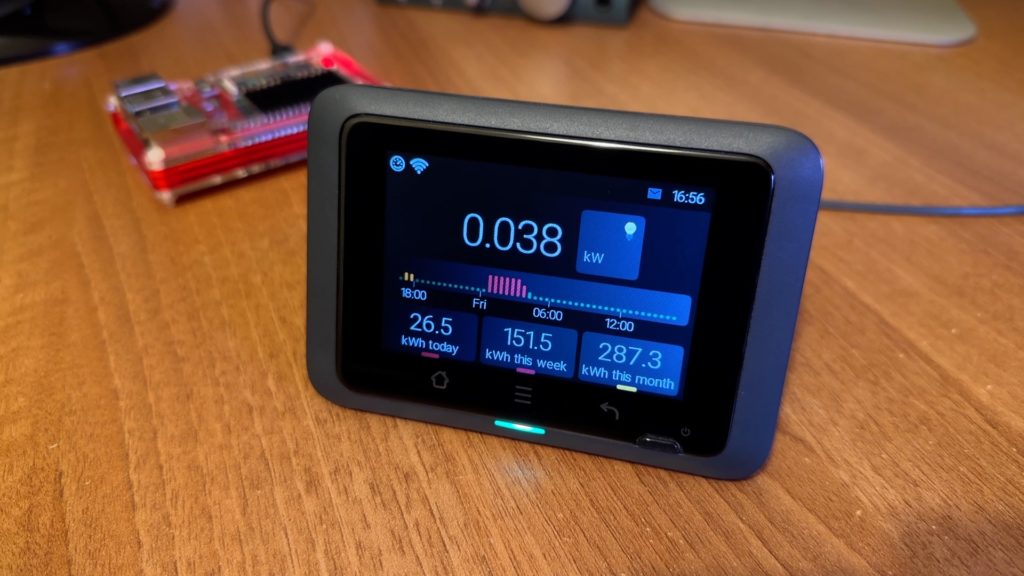
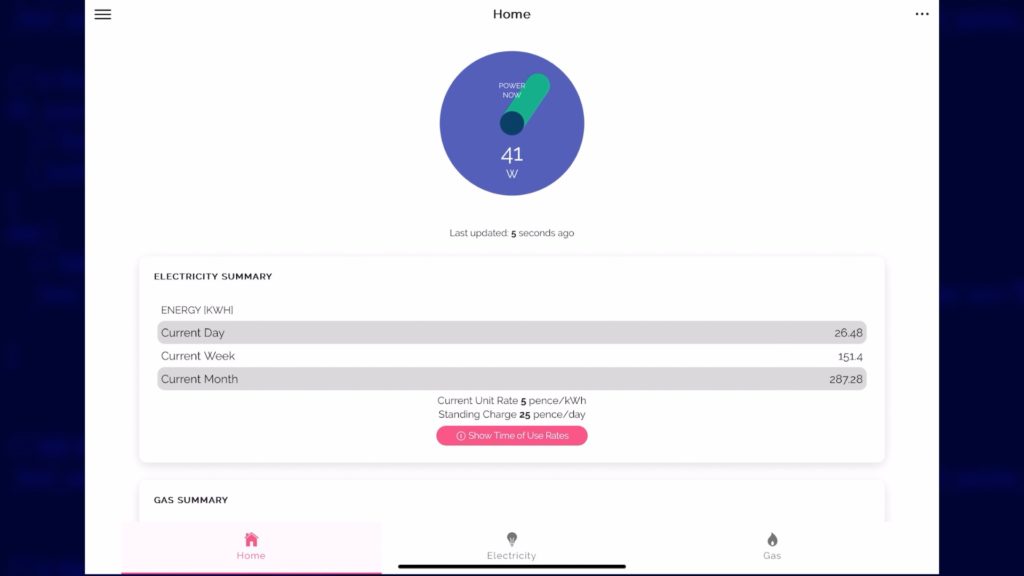
The Glow CAD is a special type of in-home display for your smart meter and it has a number of advantages over the free display that you might have been given when the meter was installed. The Glow display can be used alongside your free display if you want, but the Glow display will also connect to your Wifi network and relay live power and energy data to Glow’s server. You can use their Bright app to view that if you like , and they also provide a cloud-based API that you can use to retrieve that data.
But the best feature of the Glow display is that you can connect to it locally over your own home network to get that very same data, and that means you can integrate it nicely into your home automation solution of choice without needing to use the internet. If you do decide to purchase one, you must get it direct from Hildebrand’s Glowmarkt site because they have to be paired to your smart meter before they are sent out. At the time of writing (February 2023) they only have the wireless display version available, but there is a version without a display coming soon too.
On to the configuration then. Before you start trying to get Home Assistant working with the display, make sure that you have configured your display to connect to your WiFi network and that it is reporting live data back to their Bright app. If that part isn’t already working then the rest of this process probably won’t work either.
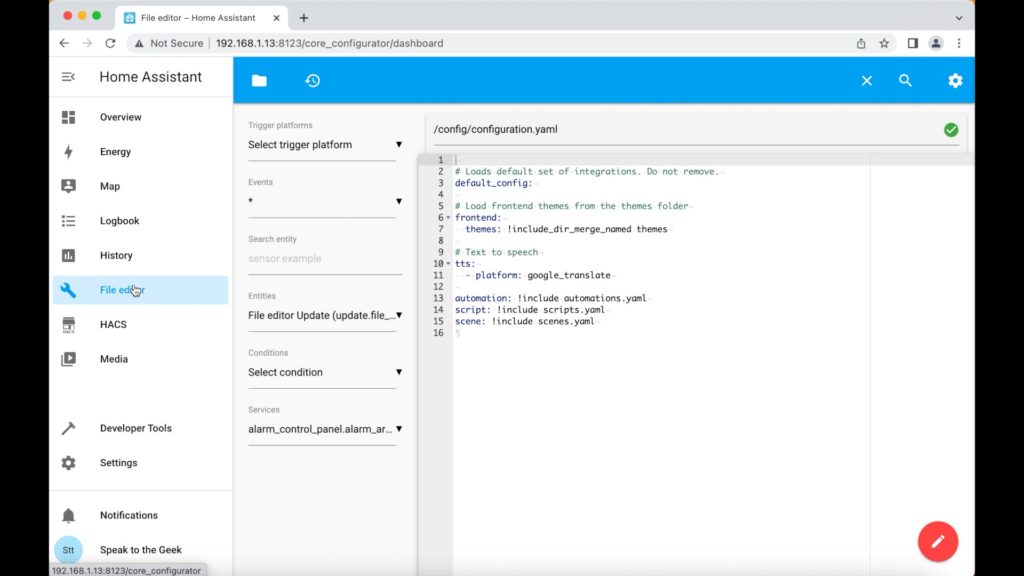
Install the File Editor
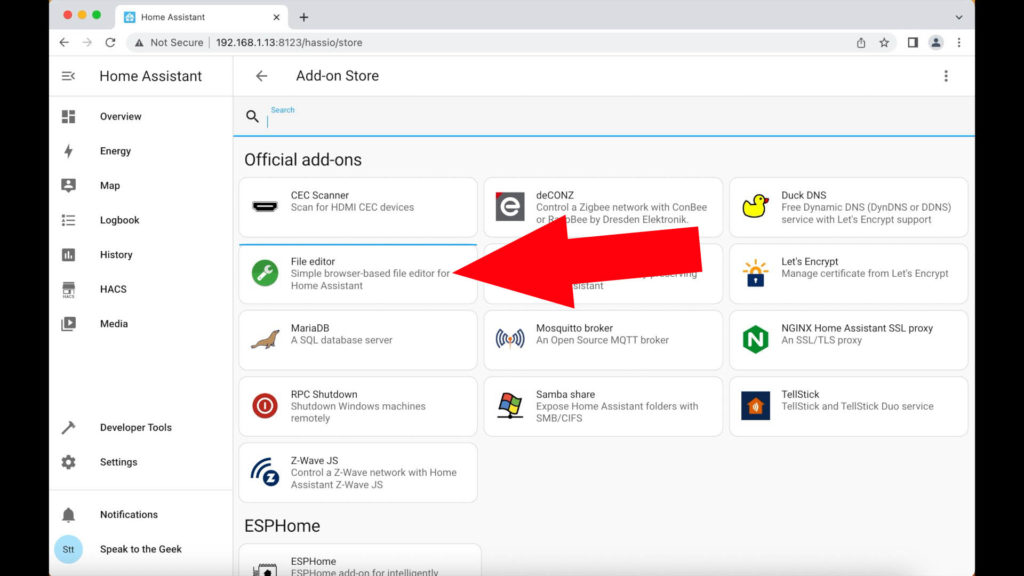
We will need some way to edit the Home Assistant configuration files. If you know how to do that already then skip ahead, otherwise I suggest you install the File Editor add-on. From the Home Assistant dashboard navigate to:
- Settings > Add-ons > Add-on store (button)
- Search for File editor
- Click on Install (takes a couple of minutes) then Start.
- Toggle Show in Sidebar on for easy access from the menu on the left-hand side

Install and Configure Mosquitto / MQTT Broker
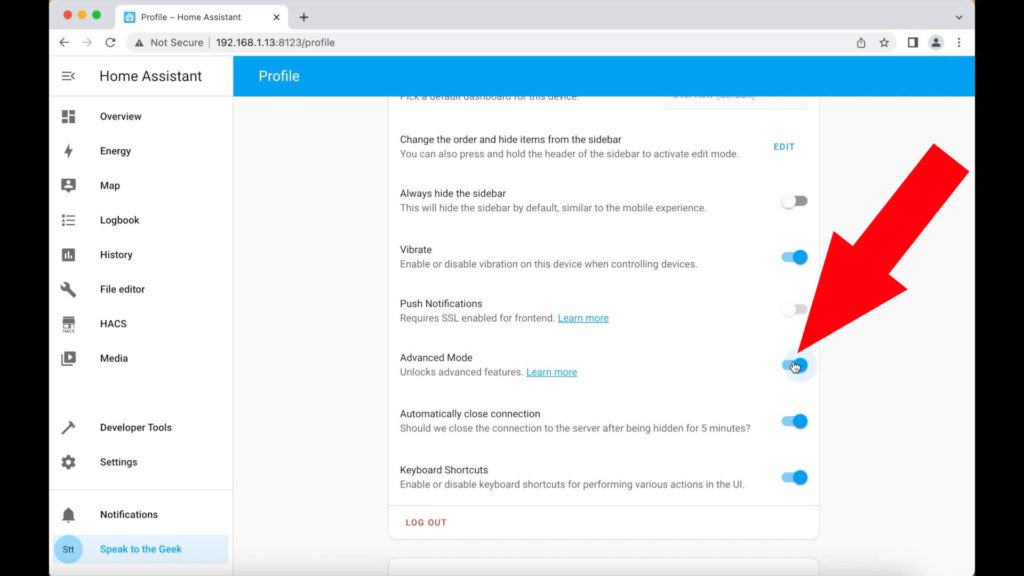
Now we need to configure an MQTT broker, which is the component that the Glow display will talk directly to. We’ll start by creating a user just for use by MQTT but in order to do that we must enable Advanced Mode first by clicking on our profile name in the menu (right at the bottom-left!) and scrolling down to enable the Advanced Mode toggle.
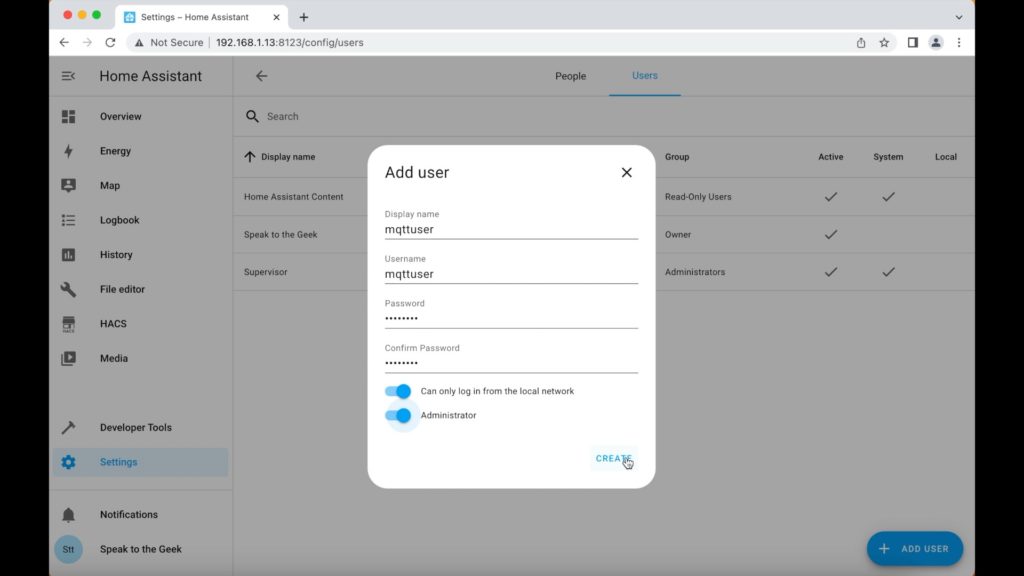
Then we create the user by navigating to:
- Settings > People > Users (tab) > Add user
Use the following parameters:
- Display name: mqttuser
- Username: mqttuser
- Password: Something complex but easy to type later on!
- Toggle on ‘can only log in from the local network’
- Toggle on ‘Administrator’
- Click on Create.
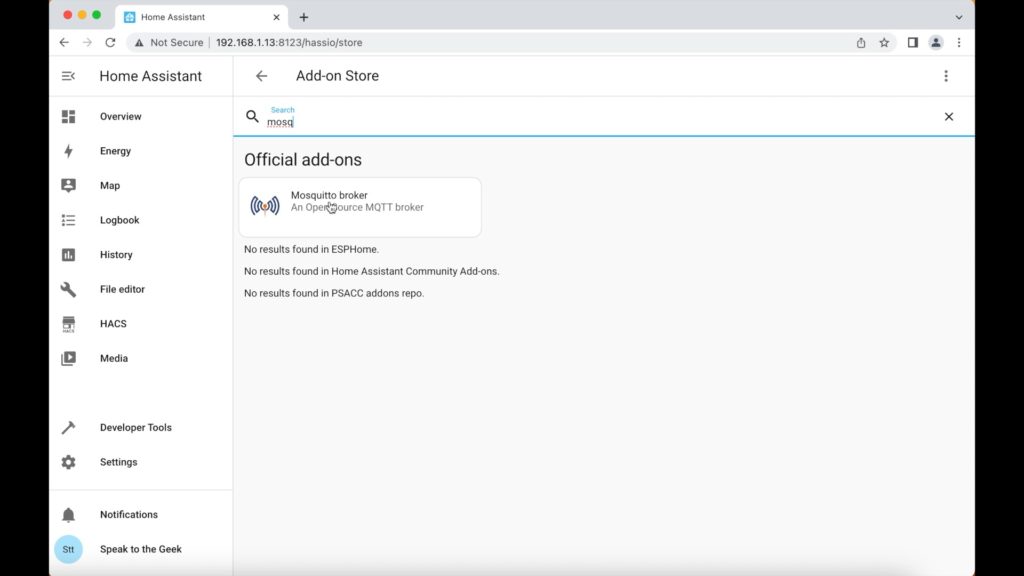
Now to install the Mosquitto add-on which is the MQTT broker itself. Navigate to:
- Settings > Add-ons > Add-on store (button)
- Search for Mosquitto
- Click on Install (this takes 2-3 minutes on my Raspberry Pi)
- No further configuration is required so just click on Start to run the add-on
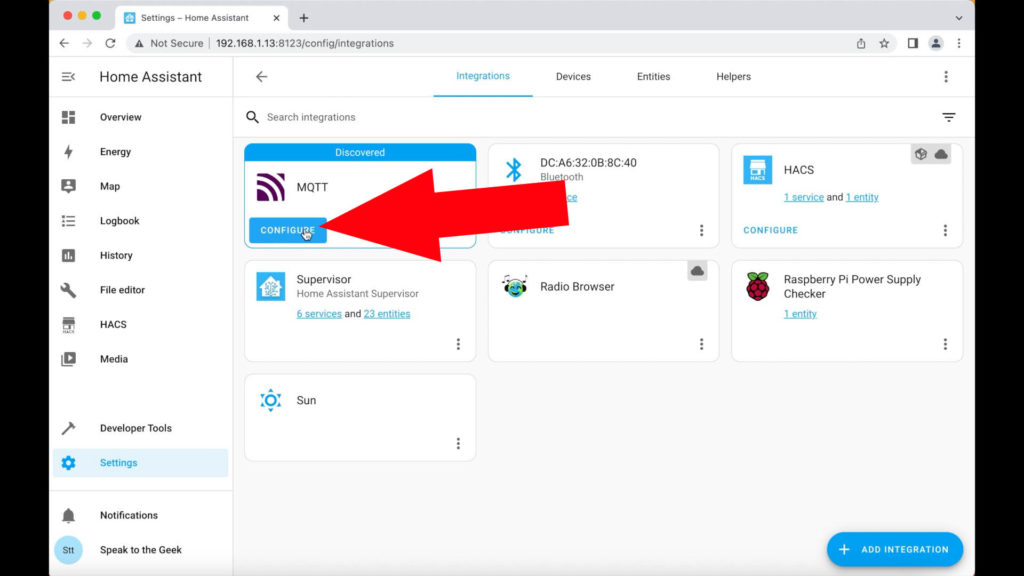
Once Mosquitto is running, Home Assistant should auto-detect it but you'll still need to manually acknowledge that you want to integrate it with Home Assistant. Navigate to:
- Settings > Devices & Services > Integrations (tab)
MQTT should be highlighted as newly discovered with a 'configure' button for you to click on. Click on button that to start a very minimalist wizard just requires you to click on submit and finish, and you're done!
Find Home Assistant's IP Address
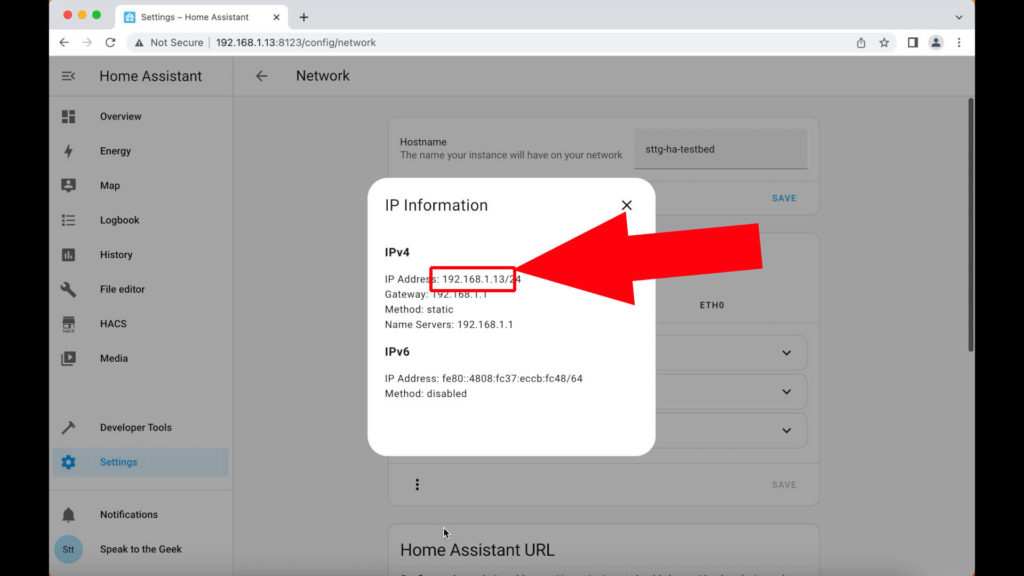
Before we configure your display to talk to Home Assistant using MQTT. We first need to find Home Assistant’s IP address. You might already know this, but if you're not certain then navigate to:
- Settings > System > Network
If Home Assistant is connected using a wired network cable to your home network, look under the tab named 'ETH0', but if it's on WiFi then select the tab named 'WLAN0'. Those interface names are valid for a Raspberry Pi, so if you're using a different bit of hardware then the names may be slightly different but still as obvious (WLAN = Wireless LAN; ETH = Ethernet cable). When you've selected the correct tab, click on the three dots below the tab and select ‘IP Information’ from the pop-up menu. You should see the IP address displayed in the IPv4 section. We need the values that are before the forward slash so in my case I need to make a note of 192.168.1.13, and I ignore the /24 at the end.
Configure MQTT on the Glow display
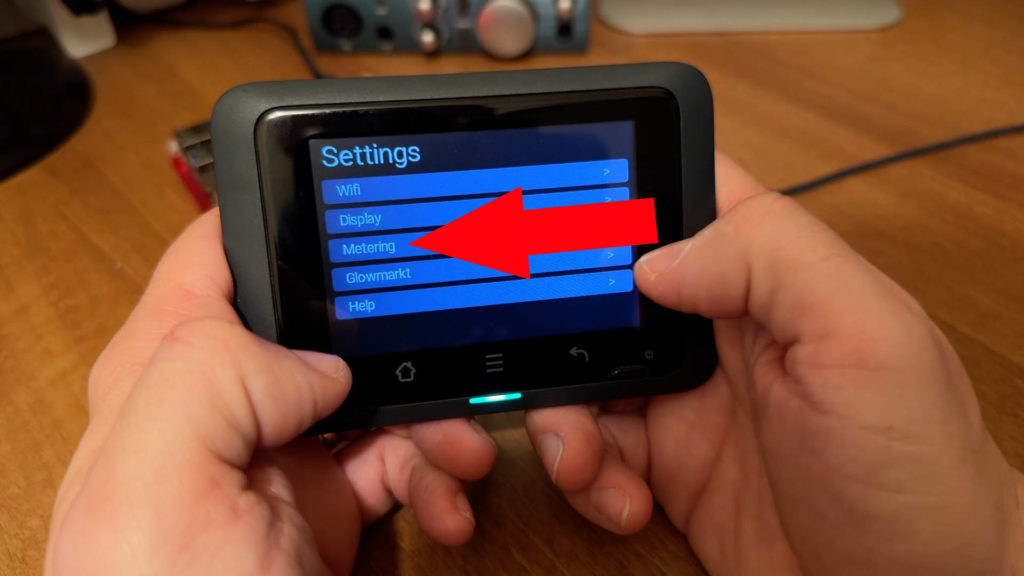
Armed with that IP address we’re going to open up the display’s menu (the three horizontal lines icon beneath the screen). Navigate through the menu choosing:
- Metering > MQTT
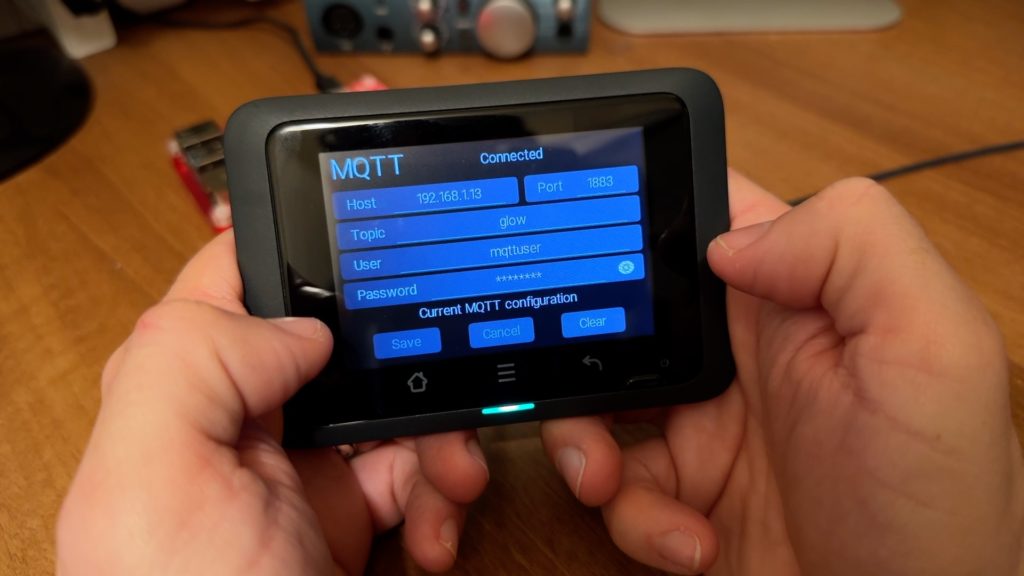
On the MQTT configuration page, configure the settings as follows:
- Host: The IP address you noted down from the previous step
- Port: 1883 (default)
- Topic: glow (lower case, default)
- User: mqttuser
- Pasword: whatever you set as the password for mqttuser
- Click on Save.
After clicking on Save, a status message at the top of the page should change to say 'Connected' after about a minute.

Find the Glow display's MAC address / Device ID
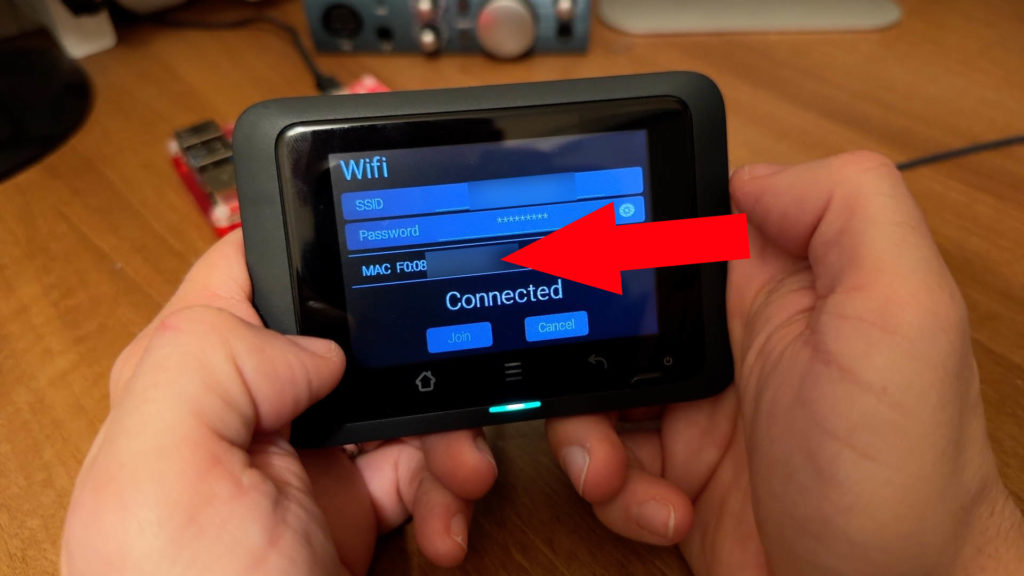
We now need to find the unique MAC address of our display. There are a couple of ways to do this - you can navigate through the menus on the display like this:
- Menu > Wifi
Look for the characters after the word MAC and write them down all in capitals and ignore the colons. You should end up with 12 character string. For example AA:BB:CC:00:11:22 becomes AABBCC001122.
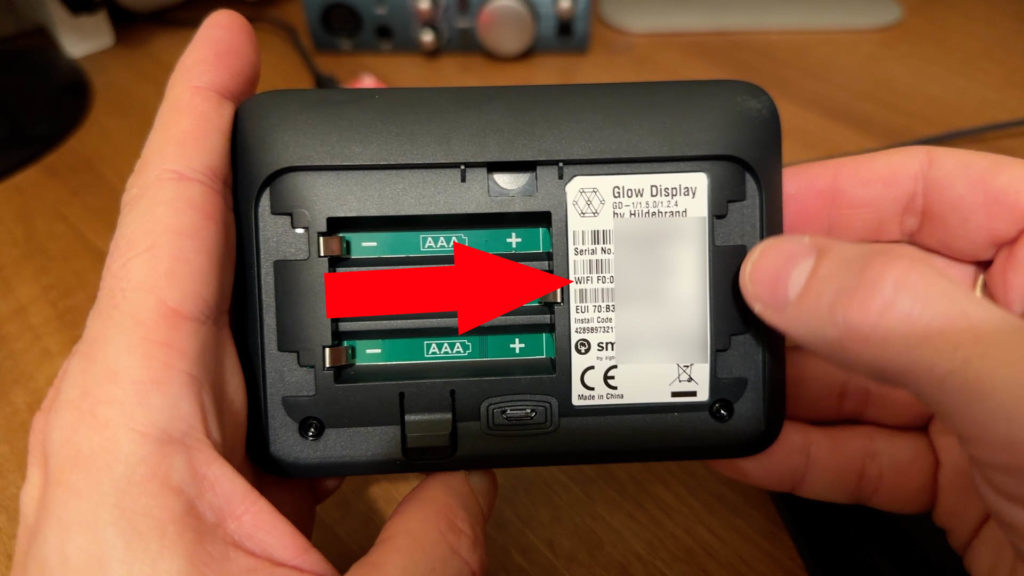
Alternatively turn the display over, unplug it and open up the battery compartment. You should see a sticker inside that also has the MAC address written on it in the section labelled ‘WIFI’. Again, we need it all in capitals and without the colons, so just 12 characters.
Configure Home Assistant
Now for the fun part. Open the File editor add-on and make sure you are editing the file called configuration.yaml by selecting the Browse Filesystem button, checking that you’re in the config/ folder, then clicking on configuration.yaml. Make a bit of space at the bottom of the file and paste the following configuration in:
mqtt:
  sensor:
    #---------------------------------------
    # New Local MQTT for Glow IHD

    - name: "Smart Meter Electricity: Power"
      unique_id: "smart_meter_electricity_power"
      state_topic: "glow/YOURDEVICEID/SENSOR/electricitymeter"
      device_class: "power"
      unit_of_measurement: "W"
      state_class: "measurement"
      value_template: "{{ (value_json['electricitymeter']['power']['value'] * 1000) | round() }}"
      icon: "mdi:flash"

    - name: "Smart Meter Electricity: Energy Import"
      unique_id: "smart_meter_electricity_energy_import"
      state_topic: "glow/YOURDEVICEID/SENSOR/electricitymeter"
      device_class: "energy"
      unit_of_measurement: "kWh"
      state_class: "total_increasing"
      value_template: >
        {% if value_json['electricitymeter']['energy']['import']['cumulative'] == 0 %}
          {{ states('sensor.smart_meter_electricity_energy_import') }}
        {% else %}
          {{ value_json['electricitymeter']['energy']['import']['cumulative'] }}
        {% endif %}
      icon: "mdi:flash"

    - name: "Smart Meter Electricity: Energy Export"
      unique_id: "smart_meter_electricity_energy_export"
      state_topic: "glow/YOURDEVICEID/SENSOR/electricitymeter"
      device_class: "energy"
      unit_of_measurement: "kWh"
      state_class: "total_increasing"
      value_template: >
        {% if value_json['electricitymeter']['energy']['export']['cumulative'] == 0 %}
          {{ states('sensor.smart_meter_electricity_energy_export') }}
        {% else %}
          {{ value_json['electricitymeter']['energy']['export']['cumulative'] }}
        {% endif %}
      icon: "mdi:flash"

    - name: "Smart Meter Gas: Import"
      unique_id: "smart_meter_gas_import"
      state_topic: "glow/YOURDEVICEID/SENSOR/gasmeter"
      device_class: "energy"
      unit_of_measurement: "kWh"
      state_class: "total_increasing"
      value_template: >
        {% if value_json['gasmeter']['energy']['import']['cumulative'] == 0 %}
          {{ states('sensor.smart_meter_gas_import') }}
        {% else %}
          {{ value_json['gasmeter']['energy']['import']['cumulative'] }}
        {% endif %}
      icon: "mdi:fire"

    - name: "Smart Meter Electricity: Import Unit Rate"
      unique_id: "smart_meter_electricity_import_unit_rate"
      state_topic: "glow/YOURDEVICEID/SENSOR/electricitymeter"
      device_class: "monetary"
      unit_of_measurement: "GBP/kWh"
      state_class: "measurement"
      value_template: "{{ value_json['electricitymeter']['energy']['import']['price']['unitrate'] }}"
      icon: "mdi:cash"

    - name: "Smart Meter Electricity: Import Standing Charge"
      unique_id: "smart_meter_electricity_import_standing_charge"
      state_topic: "glow/YOURDEVICEID/SENSOR/electricitymeter"
      device_class: "monetary"
      unit_of_measurement: "GBP"
      state_class: "measurement"
      value_template: "{{ value_json['electricitymeter']['energy']['import']['price']['standingcharge'] }}"
      icon: "mdi:cash"

    - name: "Smart Meter Gas: Import Unit Rate"
      unique_id: "smart_meter_gas_import_unit_rate"
      state_topic: "glow/YOURDEVICEID/SENSOR/gasmeter"
      device_class: "monetary"
      unit_of_measurement: "GBP/kWh"
      state_class: "measurement"
      value_template: "{{ value_json['gasmeter']['energy']['import']['price']['unitrate'] }}"
      icon: "mdi:cash"

    - name: "Smart Meter Gas: Import Standing Charge"
      unique_id: "smart_meter_gas_import_standing_charge"
      state_topic: "glow/YOURDEVICEID/SENSOR/gasmeter"
      device_class: "monetary"
      unit_of_measurement: "GBP"
      state_class: "measurement"
      value_template: "{{ value_json['gasmeter']['energy']['import']['price']['standingcharge'] }}"
      icon: "mdi:cash"
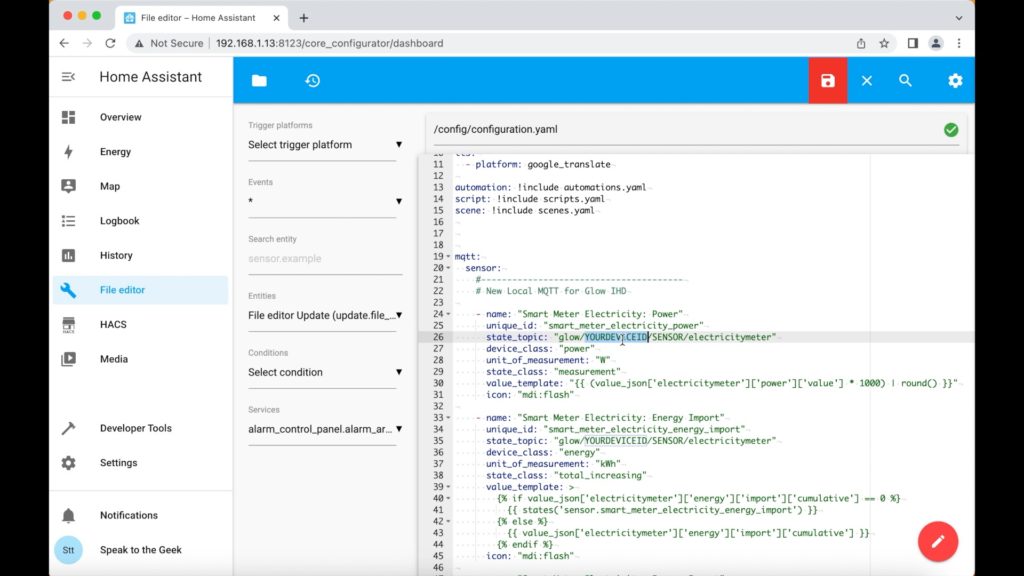
You’ll now need to go through all of that configuration looking for where it says YOURDEVICEID and replace that with the 12 character MAC address that you made a note of earlier - there are 8 instances in total that must be changed.
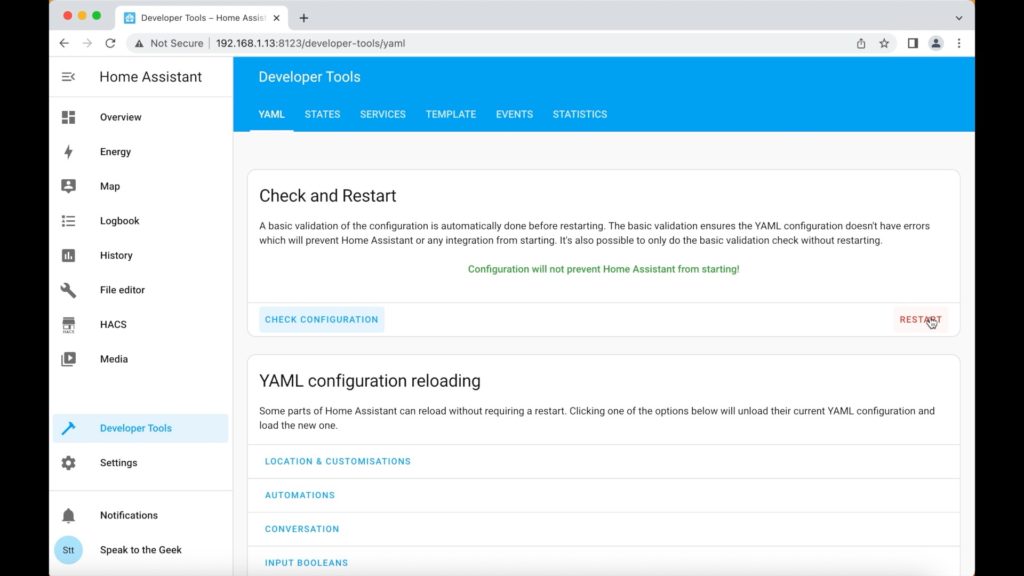
Click on Save when you’re finished (floppy disk icon near the top-right of the file editor window), and then you’ll need to restart Home Assistant before the new sensors appear by navigating to Developer Tools from the left-hand menu. Remember to click on Check Configuration to ensure your config file is error-free, and click on Restart (then the other confirmation restart).
Once it's back up, you should go and check that it's all working. Navigate to:
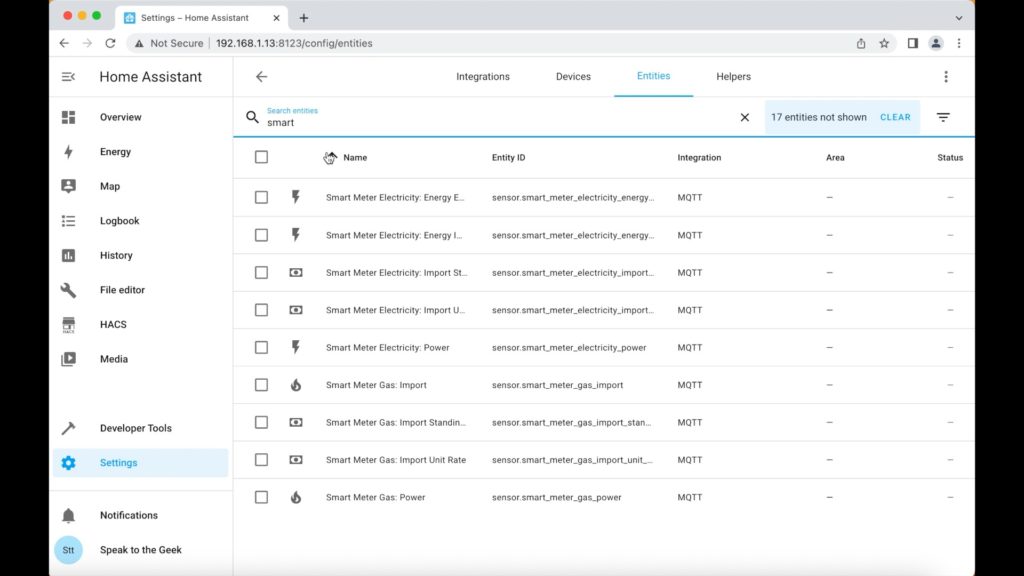
- Settings > Devices & Services > Entities (tab)
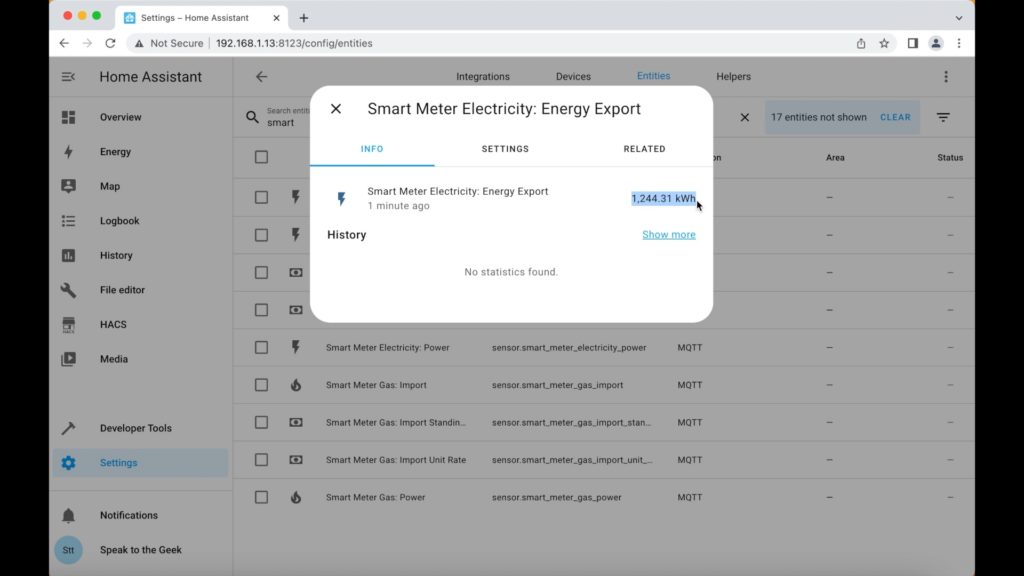
Filter the list by the words "Smart Meter" to display just the new ones that have been created. If you choose one of the sensors (for example the Power sensor), you should see data on its 'info' tab and a graph starting to form.
Home Assistant's Energy Dashboard
Now you have all of that data, you’ll probably want to do something with it. Built-in to Home Assistant is an Energy Dashboard that you can use to track your energy usage from your smart meter. It’s quite easy to set up: we’ll start by creating some utility meters. We can create one for electricity imported, one for gas if you have a gas meter, and one for electricity exported if you have solar. Navigate to:
- Settings > Devices & Services > Helpers (tab)
- Click on the Create Helper button
- Scroll down the list and select "Utility Meter"
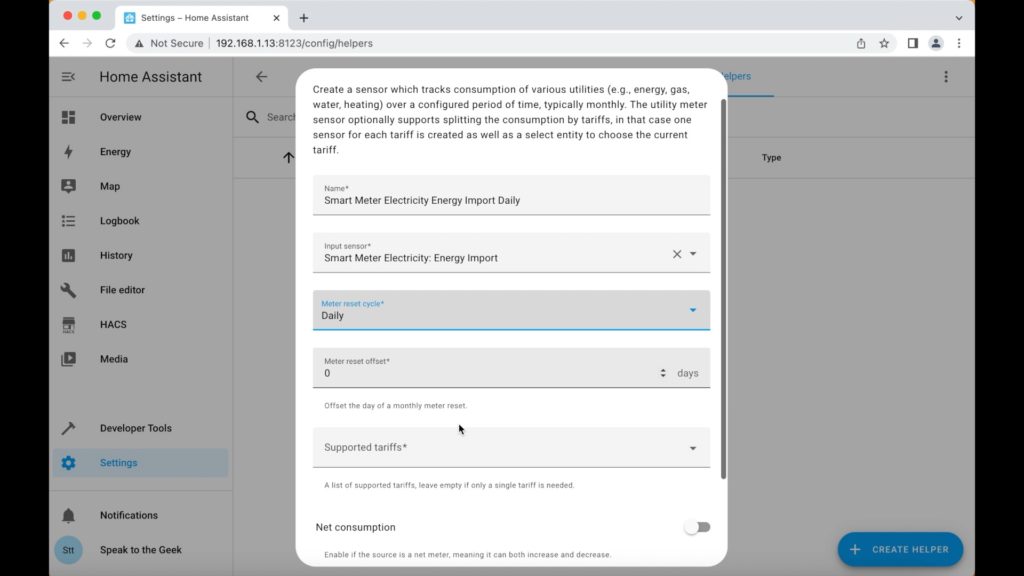
Create the utility meter with the following parameters:
- Name: Smart Meter Electricity Energy Import Daily
- Input sensor: sensor.smart_meter_electricity_energy_import
- Meter reset cycle: Daily
Save the utility meter and it should appear in your list of helpers. Repeat the same process for the gas and electricity export sensors:
- Name: Smart Meter Gas Energy Daily
- Input sensor: sensor. smart_meter_gas_import
- Meter reset cycle: Daily
- Name: Smart Meter Electricity Energy Export Daily
- Input sensor: sensor.smart_meter_electricity_energy_export
- Meter reset cycle: Daily

Once created, walk away for about an hour. This is because those new utility meters will need to start populating with data before they can be added to the energy dashboard. Depending on how much energy you are using in your home, this could be either a short or a long wait! The gas sensor is especially slow because it only updates once every 30 minutes, and even then only if you've used something so if you're frustrated by waiting, do this part while your gas boiler is on to speed things up! If you open up a utility meter you can check on its status by seeing if there is a value against its state on its info tab. Got data? Now we’re ready to configure the energy dashboard.
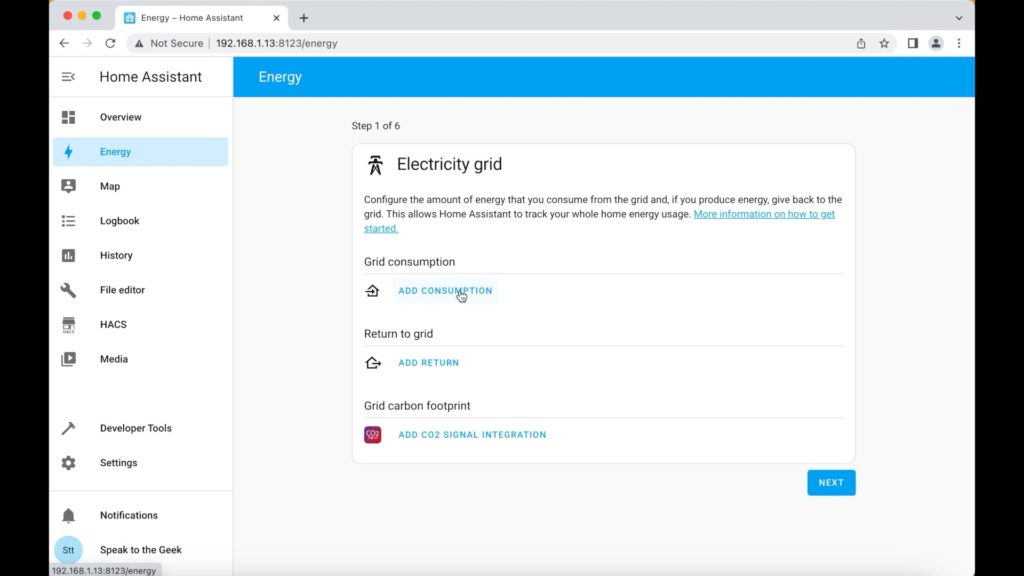
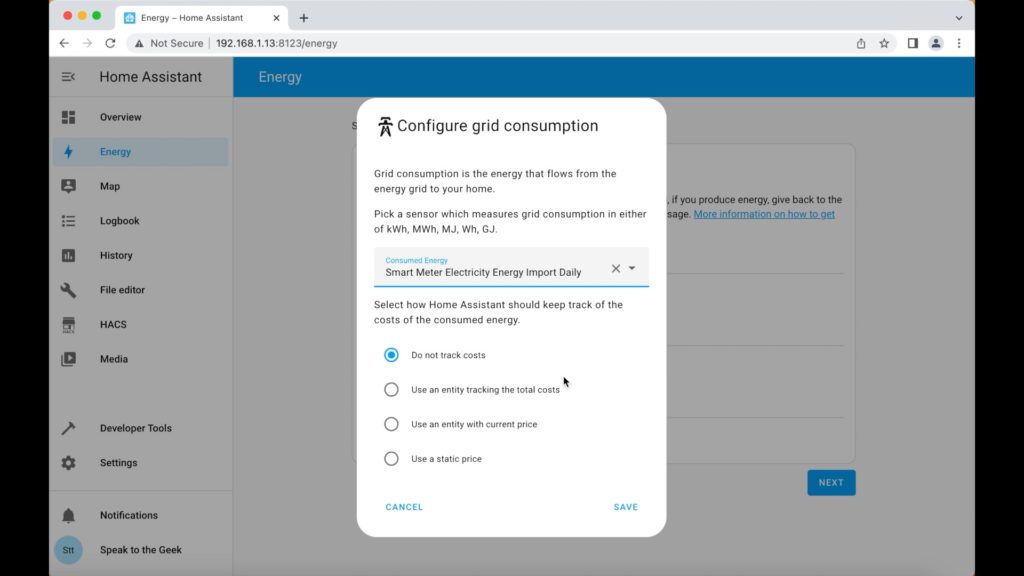
Click on ‘Energy’ on the menu on the left. You'll be asked to select a grid consumption sensor so choose 'utility_meter.smart_meter_electricity_energy_import'. If you have set up an export utility meter then add 'utility_meter.smart_meter_electricity_energy_export_daily' as the return to grid sensor. Click next to move through the wizard - you can add solar or battery entities along the way too if you wish, and on the gas page you can add 'utility_meter.smart_meter_gas_import_daily' too. Once you've finished adding your sensors, you should be shown your Energy Dashboard with some data populating the graph.
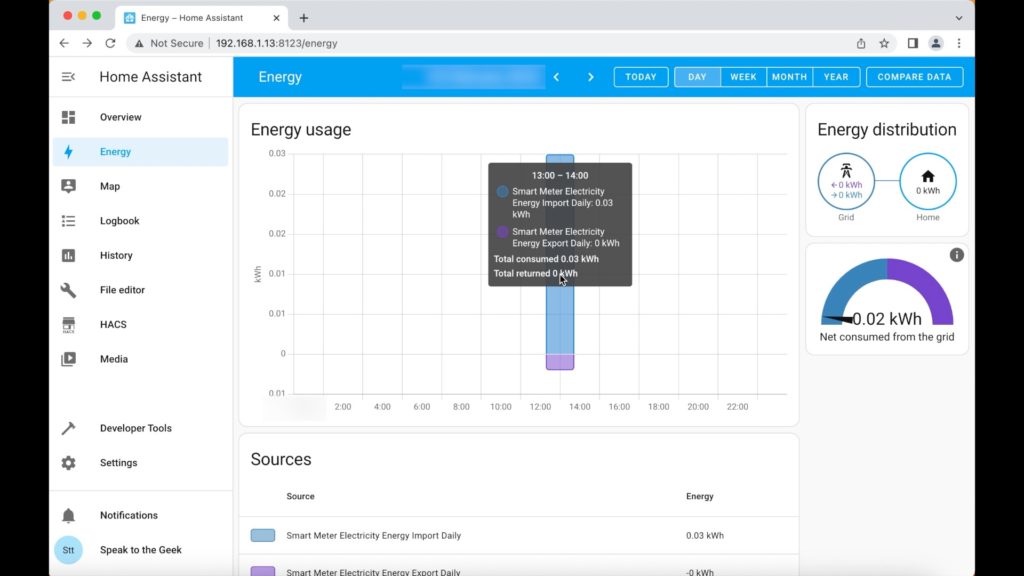
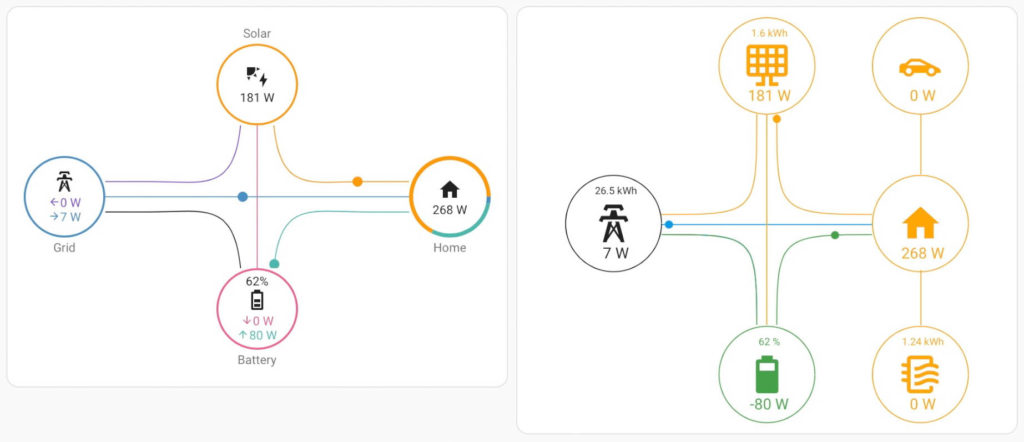
The energy dashboard is great to show you all of your historical energy data, but what if you want to view live power being used by your home right now? Well you can easily create a gauge card on your dashboard for the power import entity if you want, but if you prefer something a little fancier then you should check out the various power flow cards that are available. I have another article and video already on configuring power flow cards so you should check that out if you’re interested. They certainly look great on your dashboard!