Enable the Raspberry Pi 5 Fan in Home Assistant OS

The Raspberry Pi 5 differs from previous generations of the Raspberry Pi because it has a built-in connection for a cooling fan. However, this fan is controlled by the Raspberry Pi's firmware and the temperature thresholds at which the fan turns on are configured by editing a boot configuration file called /mnt/boot/config.txt. On regular Raspberry Pi OS, or other standard Linux variants, this is quite straightforward to do. However on Home Assistant OS its containerised nature means that access to this file is tricky - the easiest method would be to plug in a keyboard and monitor and manually edit the file using the vi text editor. This is not straightforward for beginners of course.

In order to address this issue I have put together an App (previously called Add-ons) for Home Assistant that should automatically add the required configuration into the boot config file for you. The URL for the project on Github is here:
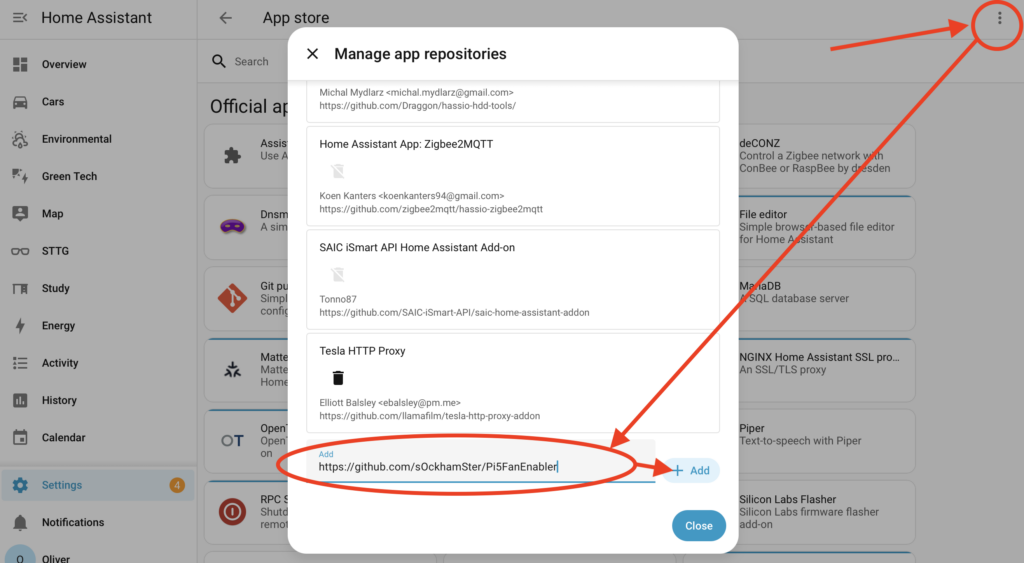
https://github.com/sOckhamSter/Pi5FanEnabler
Credit must go to Github user adamoutler for his HassOSConfigurator add-ons upon which my add-on is based, and ChatGPT for doing most of the donkey-work and saving me hours of effort. This add-on will configure four fan-speed thresholds:
- 35°C: 30% speed
- 50°C: 49% speed
- 60°C: 69% speed
- 65°C: 98% speed
Installation Process
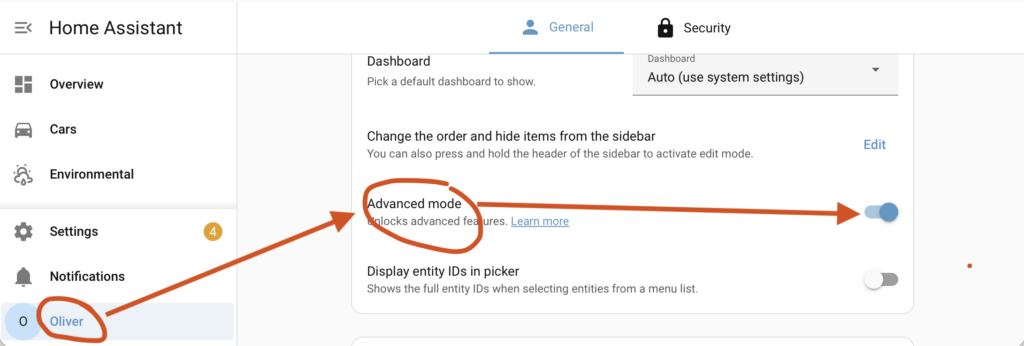
1. Enable Advanced Mode
You must enable Advanced Mode in Home Assistant otherwise when you add my app repository you will not see anything to install. This is because the Pi5FanEnabler app requires privileged permissions and gets hidden by default for user safety and security reasons.
- Click on your username in the bottom-left of the Home Assistant web interface.
- Scroll down the 'User preferences' section and locate the 'Advanced mode' toggle.
- Turn on 'Advanced mode'
2. Install the Pi5FanEnabler App
Now we must tell Home Assistant where to find the Pi5FanEnabler app and install it. This is pretty straightforward:
- Select "Settings" from the Home Assistant menu near the bottom on the left-hand side.
- Select "Apps" from the settings menu.
- Click on the blue "Install app" button in the bottom-right.
- Click on the 3-vertical-dots icon in the top-right to open a menu and select "Repositories"
- Paste the following URL into the "Add" text box and click on the "Add" button.
- Click on the Close button to close the "Manage app repositories" window.
At this point you might need to refresh your browser to force the app to appear in the list, but it may just appear on its own.
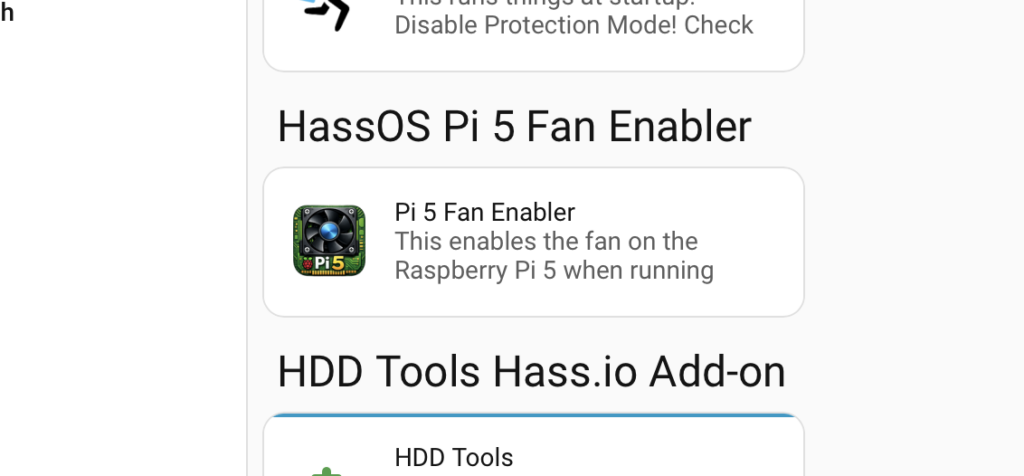
- Scroll down your list of apps and look for a section labelled "HassOS Pi 5 Fan Enabler". You should see a single entry under there names "Pi 5 Fan Enabler" - click on that.
- Click on the Install button and wait for installation to complete.
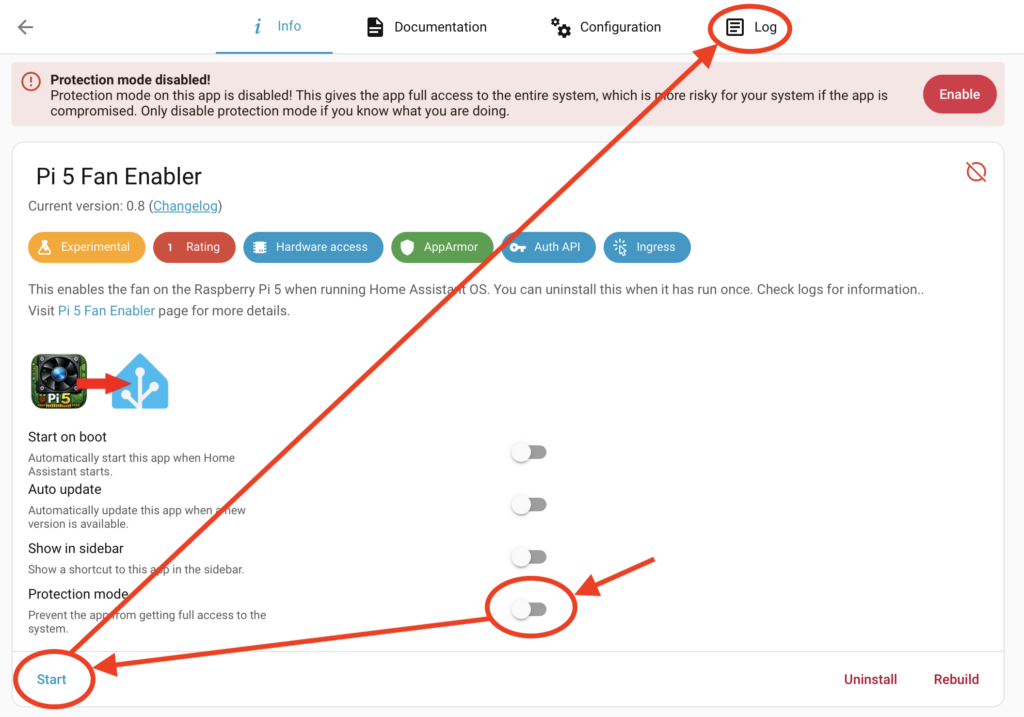
- Once installed, DISABLE the toggle for "Protection Mode". You should see a big red warning message appear - this is normal and expected, the app requires privileged access to work.
- Click on the Start button and then open the Logs tab at the top to view the logs.
Hopefully the logs should say that everything went well. Within the logs you should also see a couple of file paths for fan1_input and pwm1 - I suggest you copy and paste these into a text editor for use later.
You should now fully restart the Raspberry Pi **TWICE** - just pull the power cable out, plug it back in, wait for it to restart, then pull the cable out again, plug it back in and you should be good.


3. Create Fan Sensors in Home Assistant
We need to prove that it's working of course. Well, you could just look at the fan and see it spinning, but let's do this the proper way 🙂
- Install the 'File editor' app by navigating to Settings > Apps > Install App, like we did previously.
- The 'File editor' app is built-in so it should be listed in the available apps already. Click on it, click on the install button, and wait for it to install.
- Click on start. I also suggest toggling on "Show in sidebar" which will add a "File editor" item to the left-hand menu bar in Home Assistant.
- Open File editor from the left-hand menu.
- Click on the Browse filesystem icon (a little white folder icon on the blue file editor bar at the top) and locate the file called "configuration.yaml".
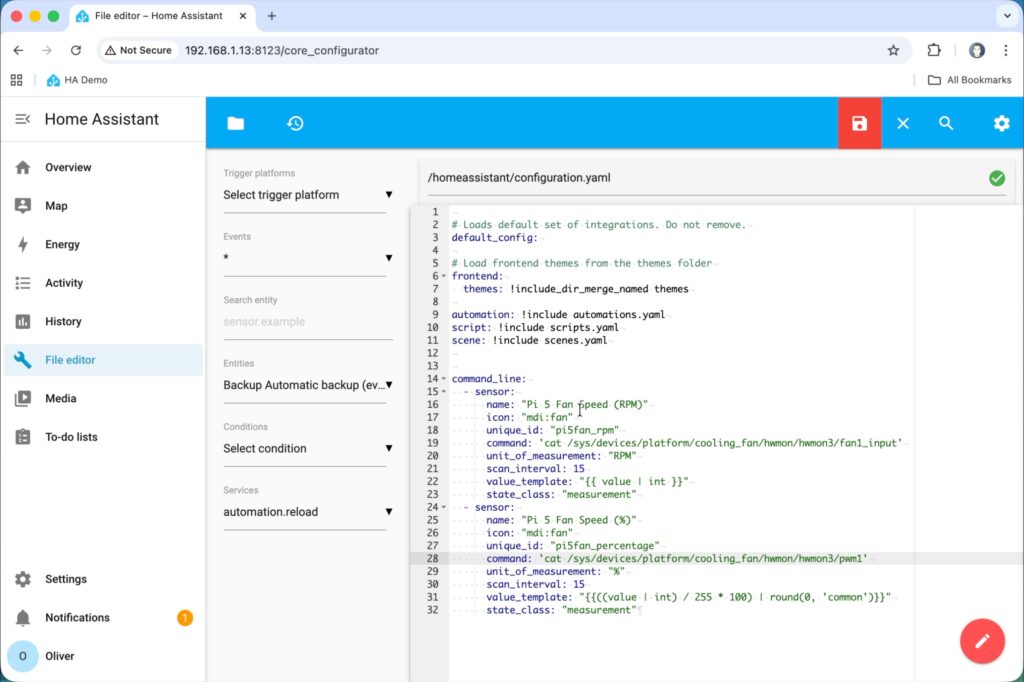
- Paste in the following configuration at the end of that file:
command_line:
  - sensor:
      name: "Pi 5 Fan Speed (RPM)"
      icon: "mdi:fan"
      unique_id: "pi5fan_rpm"
      command: 'cat /sys/devices/platform/cooling_fan/hwmon/hwmon1/fan1_input'
      unit_of_measurement: "RPM"
      scan_interval: 15
      value_template: "{{ value | int }}"
      state_class: "measurement"
  - sensor:
      name: "Pi 5 Fan Speed (%)"
      icon: "mdi:fan"
      unique_id: "pi5fan_percentage"
      command: 'cat /sys/devices/platform/cooling_fan/hwmon/hwmon1/pwm1'
      unit_of_measurement: "%"
      scan_interval: 15
      value_template: "{{((value | int) / 255 * 100) | round(0, 'common')}}"
      state_class: "measurement"
- Remember that you copied and pasted some file paths from the app logs into a text editor earlier? Well you're going to need those now! Replace the paths in the 'command' lines of the configuration with the ones you copied earlier. It's most likely just the number at the end of "hwmon?" that has changed, but just to be safe paste the whole path over the top.
- Click on the save icon in File editor (top-right)
- Restart Home Assistant nicely this time by navigating to Settings > System > little power icon in the top-right corner > "Restart Home Assistant".
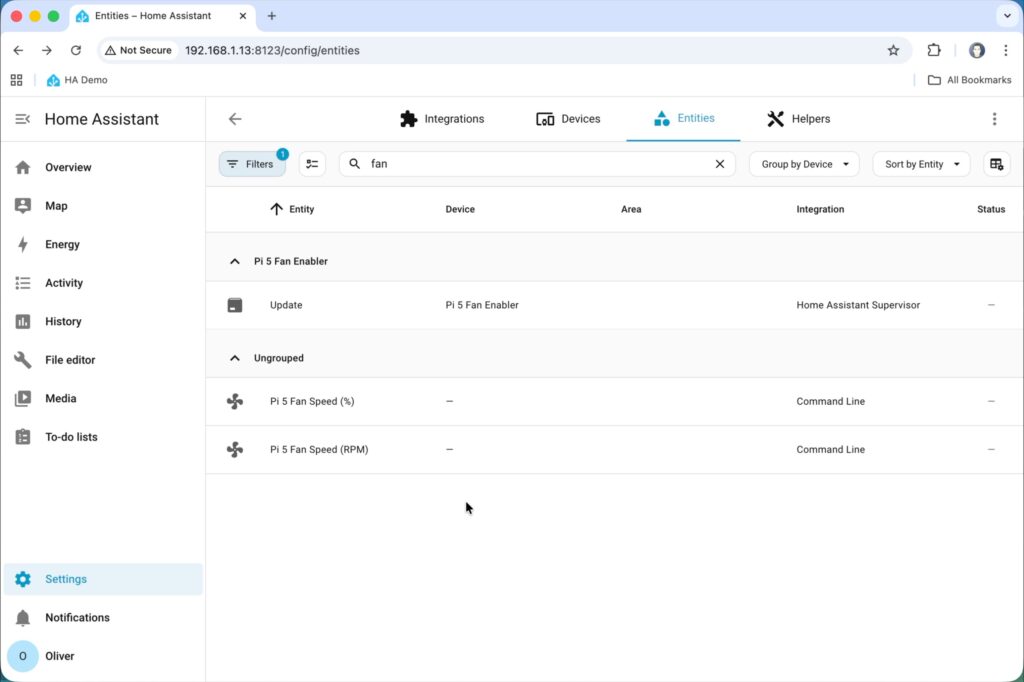
Once rebooted, we can go and confirm that the new fan sensors are working. Navigate to Settings > Device & Services > Entities (tab at the top). In the search box type "fan" and you should see two new entities named:
- Pi 5 Fan Speed (%)
- Pi 5 Fan Speed (RPM)
Clicking on these should bring up their current state and show a value.