
Glow Smart Meter Display and Home Assistant: Tutorial (2025 Update)

New and updated for 2025! Since I wrote my original tutorial over two years ago things have moved on a bit - it is now significantly easier to get your Glow CAD/IHD working with Home Assistant thanks to a new Home Assistant integration which does most of the hard work for you. This updated article replaces the old guide but if you already have it set up using the old method then there's no reason to change that - it will carry on working that way just fine. This tutorial is intended just for new users who want to set up the link to Home Assistant.
- Overview of the CAD/IHD
- Install and Configure Mosquitto / MQTT Broker
- Install HACS and the Hildebrand Glow Integration
- Find Home Assistant's IP Address
- Configure MQTT on the Glow display
- Configure the Hildebrand Glow Integration
Overview of the CAD/IHD
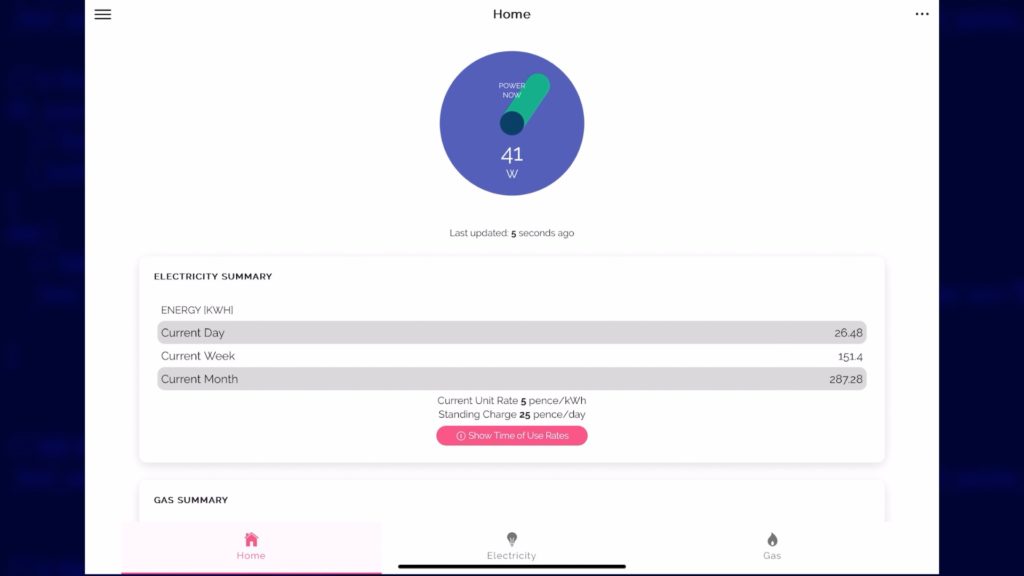
The Glow CAD is a special type of in-home display for your smart meter and it has a number of advantages over the free display that you might have been given when the meter was installed. The Glow display can be used alongside your free display if you want, but the Glow display will also connect to your Wifi network and relay live power and energy data to Glow’s server. You can use their Bright app to view that if you like , and they also provide a cloud-based API that you can use to retrieve that data.
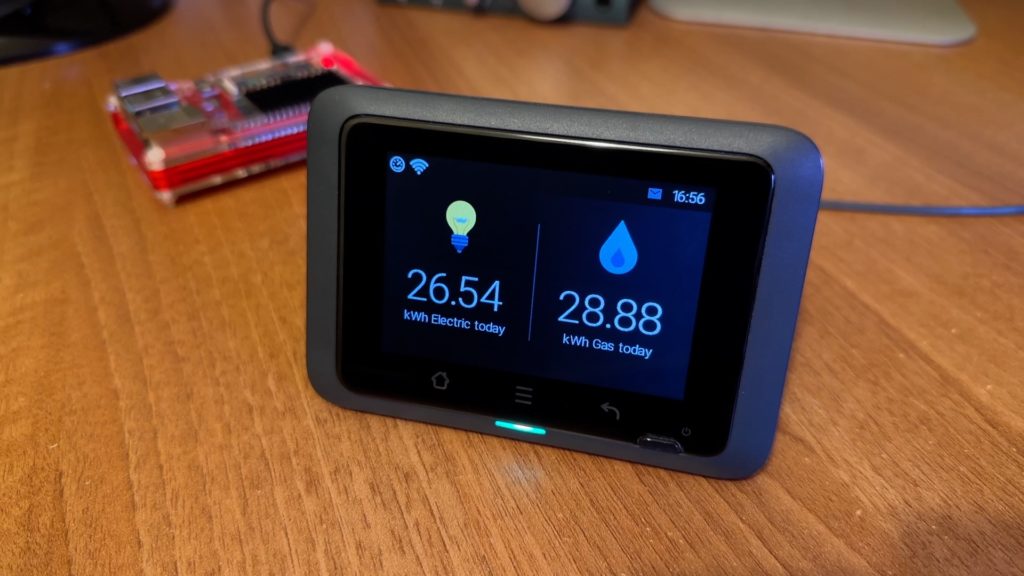
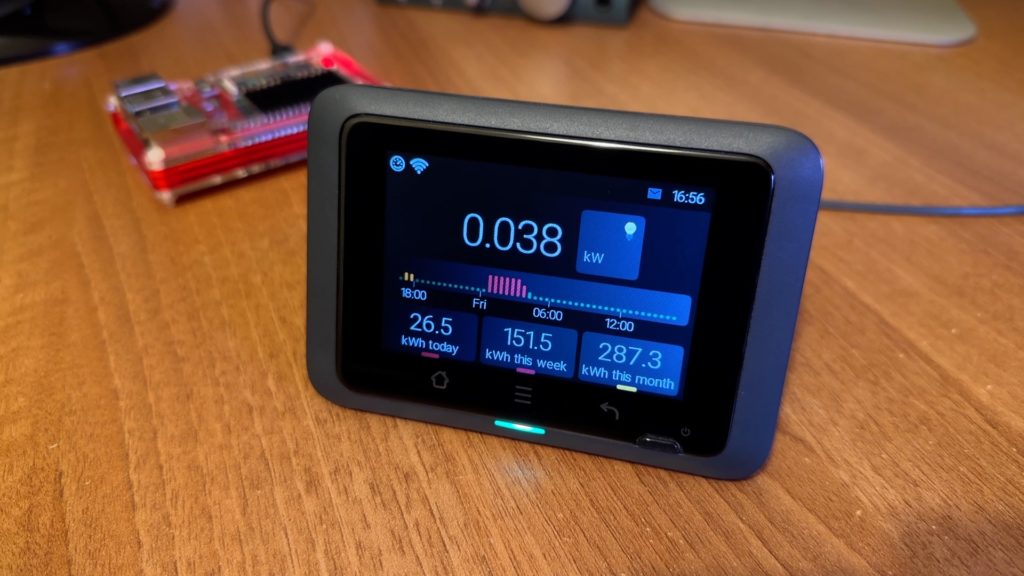
But the best feature of the Glow display is that you can connect to it locally over your own home network to get that very same data, and that means you can integrate it nicely into your home automation solution of choice without needing to use the internet. If you do decide to purchase one, you must get it direct from Hildebrand’s Glowmarkt site because they have to be paired to your smart meter before they are sent out.
On to the configuration then. Before you start trying to get Home Assistant working with the display, make sure that you have configured your display to connect to your WiFi network and that it is reporting live data back to their Bright app. If that part isn’t already working then the rest of this process probably won’t work either.
Install and Configure Mosquitto / MQTT Broker
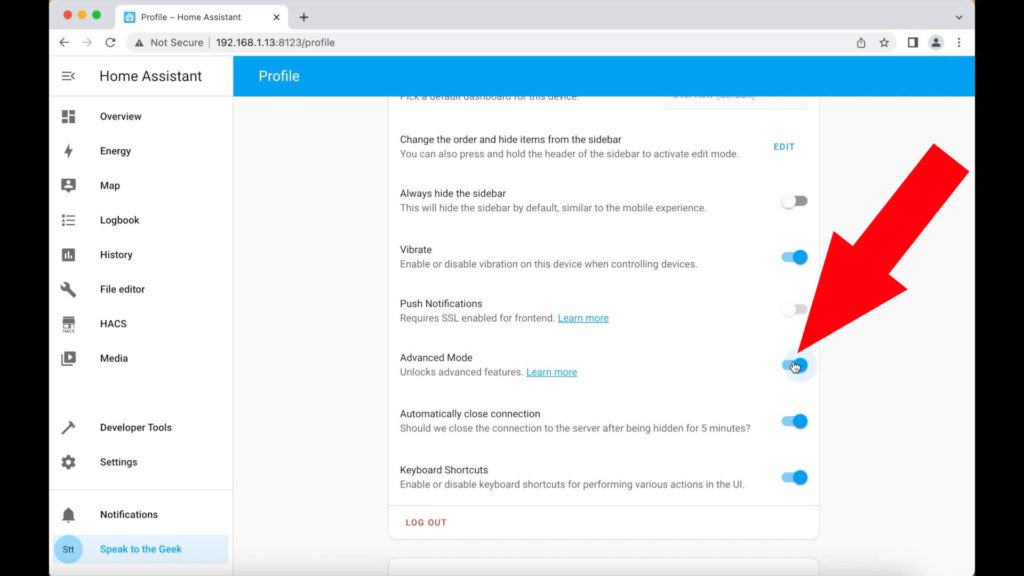
Now we need to configure an MQTT broker, which is the component that the Glow display will talk directly to. We’ll start by creating a user just for use by MQTT but in order to do that we must enable Advanced Mode first by clicking on our profile name in the menu (right at the bottom-left!) and scrolling down to enable the Advanced Mode toggle.
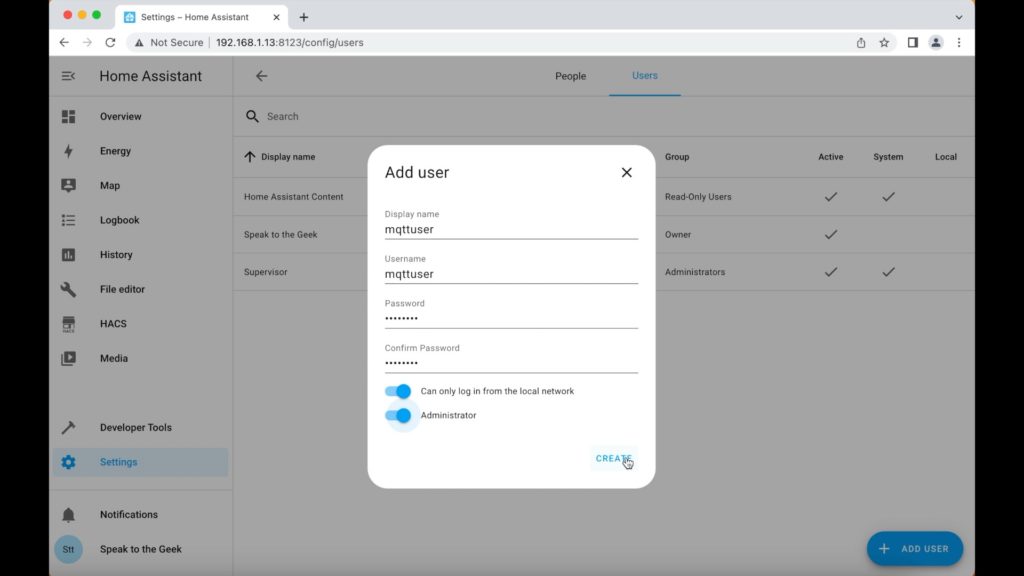
Then we create the user by navigating to:
- Settings > People > Users (tab) > Add user
Use the following parameters:
- Display name: mqttuser
- Username: mqttuser
- Password: Something complex but easy to type later on!
- Toggle on ‘can only log in from the local network’
- Toggle on ‘Administrator’
- Click on Create.
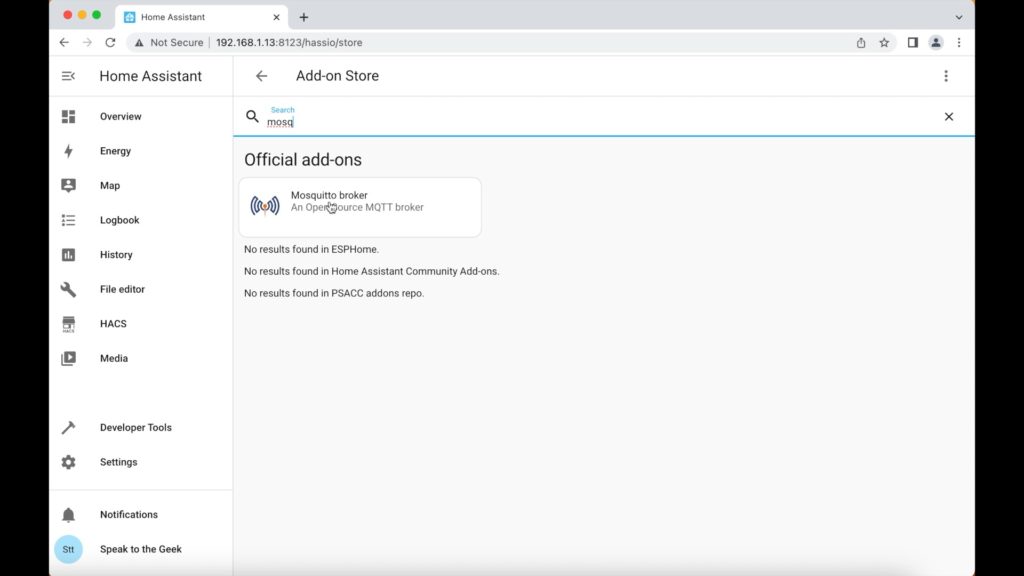
Now to install the Mosquitto add-on which is the MQTT broker itself. Navigate to:
- Settings > Add-ons > Add-on store (button)
- Search for Mosquitto
- Click on Install (this takes 2-3 minutes on my Raspberry Pi)
- No further configuration is required so just click on Start to run the add-on
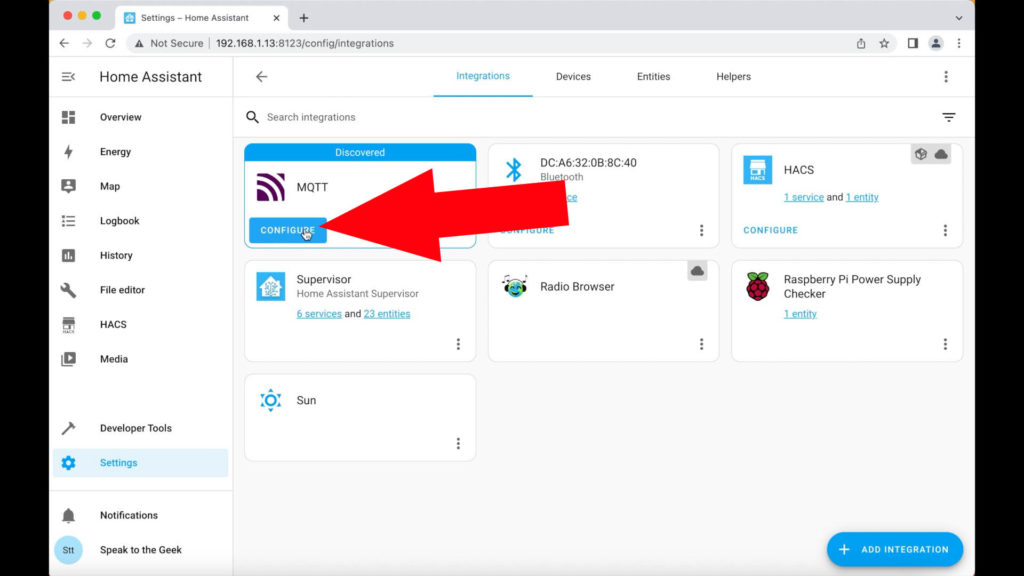
Once Mosquitto is running, Home Assistant should auto-detect it but you'll still need to manually acknowledge that you want to integrate it with Home Assistant. Navigate to:
- Settings > Devices & Services > Integrations (tab)
MQTT should be highlighted as newly discovered with a 'configure' button for you to click on. Click on button that to start a very minimalist wizard just requires you to click on submit and finish, and you're done!
Install HACS and the Hildebrand Glow Integration
HACS is essentially an 'App Store' for 3rd party Home Assistant integrations. It needs to be installed manually and configured before you can use it though - I've made a video guide on that process here: https://youtu.be/TL2eqsjhmTE
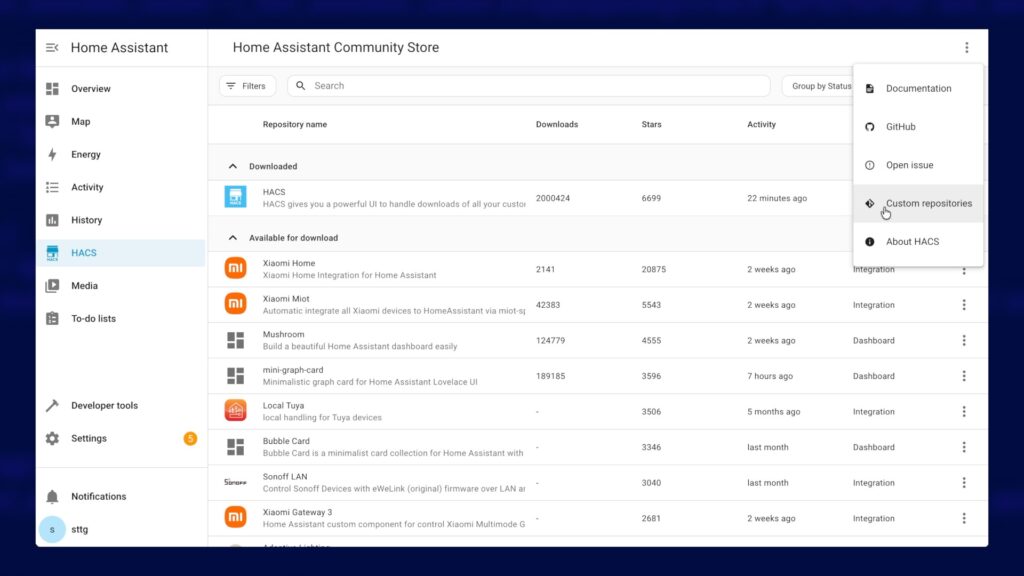
Follow that guide and once HACS is up and running you need to tell it where to find Hildebrand Glow integration:
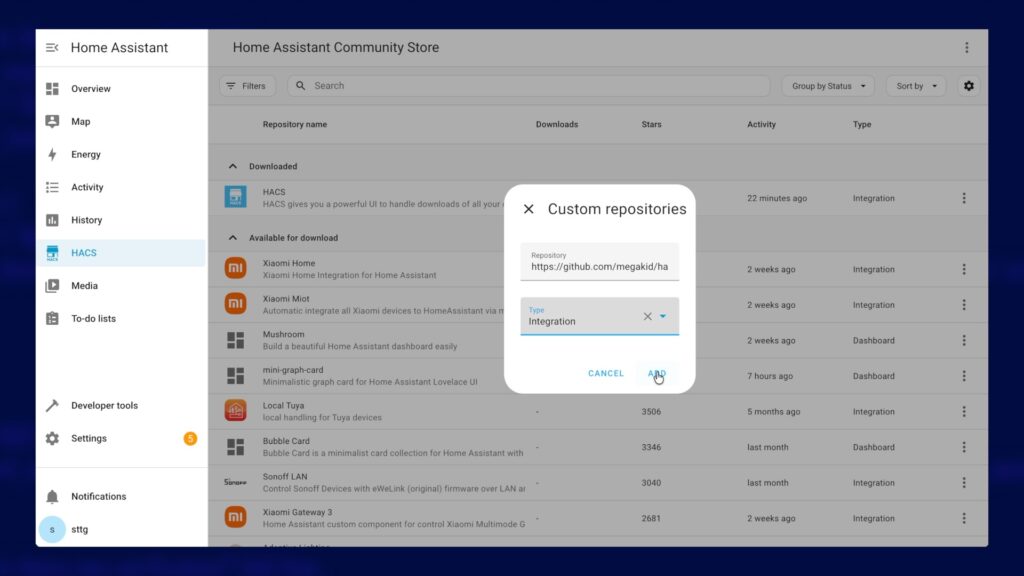
- From within the HACS interface, click on the three dots in the top-right corner to open the menu.
- Choose the option "Custom Repositories"
- Paste in the following URL as the repository: https://github.com/megakid/ha_hildebrand_glow_ihd_mqtt
- Choose the type of repository as "Integration"
- Click on "Add"
- Go back to the main HACS interface and search for "Hildebrand Glow". You should see two options, but the one you are after is titled "Hildebrand Glow IHD MQTT". Click on it to open up its info page.
- Click on the Download button in the bottom-right and the Download button on the subsequent pop-up.
- You will now need to reboot Home Assistant for the integration to become available - navigate to Developer tools > Restart > Restart Home Assistant
Note: do not configure the integration at this stage - we'll do that in an upcoming step.
Find Home Assistant's IP Address
Before we configure your display to talk to Home Assistant using MQTT. We first need to find Home Assistant’s IP address. You might already know this, but if you're not certain then navigate to:
- Settings > System > Network
If Home Assistant is connected using a wired network cable to your home network, look under the tab named 'end0', but if it's on WiFi then select the tab named 'wlan0'. Those interface names are valid for a Raspberry Pi, so if you're using a different bit of hardware then the names may be slightly different but still as obvious (WLAN = Wireless LAN; ETH / END = Ethernet cable). When you've selected the correct tab, expand the IPv4 . You should see the IP address displayed in the IPv4 section and make a note of the IP address in the 'IP address' field.

Configure MQTT on the Glow display
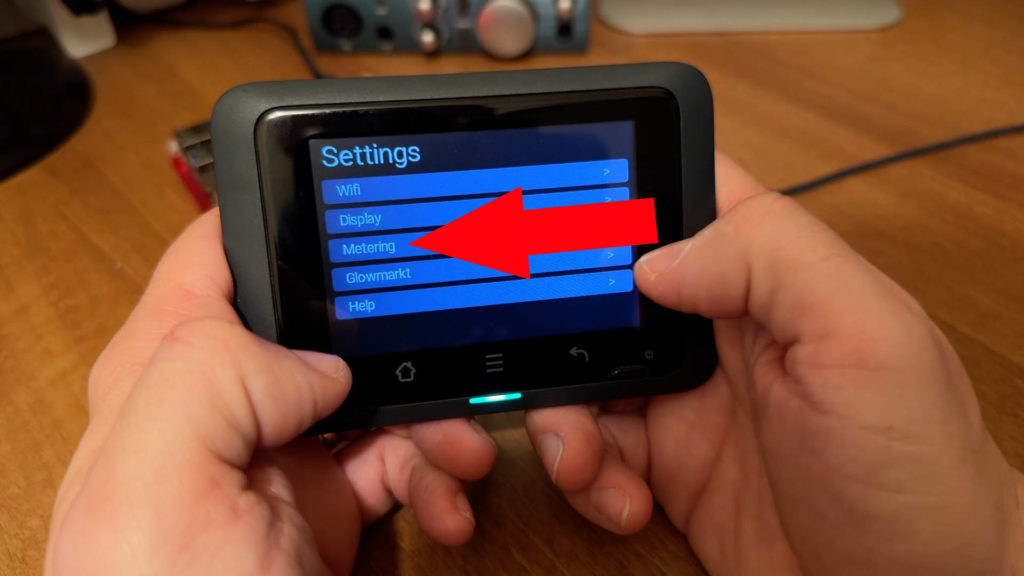
Armed with that IP address we’re going to open up the display’s menu (the three horizontal lines icon beneath the screen). Navigate through the menu choosing:
- Metering > MQTT
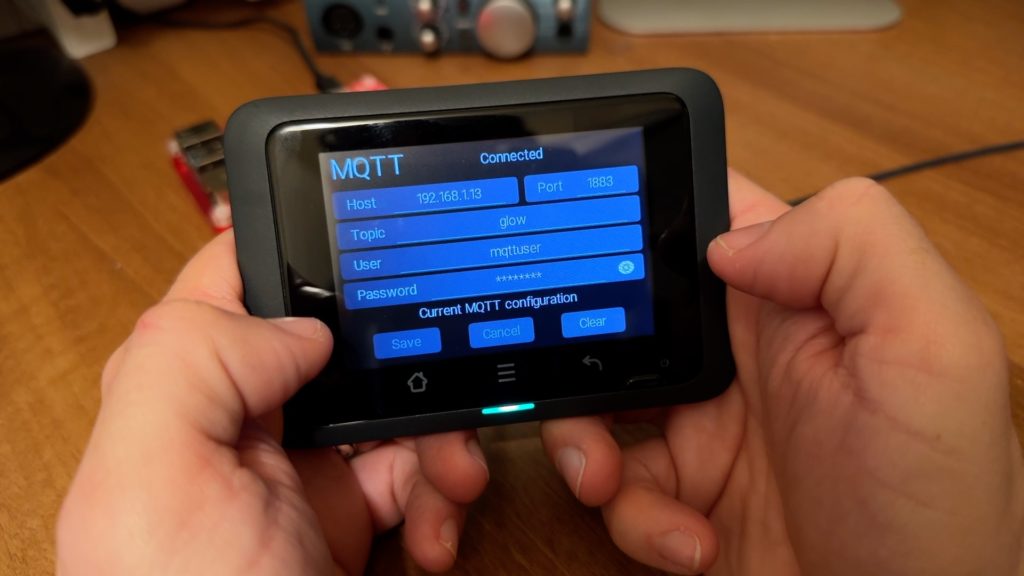
On the MQTT configuration page, configure the settings as follows:
- Host: The IP address you noted down from the previous step
- Port: 1883 (default)
- Topic: glow (lower case, default)
- User: mqttuser
- Pasword: whatever you set as the password for mqttuser
- Click on Save.
After clicking on Save, a status message at the top of the page should change to say 'Connected' after about a minute.

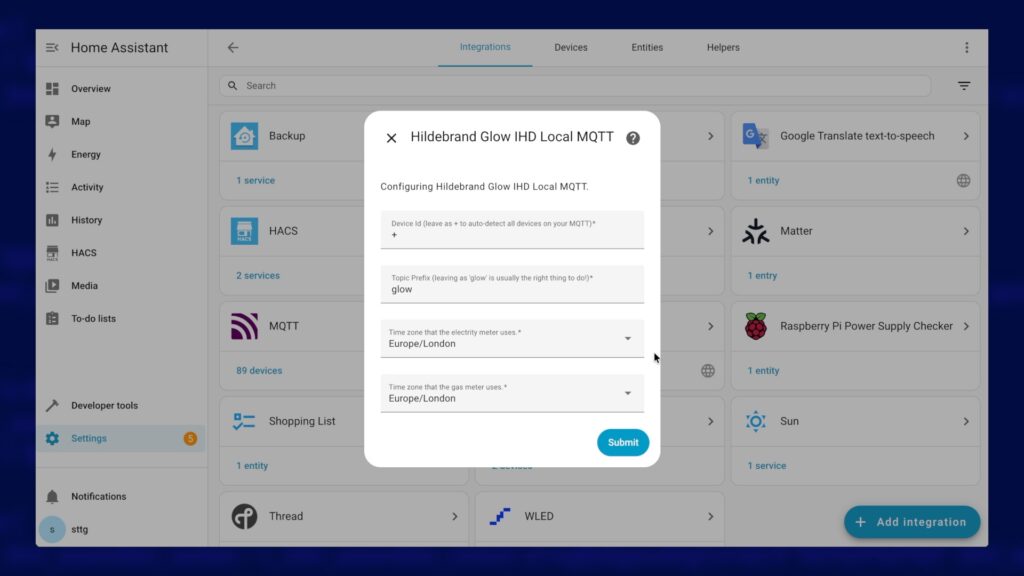
Configure the Hildebrand Glow Integration
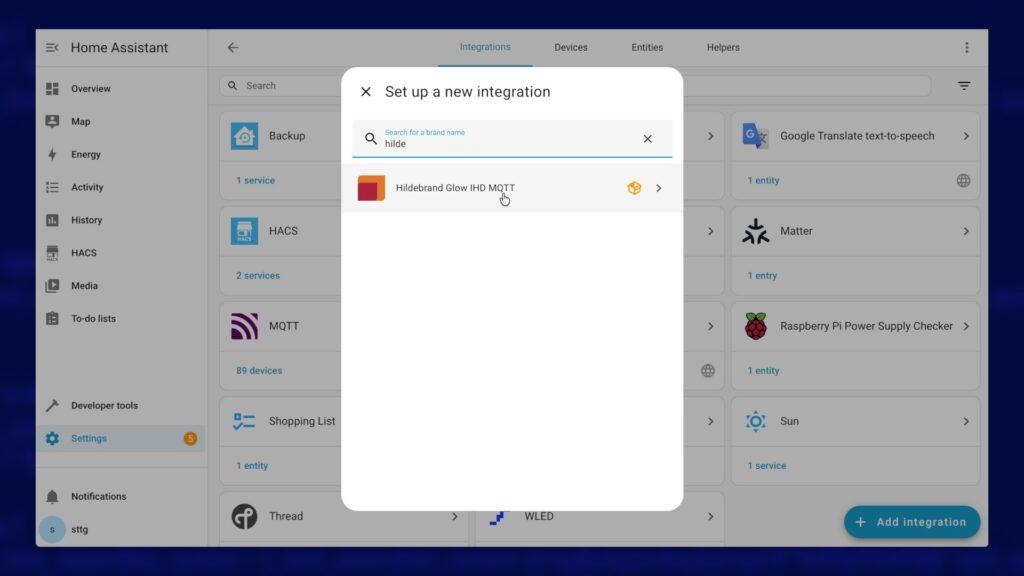
Back in Home Assistant, navigate to Settings > Device & Services. Click on the Add Integration button and search for "Hildebrand Glow IHD MQTT". Select the item from the list and it should open up the configuration page. No additional configuration should be required under most circumstances so you should be ok to accept the default options and click on Submit.
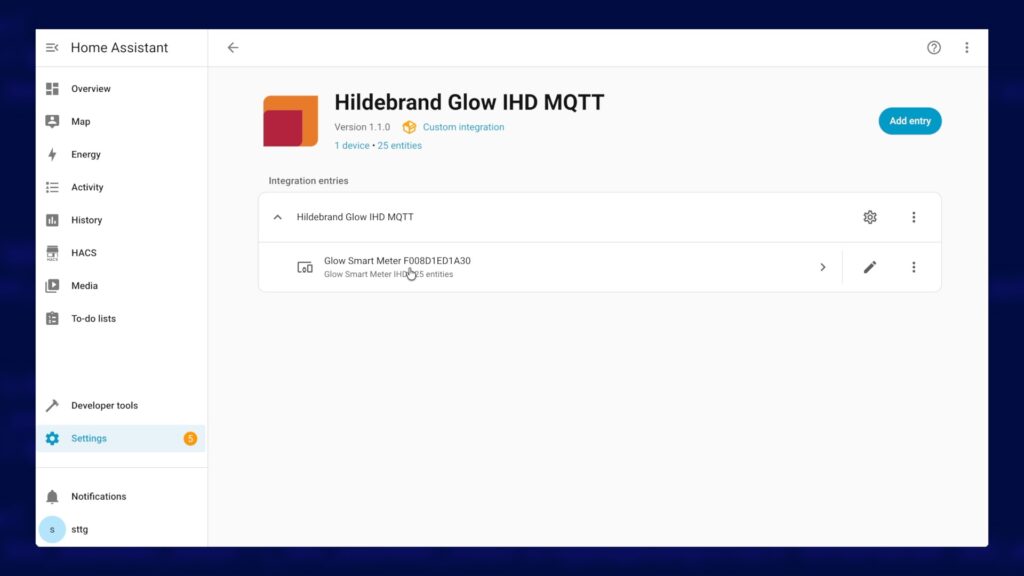
After a few moments, you should see a line item appear for your 'Glow Smart Meter' with a number of associated entities visible such as live power and cumulative energy, etc.
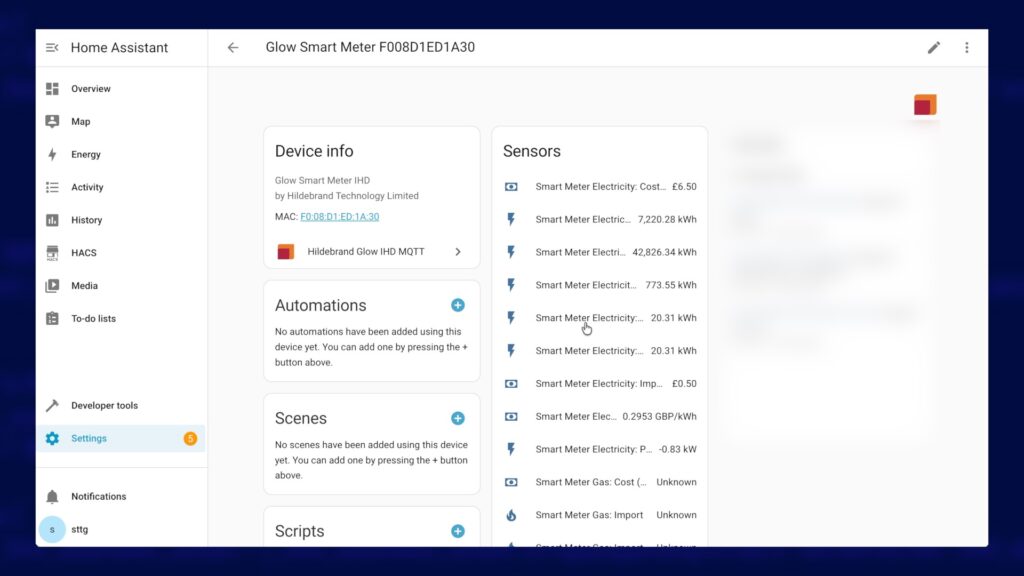
And that's it! You are now free to make use of these sensors in whatever way works best for you, whether that's displaying energy use on the Energy Dashboard, or showing live power flows on a power flow card. Check out my other videos and articles for inspiration!