Tutorial: Compare Your Solar Forecasts
A couple of months ago I put together a video where I compared three of the main solar PV forecast integrations against each other to see which was the most accurate. You can check that video out here if you are interested. I received feedback following that video saying it would be great if this sort of comparison could be made available for anyone to easily do, and that's what I've done here.
I've put together a blueprint for an automation to be used in Home Assistant allowing anyone running Home Assistant to easily compare one or more solar forecast services against their actual generation to see how accurate it is. The automation produces two outputs:
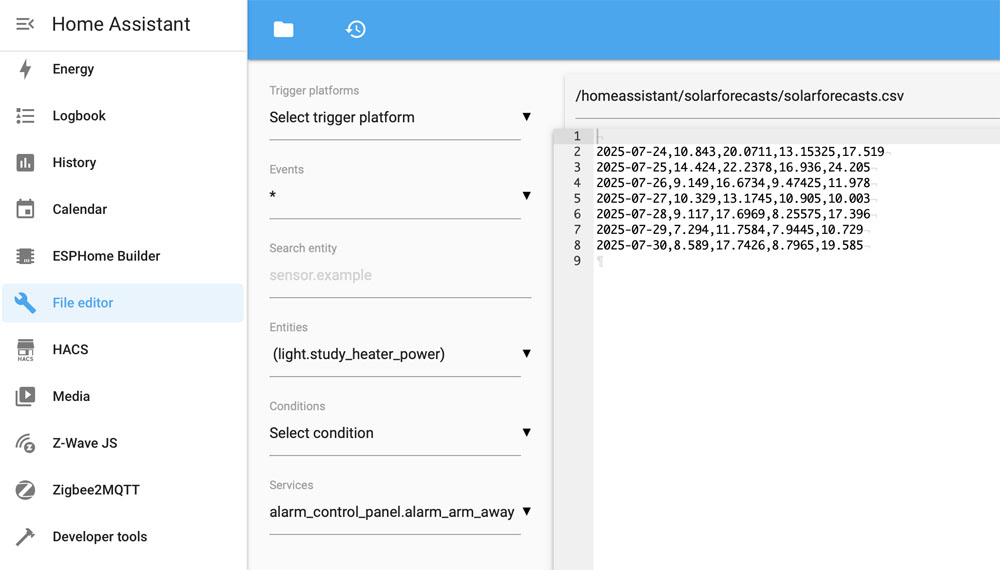
- A CSV file with each line detailing the date of the forecast, the kWh predictions from those forecasts, and the actual generation from your solar PV installation.
- An RMSE (Root Mean Square Error) value for each solar forecast service, comparing the forecast data to the actual generation data over the period for which the automation has collected data.
Contents:
- Pre-Requisites
- Create Text Helpers
- Create the CSV Output File
- Install the Blueprint
- Create the Automation
1. Pre-Requisites
This tutorial makes a number of assumptions, the key one being that you are not a total beginner when it comes to Home Assistant:
- You already have Home Assistant up and running. I have a video guide on installing Home Assistant on a Raspberry Pi 5 here if you don't have that part of this puzzle sorted yet.
- You must have a sensor in Home Assistant counting the generated energy (in kWh) from your solar PV installation. This can either be from a third party energy monitor or using an integration in Home Assistant that communicates directly with your solar inverter. For example I have a SolarEdge PV inverter and I use the SolarEdge Modbus integration installed via HACS to obtain that data directly from the inverter.
- Your solar PV energy sensor must be 'daily cycled', that is it must reset to zero at midnight and only ever show the total generated energy that particular day. If your energy sensor is a total lifetime cumulative one, it's easy to fix - in Home Assistant create a Helper of type 'Utility Meter', choose your cumulative energy sensor as the input sensor and make sure that you select 'Daily Cycle' as an option. You can now use that new Utility Meter sensor instead of your original one.
- You must have configured your solar forecast integrations in Home Assistant so as it is collecting data from those various forecasting services. In the demo in my video I make use of the following services:
- Forecast.Solar - built-in to Home Assistant and easy to configure.
- Solcast PV Forecast - installed via HACS and requires you to sign up with Solcast and define your 'sites' on there first.
- Open-Meteo Solar Forecast - also installed via HACS but all configured from within Home Assistant.
Octopus Energy using my referral link:
speaktothegeek.co.uk/energy

2. Create Text Helpers
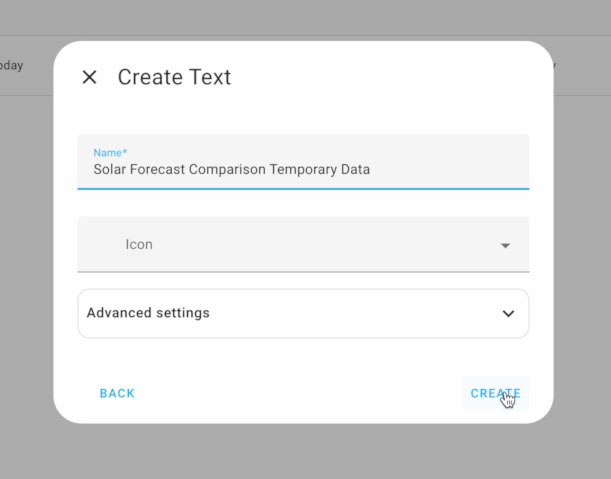
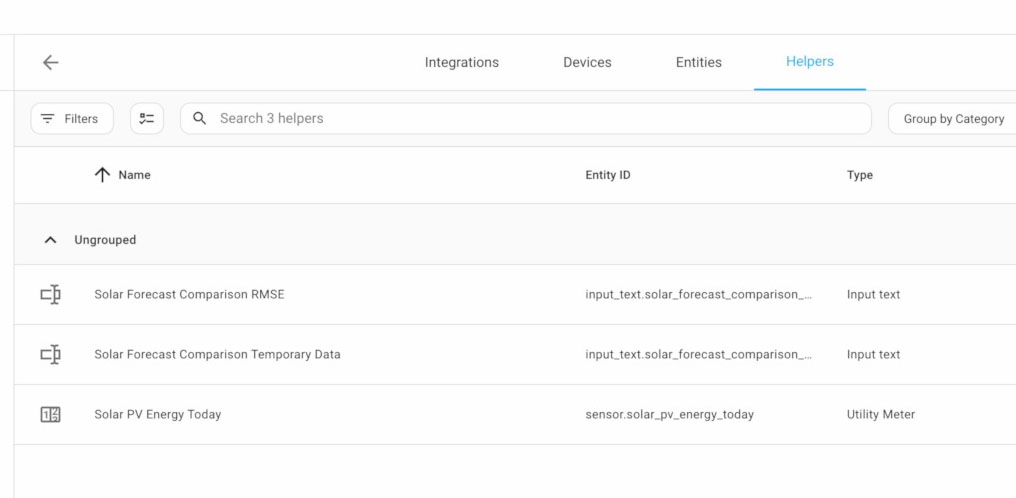
You'll need to create two input_text entities, or 'Helpers' of a type 'Text'. These text helpers will be used by the automation for storing temporary data mid-calculation (collect the data one day, collect more data the second day and perform calculations on it all), and also to store the RMSE output. Navigate to Settings > Devices & Services, and choose the 'Helpers' tab at the top of the page. Click on the Create Helper button, choose the type of 'Text'. You'll need to do this twice and give your new helpers the following names:
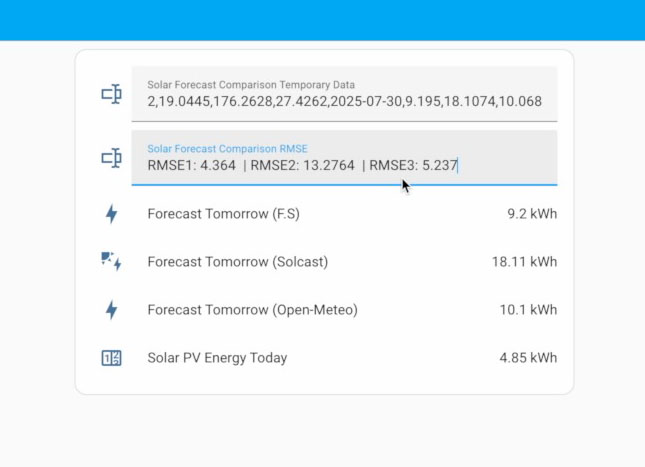
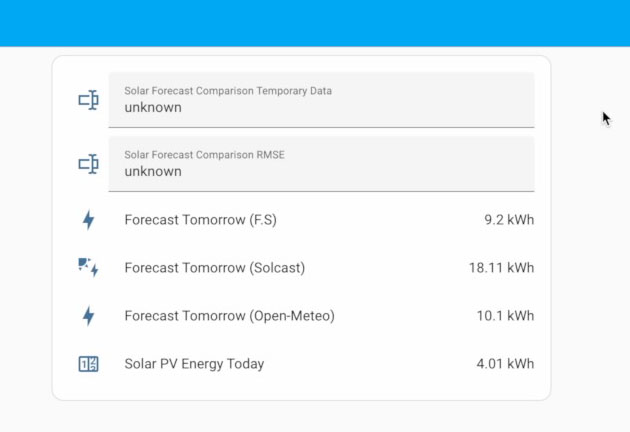
- Solar Forecast Comparison Temporary Data
- Solar Forecast Comparison RMSE
My suggestion is to then add these new helpers to a card on your dashboard (such as an entities card) so as you can see the output data and know that it's working. You must not under any circumstances edit the data in these helpers though or you will mess up your calculations!
3. Create the CSV Output File
The automation will save your forecast and generation data to a CSV file. It's a multi-stepped process to configure this though! Firstly you must install the File editor add-on. This is done by navigating to Settings > Add-ons and locating the File editor add-on in the list. You must choose to install it and then Start it. If you select the 'Show in sidebar' toggle then File editor will appear in the menu on the left-hand side of Home Assistant for easy access.
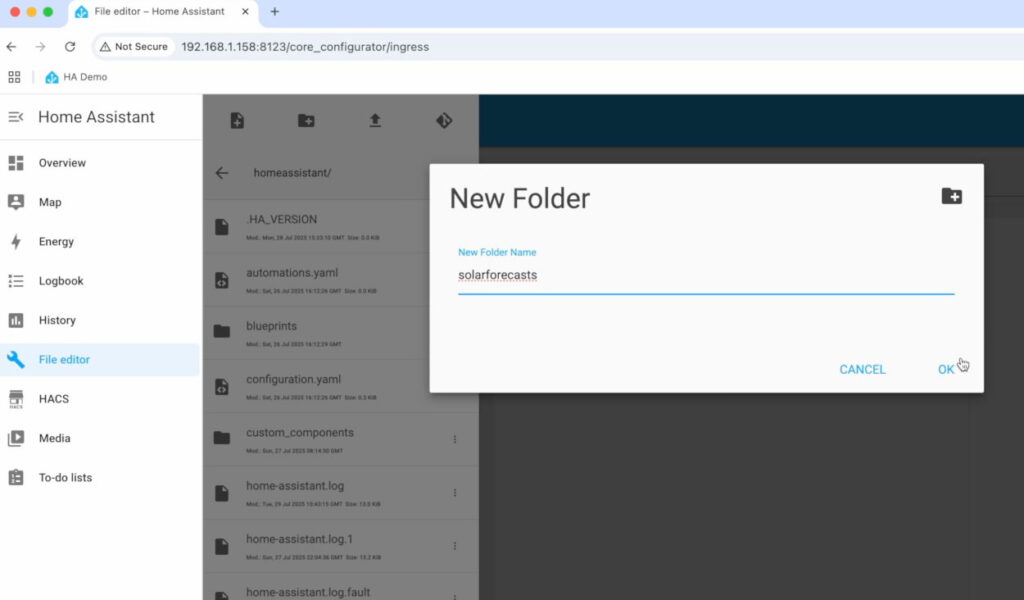
Open up File editor, make sure you are in the /homeassistant folder (displayed at the top of the File editor window) and click on the create folder button. Call the new folder 'solarforecasts'.
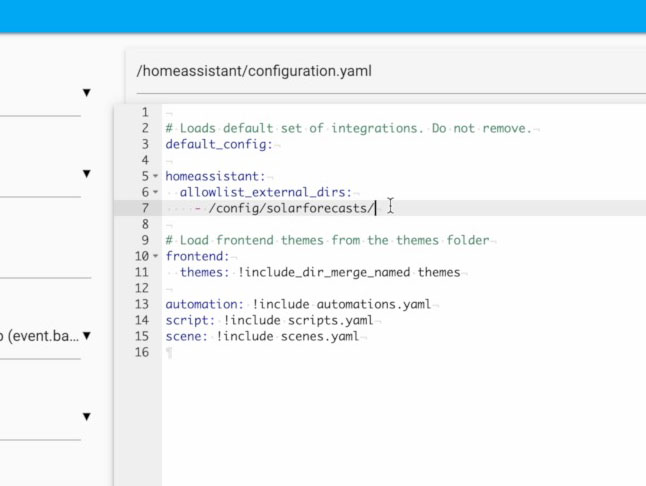
Now open up your configuration.yaml file by selecting it in the list of files, it may already be open in the background as shown in my video. Make a bit of space under the 'default_config' section by pressing enter a few times and paste in the following configuration:
homeassistant:
  allowlist_external_dirs:
    - /config/solarforecasts/
Save the file (button in the top-right), navigate to Developer Tools using the left-hand menu and restart Home Assistant to apply the changes.

And finally we are ready to create the actual CSV file output entity by navigating to Settings > Device & Services. On the integrations tab, click on the Add Integration button in the bottom-right corner. Search for the integration named 'File' and when prompted choose to 'Set up a notification service'. In the 'file path' box enter the following:
/config/solarforecasts/solarforecasts.csvMake sure that you do NOT toggle the option to add a timestamp, then click on Submit to create the new File entity.
4. Install the Blueprint
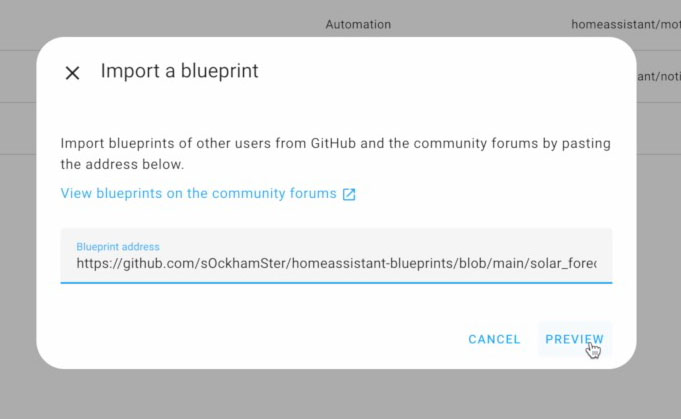
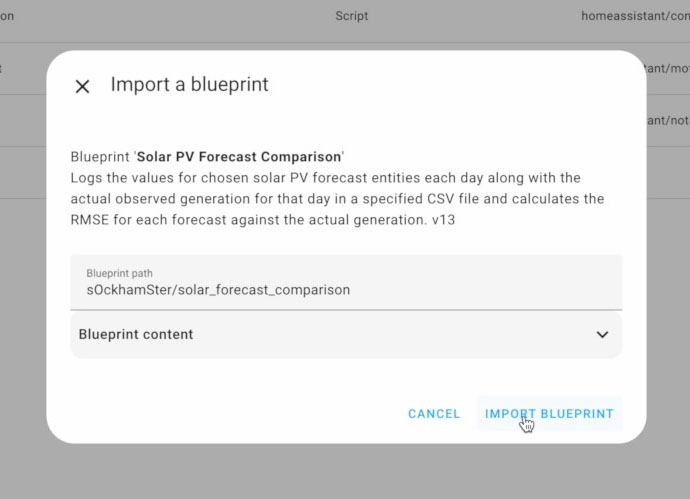
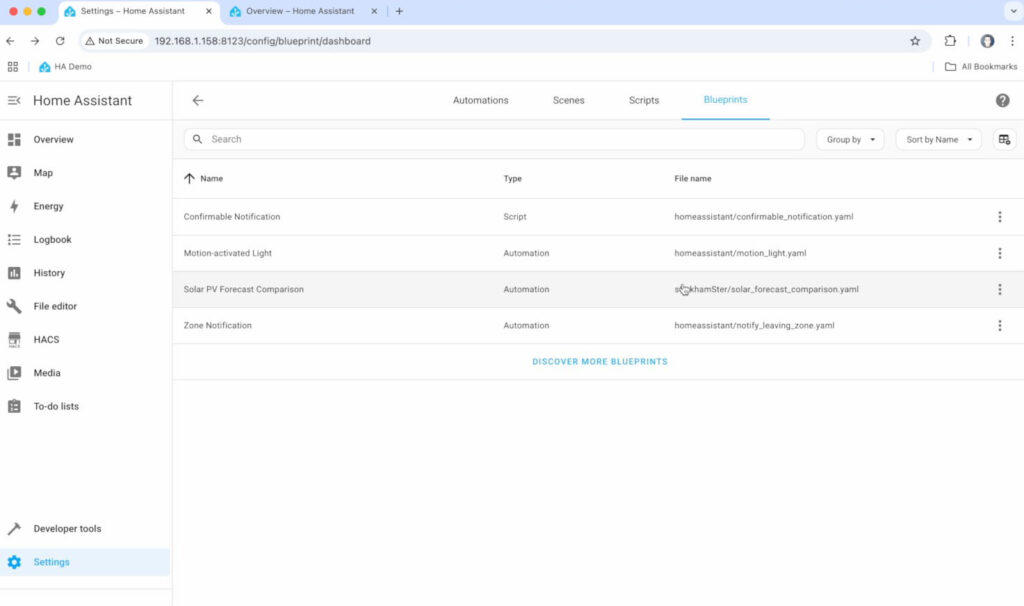
This is the easiest step of the lot! Navigate to Settings > Automations & Scenes, and choose the 'Blueprints' tab at the top. Click on the 'Import Blueprint' button in the bottom-right and in the Blueprint address box paste the following URL:
https://github.com/sOckhamSter/homeassistant-blueprints/blob/main/solar_forecast_comparison.yamlClick on the preview button and then the 'import blueprint' button. The new blueprint should appear in your list of blueprints titled "Solar PV Forecast Comparison".

5. Create the Automation
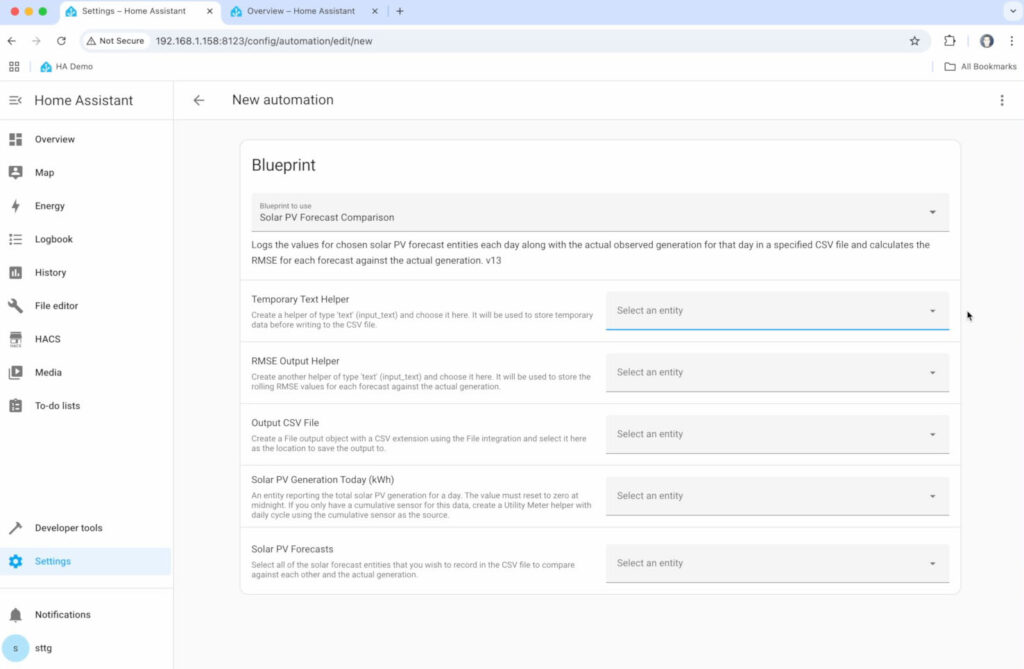
And finally it's time to create the actual automation... navigate to Settings > Automations & Scenes, making sure you're on the Automations tab and choose the 'Create Automation' button in the bottom right. You should be prompted to either create a new automation, or to select from a list of blueprints. Choose the blueprint named "Solar PV Forecast Comparison".
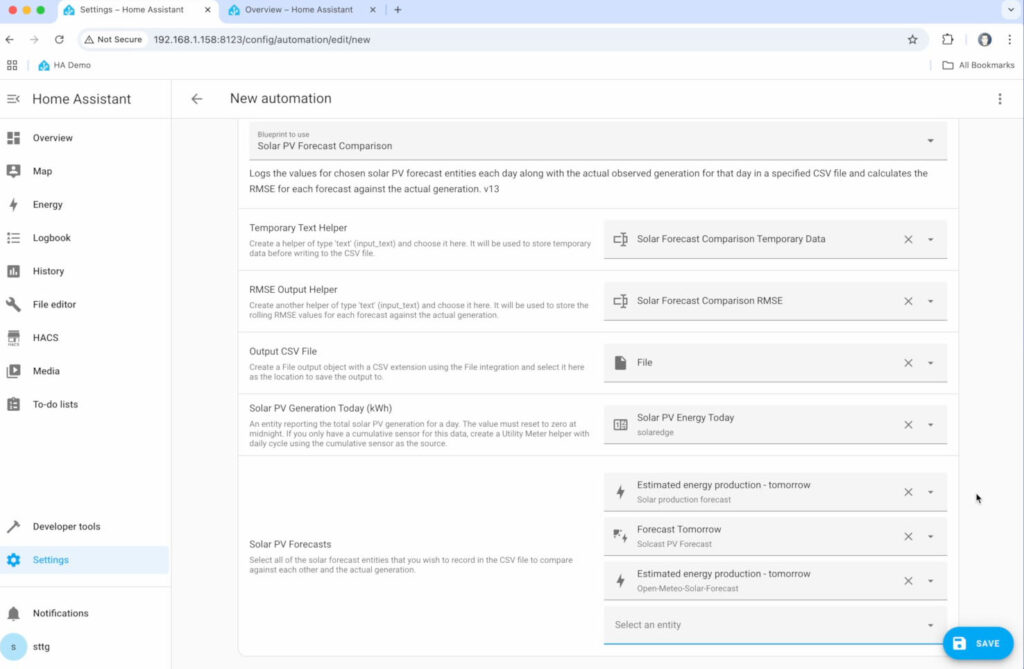
You'll need to choose an appropriate entity for each of the drop-down inputs that the blueprint is requesting:
- Temporary Text Helper: The input_text helper you created in step 2 named "Solar Forecast Comparison Temporary Data"
- RMSE Output Helper: The input_text helper you created in step 2 named "Solar Forecast Comparison RMSE"
- Output CSV File: The 'File' entity you created in step 3 that points to the CSV file.
- Solar PV Generation Today: The daily cycled energy sensor for your solar PV generation, as discussed in the pre-requisites in step 1.
- Solar PV Forecasts: One or more energy sensors storing the predicted solar PV generation for tomorrow, as supplied by the solar PV forecast integrations you have installed in Home Assistant.
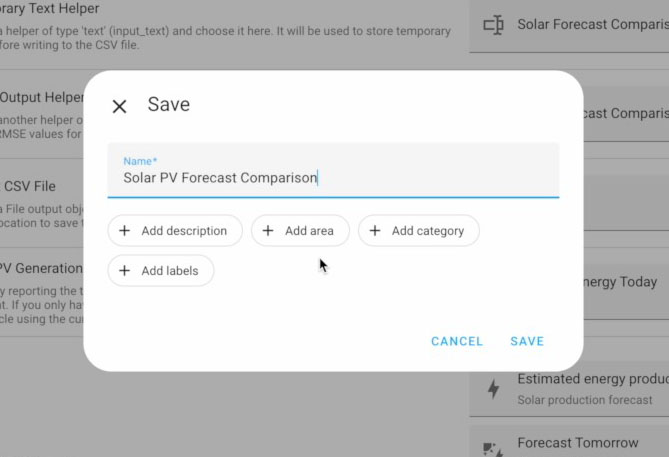
Save the automation, giving it an appropriate name and then leave alone for a few days! It will run at 23:30 every evening. The first evening it will collect the forecasts for the following day and store them in the temporary text helper. The following evening it will obtain the actual PV generation for that day, calculate the RMSE for each forecast compared to that generation, output the RMSE to the RMSE output text helper, and then write the forecasts and generation data to the CSV file.