Demand Flexibility Service Automation for GivEnergy Winter 2023/2024

It’s back for winter 2023/2024, it’s the Demand Flexibility Service or DFS as it’s commonly known, managed by the UK’s National Grid. This year if you have a home battery then you can get paid for what you export during the DFS sessions. If you’ve got a GivEnergy battery then I’ve put together an automation that you can use to help schedule those exports using Home Assistant.
If you don’t have a GivEnergy battery, carry on reading anyway because I’m going to start with an overview of Demand Flexibility Service, or DFS as I’m going to refer to it. If you're an Octopus Energy customer then skip down a bit to see an automation capable of detecting and opting in to Saving Sessions and configuring your scheduled export for you.
- What is DFS?
- Automation Options
- Automation: GivEnergy and DFS Exporter 2023-2024
- Octopus Energy Saving Session Detection
What is DFS?
Right then, it goes by many names depending on which energy supplier you are with. If you are on Octopus Energy then they’re calling them Saving Sessions, British Gas call it PeakSave. I’m not going to go through all of the different names, but hopefully your supplier will have told you about them. You need to sign up for each session in advance so make sure you do that first. You’ll be paid for every kWh that you don’t use during that session, when compared to your normal usage during that time period. Unlike last year there is no in-day adjustment, so you can’t hammer the grid beforehand in order to artificially inflate your usage. So if you don’t have a battery then just use less during that hour, that’s pretty much your only option. But this year if you have batteries then you can get paid for your export. Crucially, this will only be for additional export. If you are a tariff like Octopus Flux where you export during peak hours normally, then you need to be careful because you might not actually get paid extra for all that you export.
Automation Options
Now you’ve got a choice to make. You can go totally manual, use the GivEnergy app to force an export when the session starts, and resume normal eco or dynamic mode afterwards. But that’s not why you’re reading this article is it!?
If you are feeling very adventurous then on the GivTCP Facebook group is a semi anonymous member going by the name of Willy Reckitt. If you want a comprehensive solution that will try and make sure your batteries are charged up before the event, and then forces an export at the right time then go and join that Facebook group and look for his posts. Look out for his scripts for a single inverter or dual inverters if you have more than one you need to automate.
Alternatively you can use my automation. Mine is considerably simpler in terms of setting it up and the functionality it offers. Mine is a blueprint which makes it very easy to install, but all it really does is force export your batteries at the specified time and stops them again afterwards. It deals with all the various settings that you need to look at when the session ends such as putting the inverters back into eco mode and enabling discharge again. Some inverters behave slightly different to others in that respect so it tries to cater for all scenarios. You can also specify the power output that you want to export at, so if you have a DNO limit then it’s important to set that, and it’ll also deal with multiple inverters quite nicely too.
Automation: GivEnergy and DFS Exporter 2023-2024
Now, let’s start with the basics, you need Home Assistant up and running, and you need the GivTCP add-on installed and configured. Go and check out my latest GivTCP video if you need help on that. With that out of the way, let’s dive into the configuration in Home Assistant and I’ll show you just how easy this is to set up!

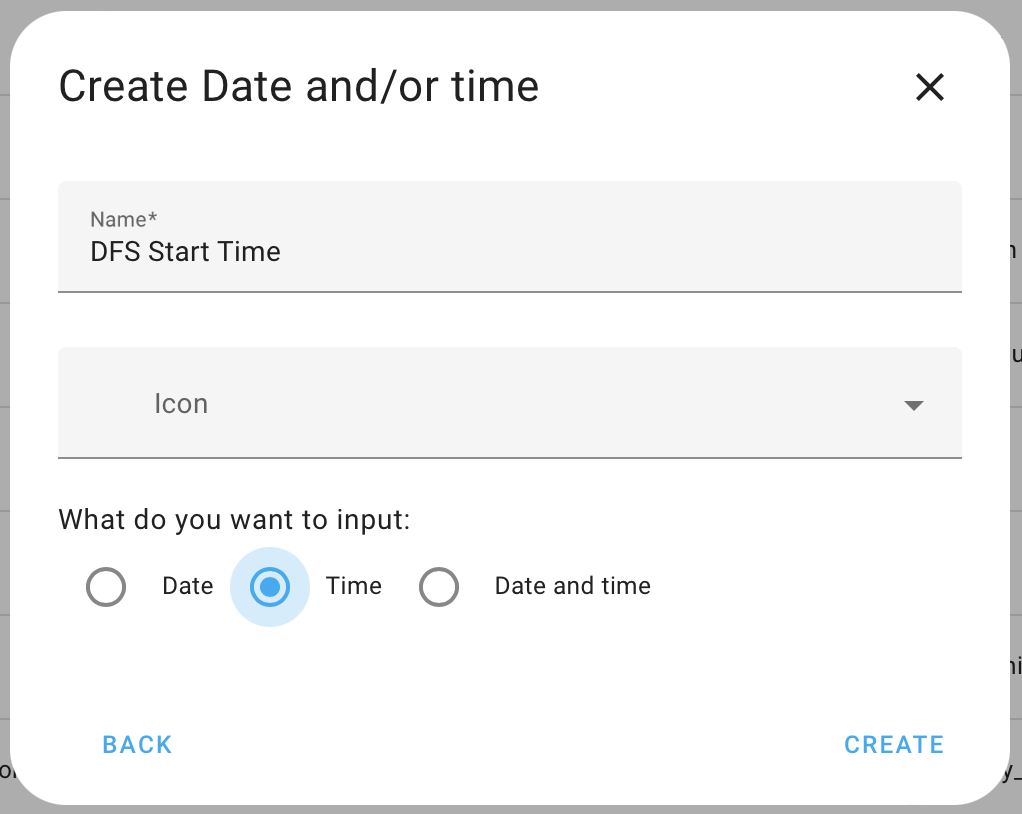
- Create two 'time only' helpers. Navigate to Settings > Devices & Services, choose the 'Helpers' tab at the top, and click on the 'Create Helper' button in the bottom-right. Find and select the helper type of 'Date and/or time' from the list. Give the helper a name of 'DFS Start Time', choose the 'Time' only checkbox, and click on 'Create'. Repeat the process to create another identical helper named 'DFS End Time'.
- Import the blueprint (manual method): Navigate to Settings > Automations & Scenes, choose the 'Blueprints' tab at the top, and click on the 'Import Blueprint' button in the bottom-right. Paste the following URL into the 'Blueprint address' box:
https://github.com/sOckhamSter/homeassistant-blueprints/blob/main/givenergy_dfs_2023.yaml
Click on the 'preview' button, then 'import blueprint' so save it. - Import the blueprint (easy method): Click in the following button to start the import into Home Assistant automatically.

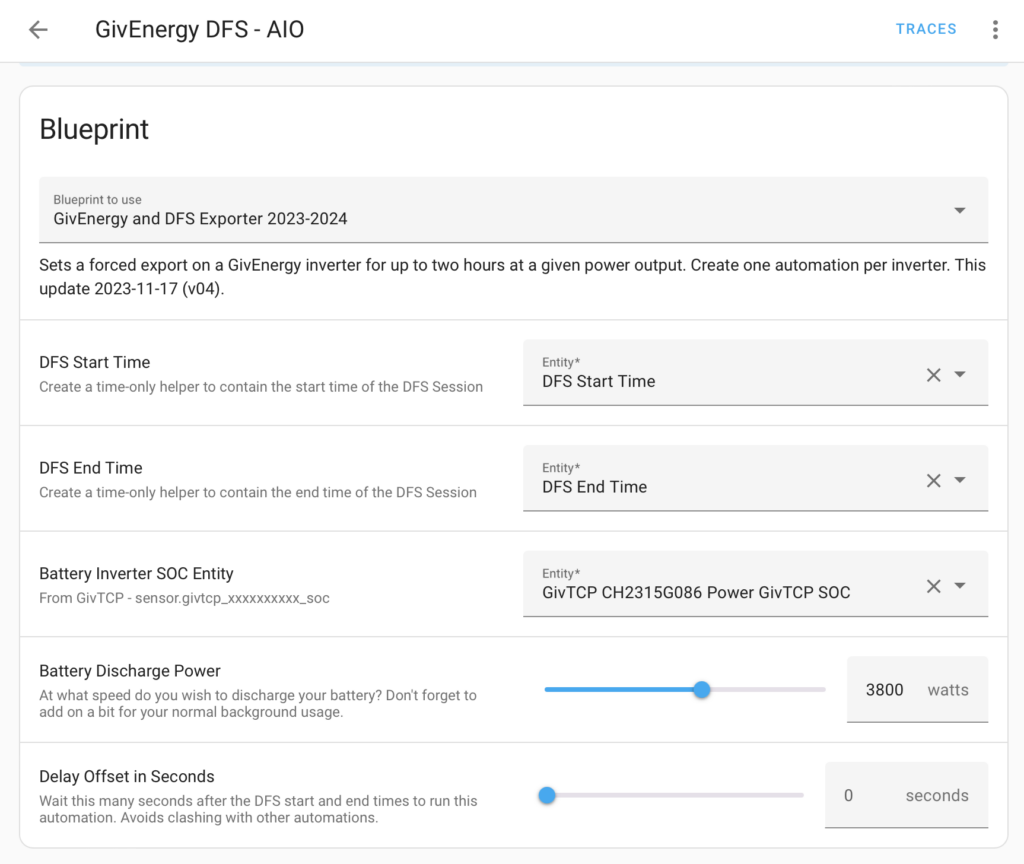
- Create your automations: Navigate to Settings and you should be placed in the Automations tab by default. Click on 'Create Automation' in the bottom-right and choose the imported blueprint 'GivEnergy and DFS Exporter 2023-2024'. For the DFS Start Time and DFS End Time drop-downs, select the DFS Start Time and DFS End Time helper entities you created in the previous steps. For the Battery Inverter SOC Entity, you need to choose the SOC entity provided by GivTCP for the inverter you are controlling. This is usually in the format sensor.givtcp_xxxxxxxxxx_soc. Adjust the Battery Discharge Power slider if necessary. By default this is 3000 watts, but if you have a smaller or larger inverter then you must set this to the actual power capability of your inverter or lower. Setting this to a value that your inverter is not capable of will cause the automation to fail. You can optionally change the Delay Offset too which will effectively insert a delay into the automation after the Start and End times. This is intended to prevent GivTCP commands clashing when running multiple instances of this automation at the same time. If you have multiple inverters, create an automation from this blueprint for each inverter and set Delay Offset for each additional inverter to avoid them running at the same time. For example, for my second inverter, I set a delay of 35 seconds.
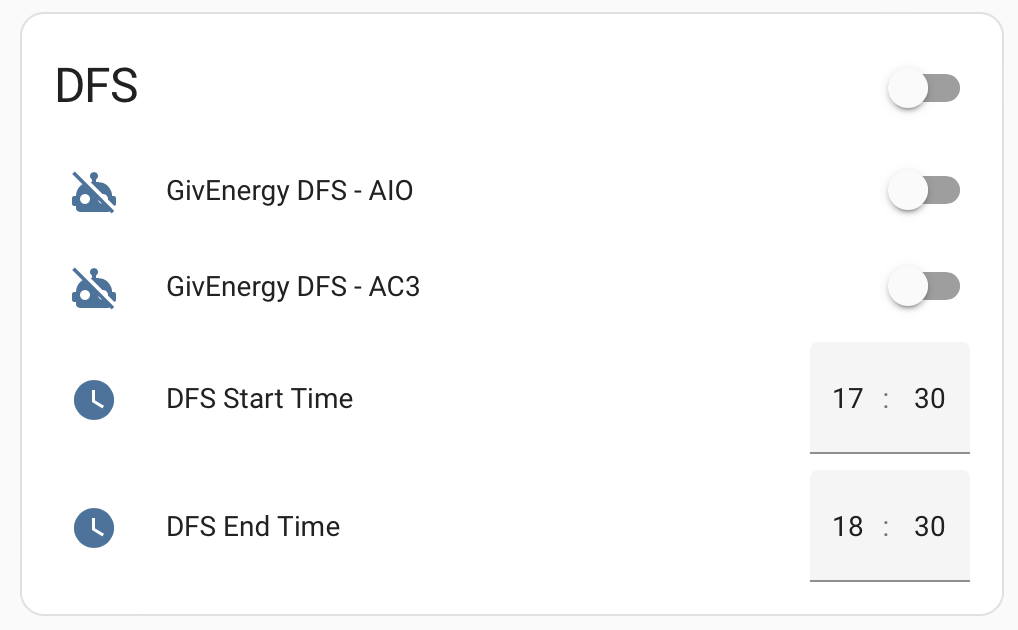
- Create a Dashboard Card: To make it easy to control, you should add some entities to your dashboard. I suggest creating an 'Entities' card and adding the following:
- Each of your automations, created from the blueprint
- DFS Start Time
- DFS End Time
One quirk of GivTCP, certainly for me, is that when you set the discharge power to a specific value, it ends up setting itself to a lower value, so when I set it to 2000 watts, it’ll probably end up at about 1900 watts. It’s just something to be aware of when you are configuring the automations.
And that’s it! When you get a session announced, update the time entities on your dashboard card with the start and finish times then enable the automations so as they run. Don’t forget to disable them again afterwards or they’ll run the following day.
Octopus Energy Saving Session Detection
If you are with Octopus Energy then you can make use of another blueprint which will automatically detect any sessions that you have signed up to, it’ll set the start and end times for you, and then enable the automations. Crucially it’ll also disable those automations for you at the end of the session. In theory this automation will even automatically opt in for announced saving sessions. Now I say in theory because at the time of putting this video together we’ve not actually been able to test any of this because there’s only been one session. So if you decide to give this one a go, keep a close eye on your dashboard card that we created earlier. Make sure that the start and end times get set and if they don’t then manually set them yourself and enable the automations. Crucially, go into your Octopus account and double check that you have opted in to each one. If any bugs are discovered then I’ll update the blueprint as we discover them. Just delete your automation and blueprint, redownload and reconfigure it to get the updates.
If you're not with Octopus Energy then why not sign up with them? If you use my referral code crisp-moth-619 or click on the following link then we both get £50 credit as a bonus!
Octopus Energy using my referral link:
speaktothegeek.co.uk/energy

Existing customer? Find out how you can benefit too. T&Cs apply (only one switching offer per household)
This automation was originally created by Willy Reckitt in the GivTCP Facebook group, and I’ve adapted it to the blueprint format to make it a bit easier to use. It’ll work with both my export blueprint, and his more advanced automations. Before you start, you will need to make sure you have already installed and configured the Octopus Energy integration by BottlecapDave via HACS. I’ll assume you have already done that!
- Import the blueprint: Like before, you can either import it manually or click on the easy importer button further down this article. To import it manually navigate to Settings > Automations & Scenes, choose the 'Blueprints' tab at the top, and click on the 'Import Blueprint' button in the bottom-right. Paste the following URL into the 'Blueprint address' box:
https://github.com/sOckhamSter/homeassistant-blueprints/blob/main/octopus_saving_session_detection.yaml
Click on the 'preview' button, then 'import blueprint' so save it.
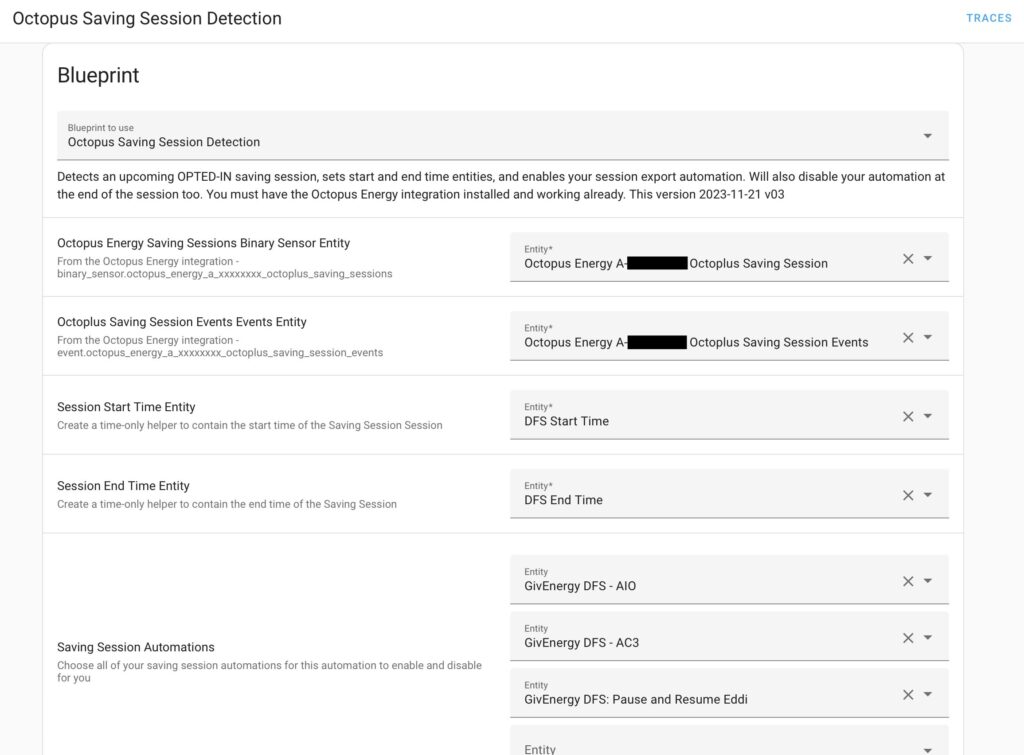
- Create the automation: choose your 'Octoplus Saving Session' entity as provided by the Octopus Energy integration. It is usually in the format binary_sensor.octopus_energy_a_xxxxxxxx_octoplus_saving_sessions. Also choose your Saving Session Events entity which is in the format event.octopus_energy_a_xxxxxxxx_octoplus_saving_session_events. You'll then be asked to choose your Start and End time entities, which should be DFS Start Time and DFS End Time if you followed the steps near the start of this guide. Finally, you must select the automations that this automation will be enabling and disabling. These could be the automations you created using the more advanced Willy Reckitt process, or the ones created from my previous blueprint. I also add in another automation which pauses and resumes my eddi hot water diverter during the DFS hours in order to prevent it trying to divert the exported power.
Keep your eyes on the Github file because I might tweak the blueprint throughout the winter if I find any bugs or ways to improve it. I’ll update the description line in the file with the date that I make any changes so as you can easily see.