
ESPHome Smart Garage Door Controller

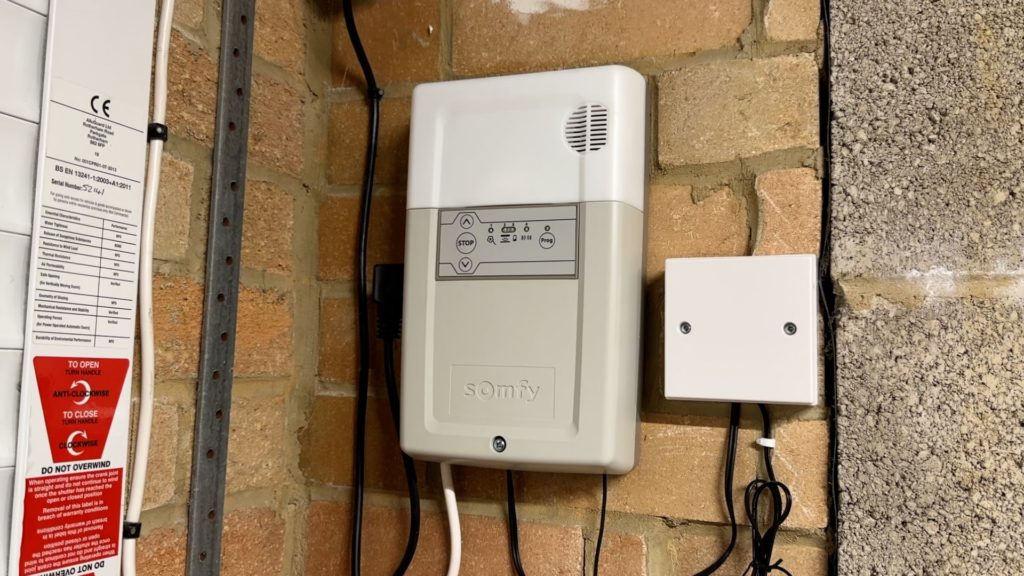
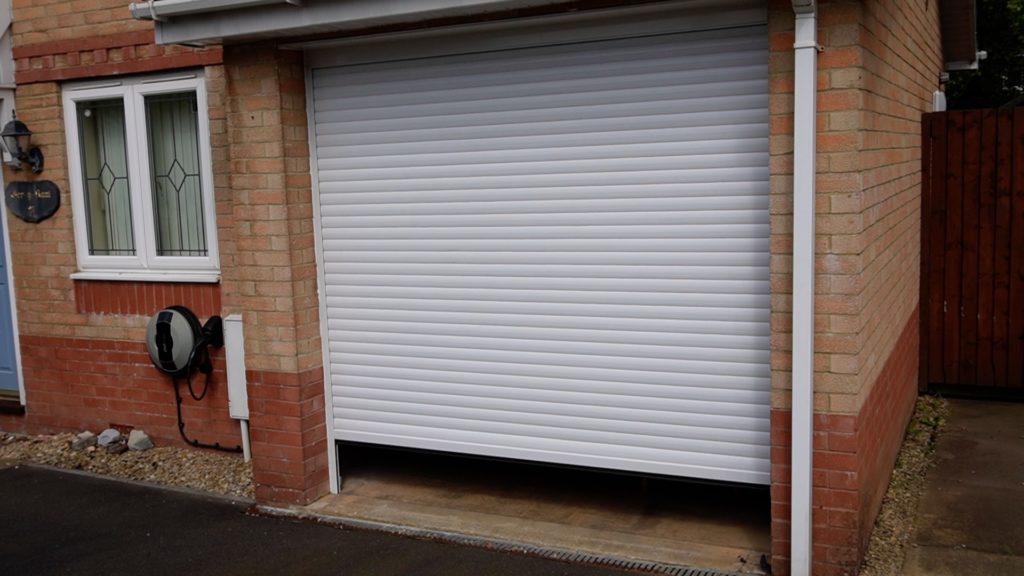
A lot of people, including me, are having motorised roller garage doors installed. Most of the receivers, those are the main control boxes, are not very smart at all. I’m going to show you how to turn a standard receiver into a smart one connected to Home Assistant. My garage door is controlled by a Somfy Rollixo RTS roller door system. It has a receiver bolted to the wall and plugged into the mains and there’s a wireless safety edge sensor at the bottom of the door which also has a magnet so as it knows whether or not the door is shut.
Shopping List:

It comes with a couple of wireless remotes which work on 433MHz and I was previously using an RFXCom to intercept the signal of one of those remotes and control it using Home Assistant. But, I’m looking to start retiring that old wireless device so thought I should look at a controlling it more directly.
There are lots of smart garage door controllers out there that you can buy off the shelf. One of the more popular ones I’ve seen around is the Meross Smart Garage Door Opener. It works over Wifi, has its own app, comes with a door contact sensors and isn’t a bad price really. But what most of these pre-made options all have in common is that they are basically just a fancy momentary switch - so a relay that turns on and then off straight away and that’s something that is really easy to make in ESPHome.
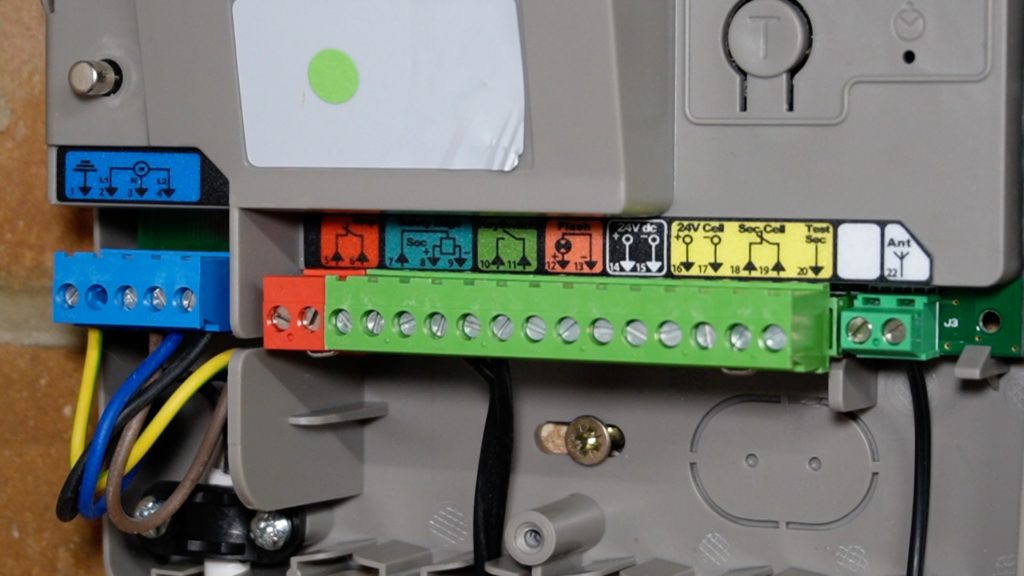
Inside my Somfy Rollixo (the receiver) are a couple of contacts labelled 'Key Switch' and numbered 10 and 11. If those terminals are shorted temporarily then it indicates to the receiver that it needs to control the garage door motor. It does this in the order of open, stop, close, stop, and repeat for each occasion that the terminals are shorted. All off-the-shelf smart controllers connect to these terminals and basically short them using a relay.
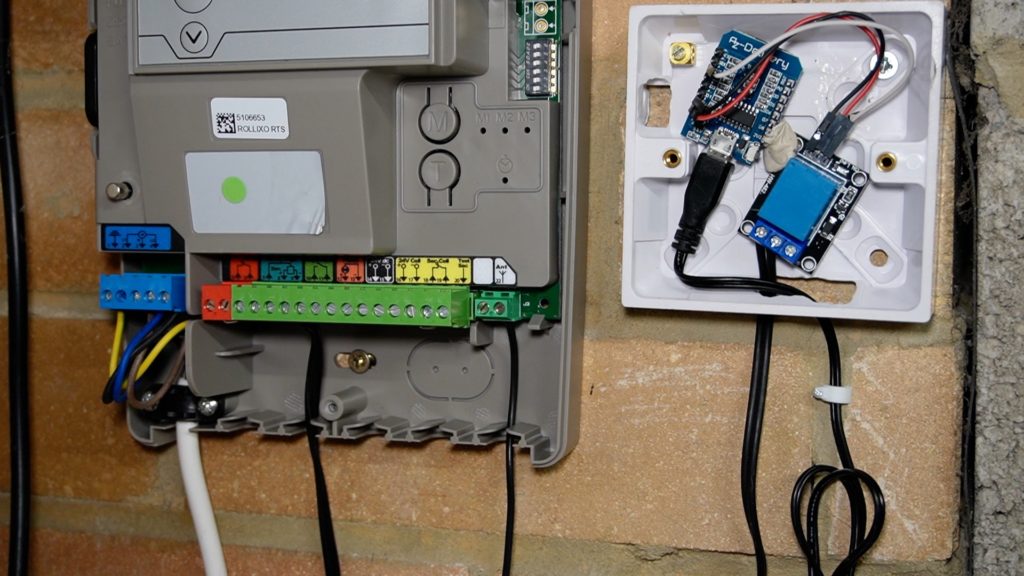
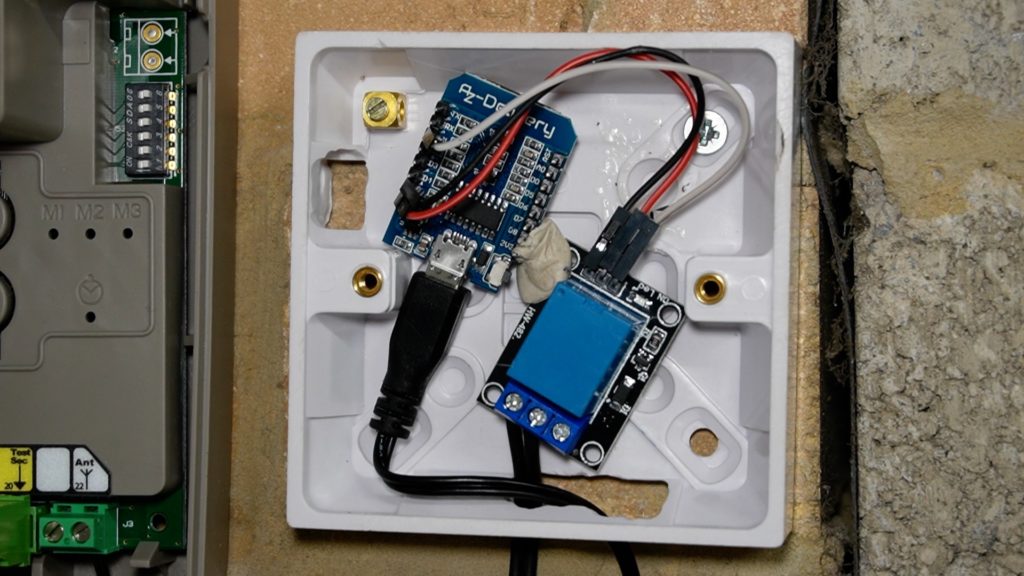
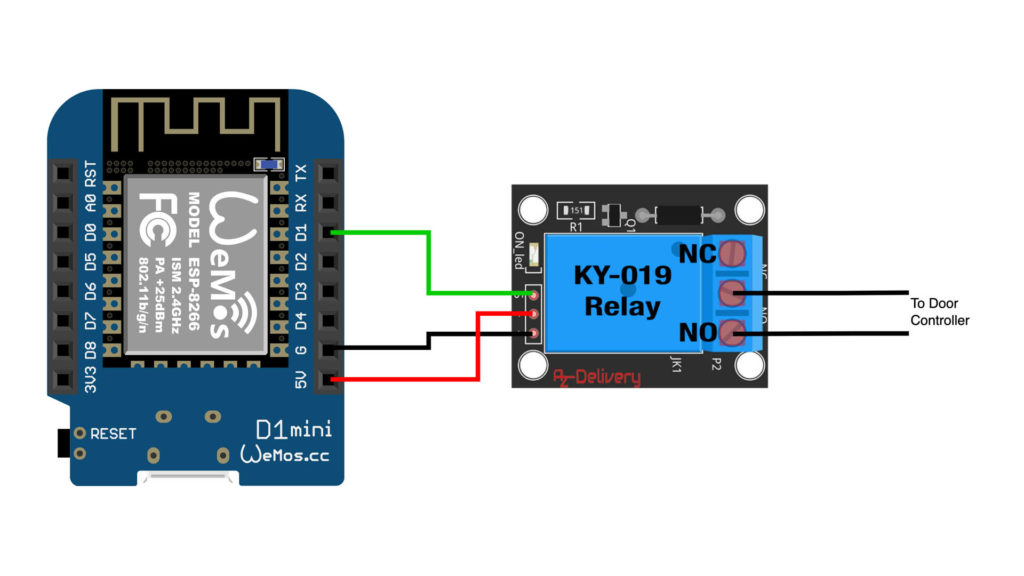
I've connected some bell wire to those terminals, and on the other end of that bell wire is a KY-019 5v relay. The relay is connected to a D1 Mini, and the D1 Mini is powered by a USB cable. Those two components are fitted inside a single-gang wall pattress to keep it neat and tidy.
Connecting it all together is quite simple - note that I am using pin D1 on the D1 mini to connect to the relay and that is very important. Pin D1 doesn’t push out any stray voltage on boot up like the other pins do. If you connect a relay to the other pins then when you power on the microcontroller it sends a pulse to the relay which will cause your garage door to open unintentionally. You’ll see we also have the outside of the relay connected to the NO, or normally open pins.
Now that you’ve physically put the project together, you’re going to need to programme it. This is an ESPHome video so I’m of course going to show you the ESPHome configuration.
substitutions:
  device_name: "garage-door-relay"
  friendly_name: "garage-door-relay"
  device_description: "Momentary relay used to control the garage door receiver"

esphome:
  name: '${device_name}'
  comment: '${device_description}'
  platform: ESP8266
  board: d1_mini

# Enable logging
logger:

# Enable Home Assistant API
api:

wifi:
  ssid: !secret wifi_ssid
  password: !secret wifi_password

  # Enable fallback hotspot (captive portal) in case wifi connection fails
  ap:
    ssid: '${device_name}'
    password: !secret fallback_password

captive_portal:

ota:
  - platform: esphome

safe_mode:
  disabled: false
  reboot_timeout: 10min
  num_attempts: 5


# Switch object to control the relay
switch:
  - platform: gpio
    name: "garage_door_relay_switch"
    id: garage_door_relay_switch
    pin: D1
    on_turn_on:
      - delay: 500ms
      - switch.turn_off: garage_door_relay_switch
It’s very simple - apart from the usual standard configuration, there’s only one entity right down at the bottom. It’s a switch that when turned on will wait half a second and turn itself off again. Install that to your controller and you should end up with an entity called switch.garage_door_relay_switch.
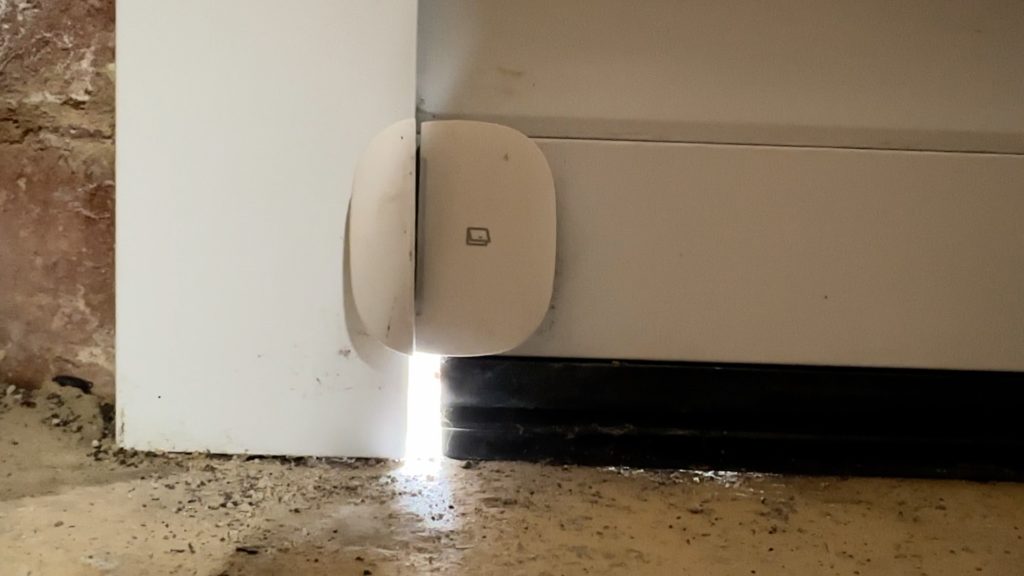
You can test that relay out by turning on the switch entity, and it should immediately turn itself off. It should also control your garage door. But so far this is just one way thing, you can control it but you have no way of knowing whether it is open or closed - it could have been opened manually and when you send it the command to open then you could inadvertently close it. To fix this piece of the puzzle you need another component - a door contact sensor. I have an old SmartThings Zigbee multi-sensor on the opposite side of the garage door right at the bottom. You could use any door contact sensor really, there are wifi ones, z-wave ones, or Zigbee ones, the choice is yours.
You’ll then need to join it all together using a special template cover entity in Home Assistant. Edit your configuration.yaml file - I’m going to assume you already know how to edit configuration files if you’ve made it this far!
Paste in a template sensor like this one:

cover:
  - platform: template
    covers:
      garage_door:
        device_class: garage
        friendly_name: "Garage Door"
        value_template: >-
          {% if is_state('binary_sensor.garage_door_contact_contact', 'on') %}
            open
          {% else %}
            closed
          {% endif %}
        open_cover:
          service: switch.turn_on
          entity_id: switch.garage_door_relay_switch
        close_cover:
          service: switch.turn_on
          entity_id: switch.garage_door_relay_switch
        stop_cover:
          service: switch.turn_on
          entity_id: switch.garage_door_relay_switch
        icon_template: >-
          {% if is_state('binary_sensor.garage_door_contact_contact', 'on') %}
            mdi:garage-open
          {% else %}
            mdi:garage
          {% endif %}
You’ll need to edit the contact sensor entity (where is says 'binary_sensor.garage_door_contact_contact') with the actual entity ID of the contact sensor you’ve installed on the garage door in two places. The three actions for open, stop and close all do the same thing and turn on the relay switch from the ESPHome device we built. Save that configuration and restart Home Assistant. Once you’ve restarted you should have an entity called cover.garage_door. I’ve added it to my dashboard along with all of the other related entities.
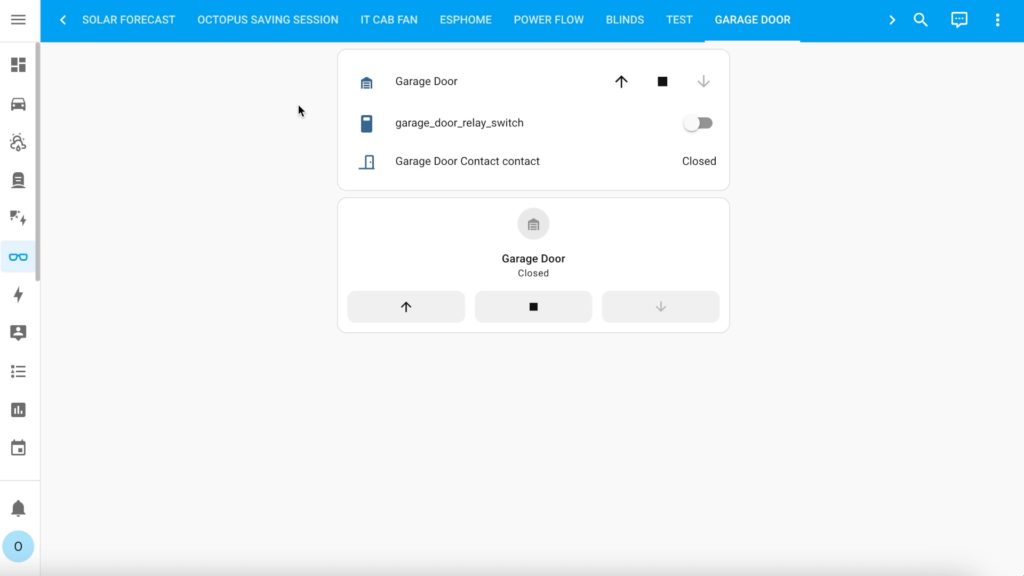
Clicking on the 'up' arrow should open the garage door - you’ll see the door contact show as open too. The cover entity’s state is totally linked with the state of that contact sensor so if the door is opened manually then the cover’s state in Home Assistant will also show as open.
If you didn’t want to buy a wireless door contact sensor then you could take the project a step further and use a cheap magnetic ‘reed’ sensor wired directly into the microcontroller. You’d need to adjust the configuration of course in order to present that sensor as a contact sensor in Home Assistant. I’d already got the Zigbee sensor on the door so didn’t need to do that but please do share in the video's comments if you decide to go down that route.