
SwitchBot Blind Tilt: Vertical Blind Support and Apple HomeKit Control

The SwitchBot Blind Tilt is a clever little robot that wraps itself around the wand used to adjust the tilt of your blinds. It’s actually designed for Venetian blinds, that’s the ones with horizontal slats and it adjusts the tilt of the slats. But, I don’t have Venetian blinds, I have vertical blinds. Ok, old and tatty vertical blinds but I like the way they let light in even when fully closed, so I get privacy and a bit of natural light from them.
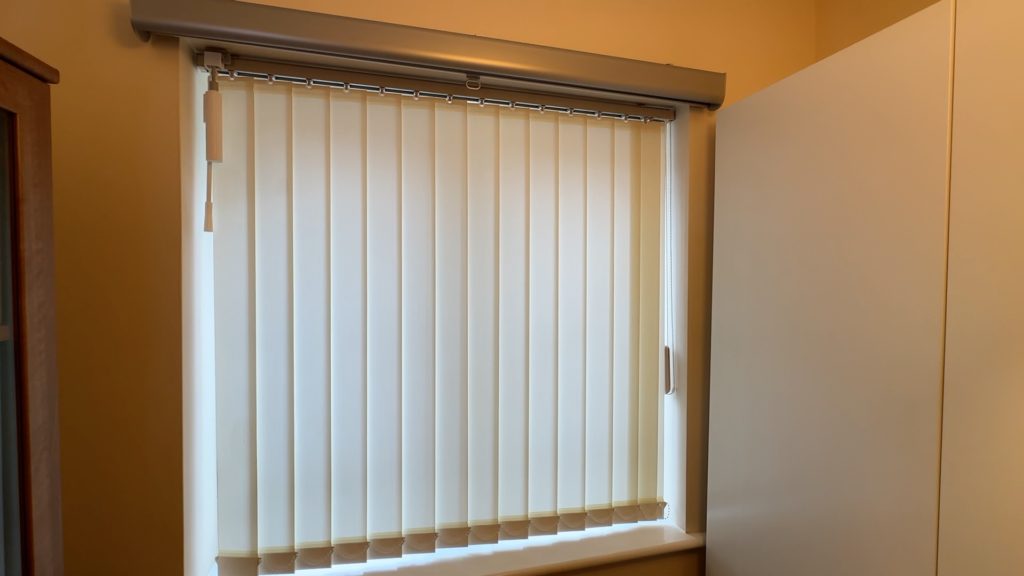
Officially, according to the SwitchBot FAQ, the Blind Tilt does not support vertical blinds. This is understandable seeing as most vertical blinds are not wand controlled, and also if you open the tilt over half way then the slats are just going to hit the robot. Well, I saw that as more of a challenge than a restriction. I managed to hack my vertical blinds to support wand control, which means I could then attach the Blind Tilt. I’ll show you later on how I actually did that, but let’s talk about the SwitchBot Blind Tilt itself first.
The Parts List!
- SwitchBot Blind Tilt: (UK) (US)
- SwtchBot Remote: (UK) (US)
- SwitchBot Hub Mini: (UK) (US)
- Vertical Blind Wand Control Mechanism: https://ebay.us/qv4FHt
- 50cm Wand: https://ebay.us/xE06Qt
Overview of the SwitchBot Blind Tilt
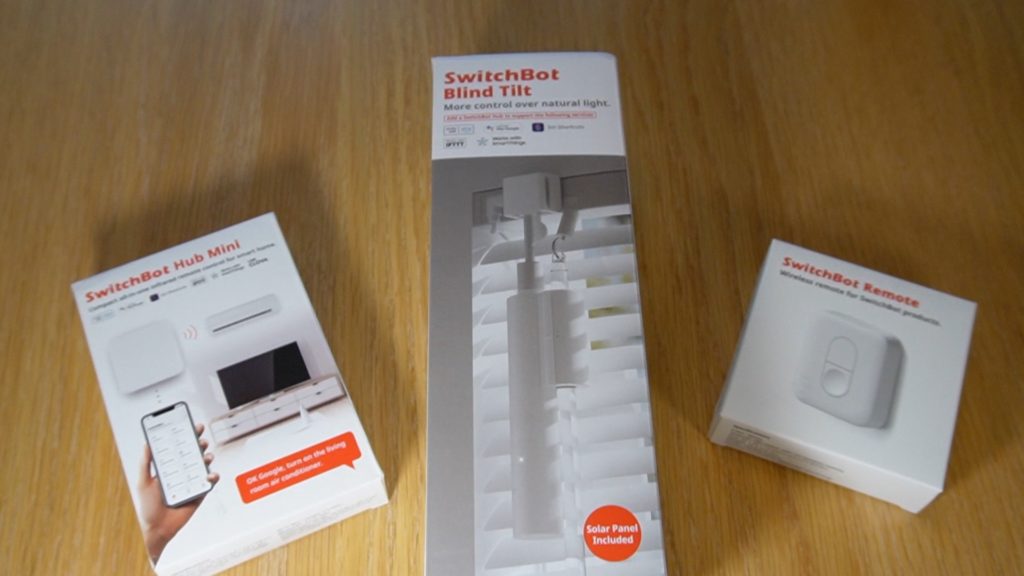
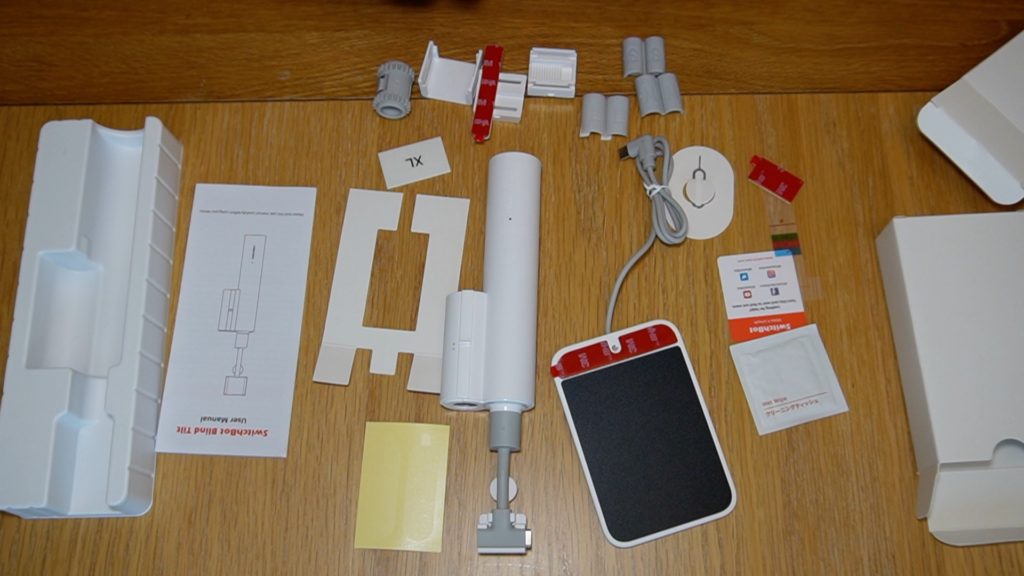
As well as the Blind Tilt, SwitchBot also sent me their Hub Mini and a little remote. Now here’s the thing, if you have Home Assistant and your hardware supports Bluetooth - like on a Raspberry Pi 4, then you don’t actually need that hub because the Blind Tilt will connect straight to Home Assistant really easily. There are some limitations with that which I’ll go over when I show you how to set it up, but the hub itself does have some neat features worthy of discussion in its own right. If you don’t use Home Assistant then for starters you are probably watching the wrong video (or reading the wrong article..?!?), but also you might find the hub a lot more useful for automating the Blind Tilt. Unboxing the Tilt was a bit like unpacking a Lego set, there are so many pieces but don’t worry, just follow their installation video and it’s actually a lot easier to install that you might think. Oh, and there’s a solar panel to keep the battery topped up too.
Bodging a Vertical Blind for Wand Control
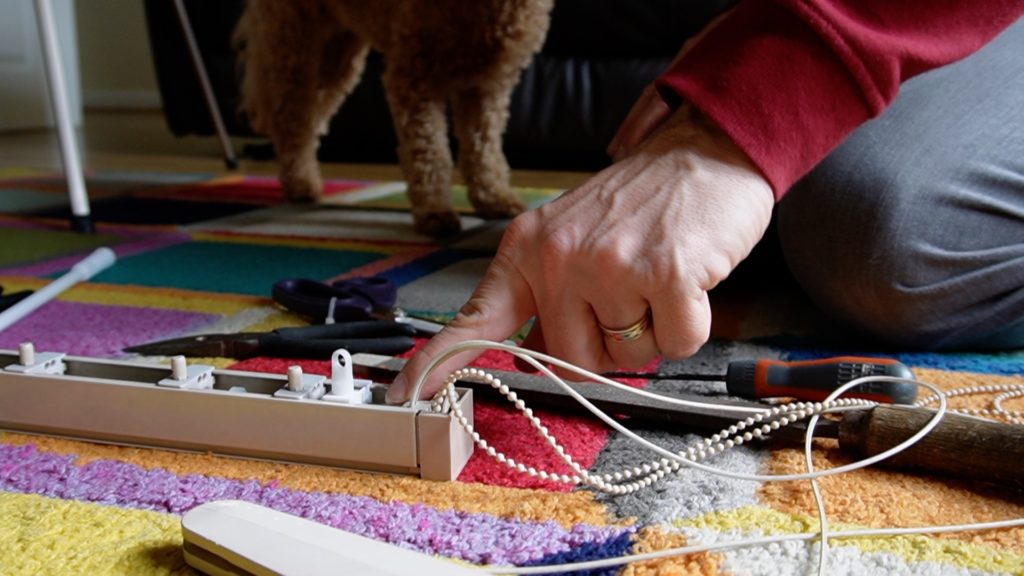
So I got it all installed and working on my study blind, and it took me a few days to get the parts I needed from eBay to make the conversion to wand control. But I didn’t film or photograph any of that for some reason. Fortunately, SwitchBot sent me two of them! We have more vertical blinds in our living room, so I went into that room to document the blind conversion process.
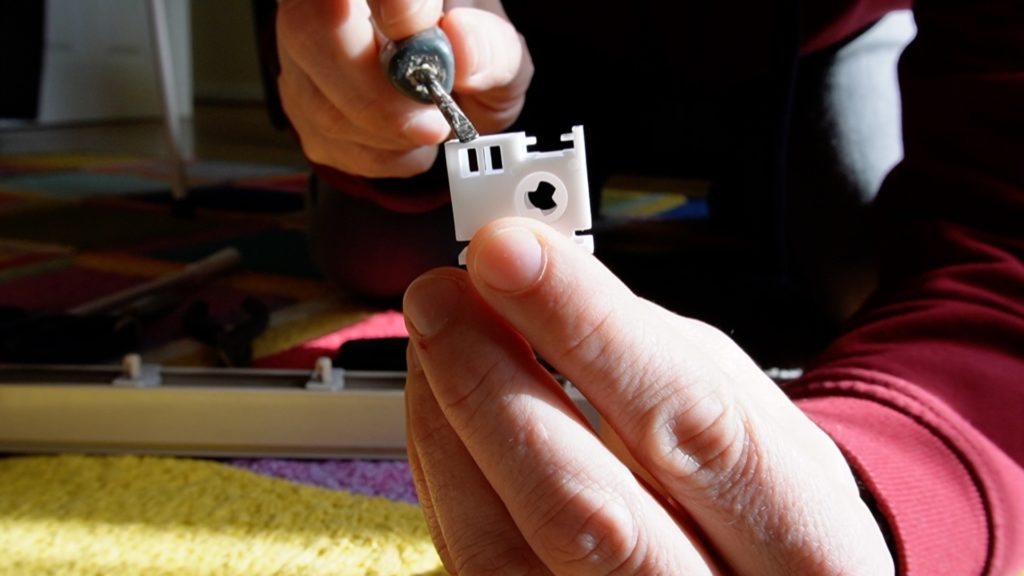
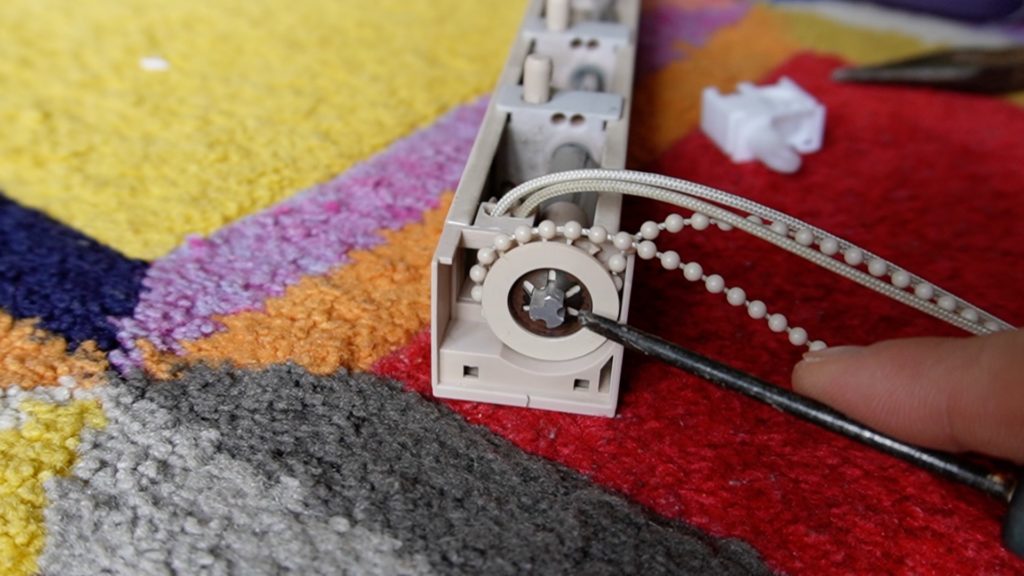
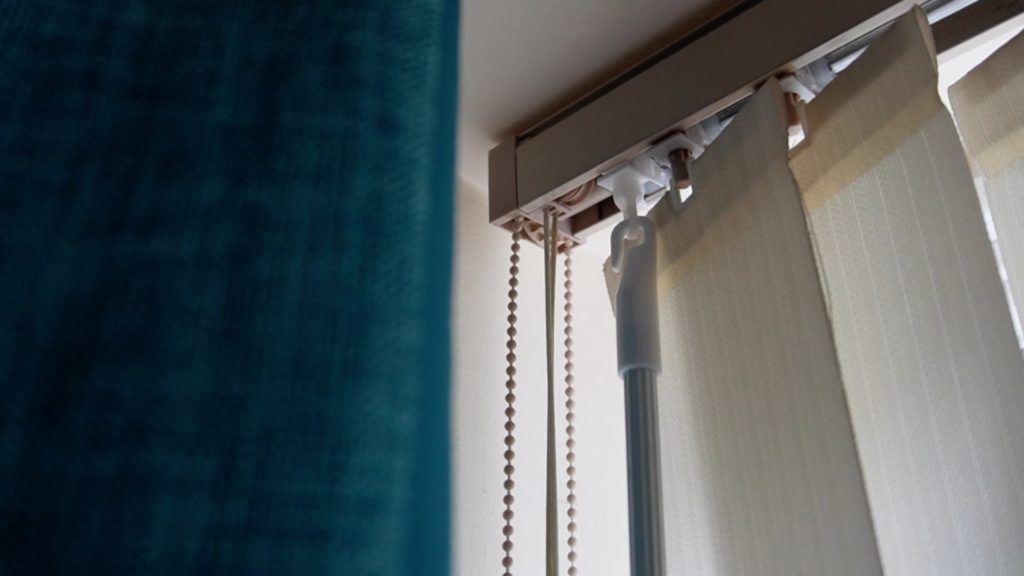
The idea is that I needed to disassemble the rail and replace an existing spacer with a special wand control gizmo. Opening up the rail involved pulling off a locking washer attached to the end of the tilt rod and removing the existing beaded tilt cord. Before I could fit the wand controller, I needed to snip off a couple of pieces of plastic opening up the holes through which the open/close cord runs. This saved me having to totally disassemble to cord running the length of the blind rail! The wand controller would actually sit in the middle of where the spacer was, so I also chopped the middle half out of the spacer and fed the wand controller on to the tilt rod in the order of 1/4 spacer, controller, 1/4 spacer. After that it was just a case of reversing the disassembly steps and fitting the blind back to the window. I hooked a wand onto the wand controller and hey presto, wand controlled vertical blind tilt! Finally, I installed the SwitchBot Blind Tilt and added it to the SwitchBot app as per their standard setup instructions.
Connect to Home Assistant
So, the next part, Home Assistant. Well, it’s really very easy if you have Bluetooth enabled on your HomeAssistant server, which you probably do by default if you have it running on a Raspberry Pi as I said before.
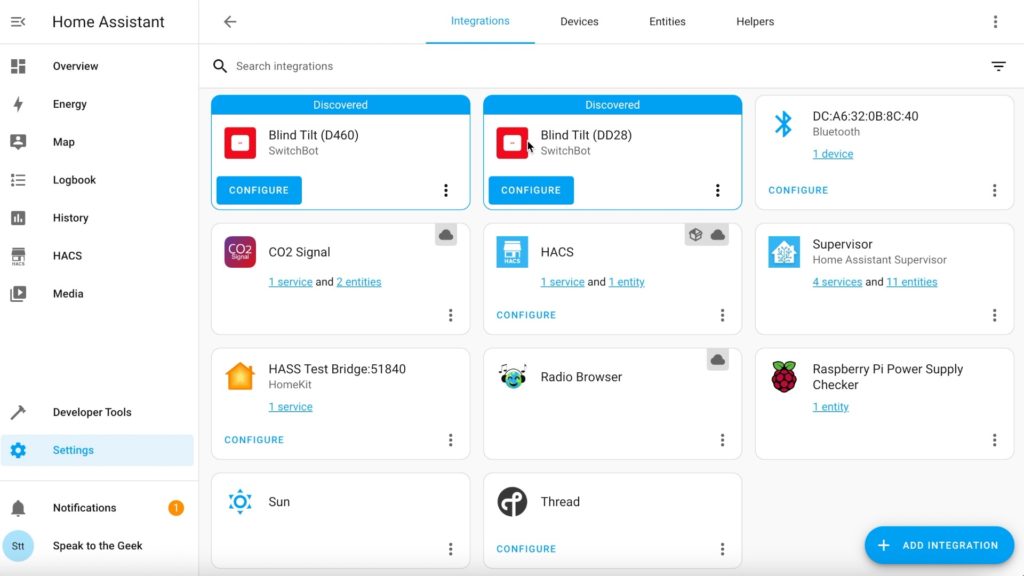
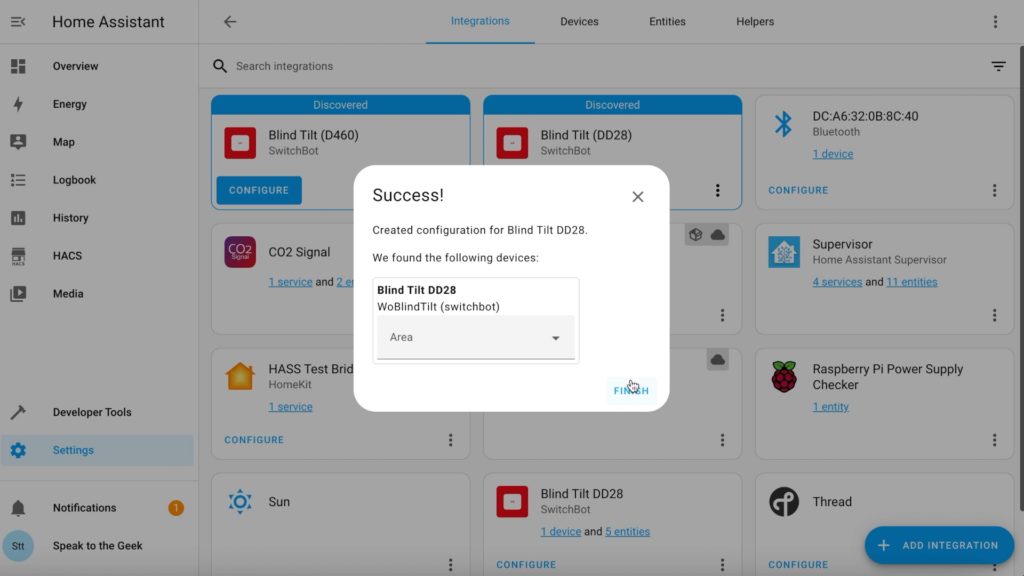
For me at least, the SwitchBot Blind Tilt just appeared as a discovered device! All I needed to do was click on Configure and add the controls to the dashboard! Possibly one of the easiest installations ever. But, there’s a catch. This is Bluetooth and range is going to be limited. If your blinds are not within Bluetooth range of your Home Assistant server then it won’t work. Well, there’s a workaround and it’s called a Bluetooth Proxy.
There’s an add-on for Home Assistant called ESPHome, it basically lets you really easily create your own devices and sensors and connect them over Wifi to Home Assistant. You might have seen some of my other videos about this where I create a lot of fan controllers. Well, if you use what’s called an ESP32 microcontroller, you can configure it as a Bluetooth proxy device. Place it near your Bluetooth devices, it’ll connect to your Wifi network and relay those Bluetooth signals over Wifi back to Home Assistant, genius!
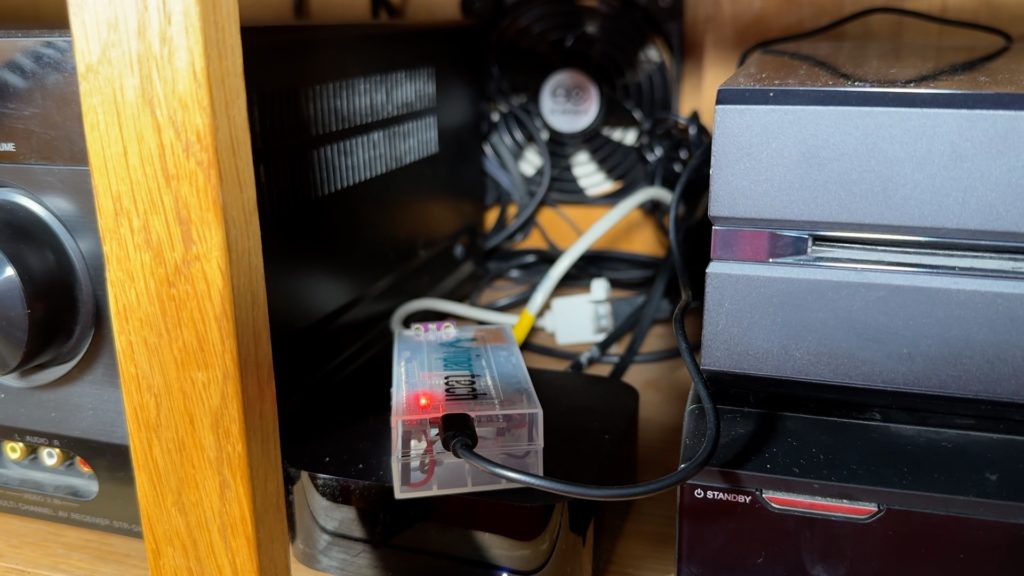
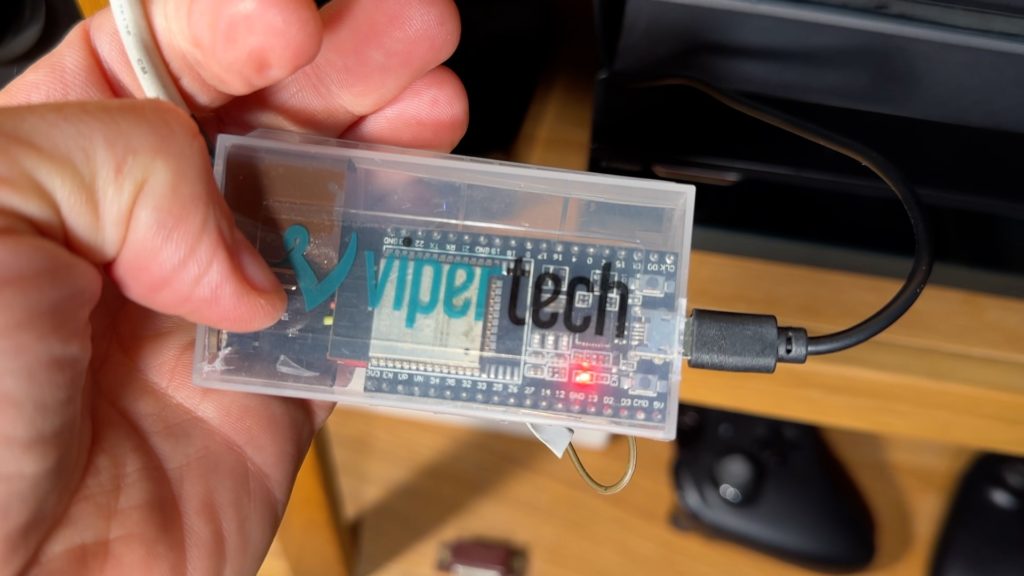
I happen to already have an ESP32 device sitting in my lounge because it runs the fan inside my AV cabinet, so I updated its configuration to support the Bluetooth Proxy service too. I’m not going to go over how to configure a Bluetooth Proxy device here because there are already loads of tutorials out there. Check out the video from mostlychris if you want to take a look at this.

Apple HomeKit Control
So now you have your vertical blinds converted to use a wand, and your fancy SwitchBot Tilt all set up in Home Assistant, but wouldn’t it be nice to be able to ask Siri to control your blinds? Of course it would. If you don’t yet have Home Assistant connected to Apple HomeKit, follow the instructions in this video. Once you’ve got that up and running, carry on with this article.

Now as with most things Apple Home, we’re going to need to fudge things a bit. HomeKit doesn’t understand blind tilts, it only understands opening and closing, that means we can’t just take the tilt entity from Home Assistant and pass it to HomeKit. On the SwitchBot page of the Home Assistant web site there’s an example ‘proxy’ template entity which wraps that tilt control and places it in a normal open/close blind entity. But I found that it didn’t work well for me because even though if the tilt is fully open, it is supposed to report a position of 50, sometimes it reports any value between 45 and 50, so using that configuration it frequently failed to show as open. Of course, I have an alternative.
You’ll need to edit Home Assistant's configuration.yaml file. I suggest you go to the add-on store and install the File editor add-on. Edit configuration.yaml, find an empty section, or find your covers section if you already have one, and paste in this configuration:
# ===============================================================
# Covers (Roller doors / Blinds)
cover:
  - platform: template
    covers:
      study_blind_tilt_wrapper:
        device_class: blind
        friendly_name: "Study Blind Tilt (Wrapper)"
        open_cover:
          service: cover.set_cover_tilt_position
          data:
            tilt_position: 50
          target:
            entity_id: cover.study_blind_tilt
        close_cover:
          service: cover.set_cover_tilt_position
          data:
            tilt_position: 0
          target:
            entity_id: cover.study_blind_tilt
        stop_cover:
          service: cover.stop_cover_tilt
          data:
            entity_id: cover.study_blind_tilt
        position_template: >-
          {% set perc_pos = (state_attr('cover.study_blind_tilt','current_tilt_position')*2)|int(0) %}
          {% if perc_pos > 89 %}
            100
          {% elif perc_pos < 11 %}
            0
          {% else %}
            {{ perc_pos }}
          {% endif %}
        set_cover_position:
          service: cover.set_cover_tilt_position
          data:
            tilt_position: "{{position/2}}"
          target:
            entity_id: cover.study_blind_tilt
Make sure that the cover entity referenced in this template matches the actual tilt entity for your blind. You should customise the main name on lines 6 and 8.
Reload the Template Entities configuration using Developer Tools. You should find that you now have a wrapper cover entity. You can add that to your dashboard to test out. Grab the entity ID for it and copy it to your clipboard.
Back over in File Editor, edit your HomeKit configuration and paste the new cover entity into the included_entities list. Reload the HomeKit configuration from Developer Tools and head on over to your Apple device. Open up the Home app and you should see your new blind tilt controller and be able to open, close, or set a specific position