
Off-Peak Tariffs In Home Assistant's Energy Dashboard

If you’re on a special energy tariff that gives you discounted rates at off-peak times of the day, such as economy 7 or Octopus Go, and you’d like to keep track of that in the Home Assistant energy dashboard, then you’ll need to do a little bit of automation work to set it up. It’s quite easy to do so keep reading and I’ll walk you through the whole process.
You can use Home Assistant's energy dashboard to keep track of how much energy your home is using or generating from various different sources. If you configure it to look at your grid import and export sensors, battery energy sensors and solar generation sensors, then the dashboard will start to graph your usage nice and clearly. If you also configure it with your energy tariff details then it’ll also keep track of how much you are spending or earning.
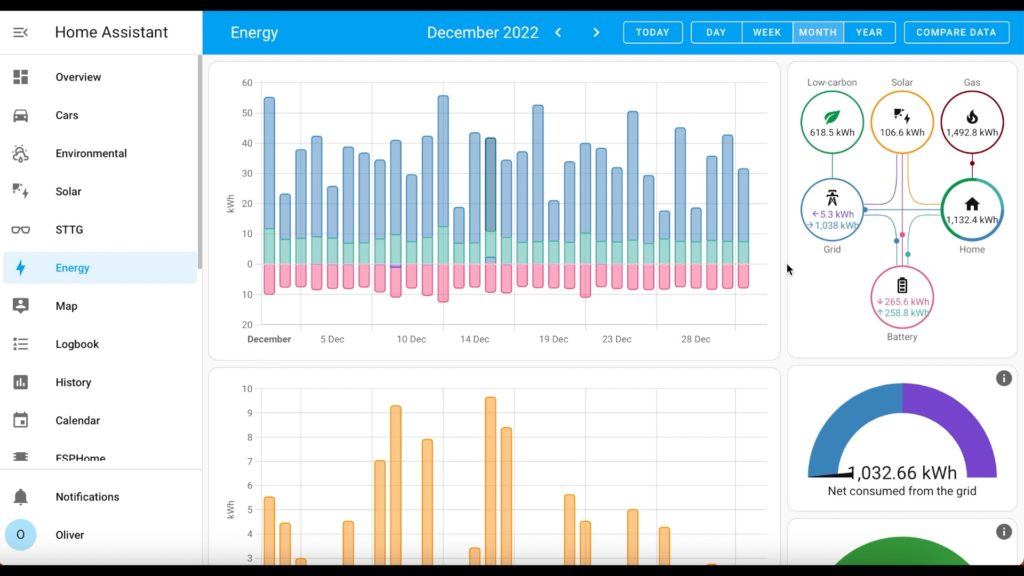
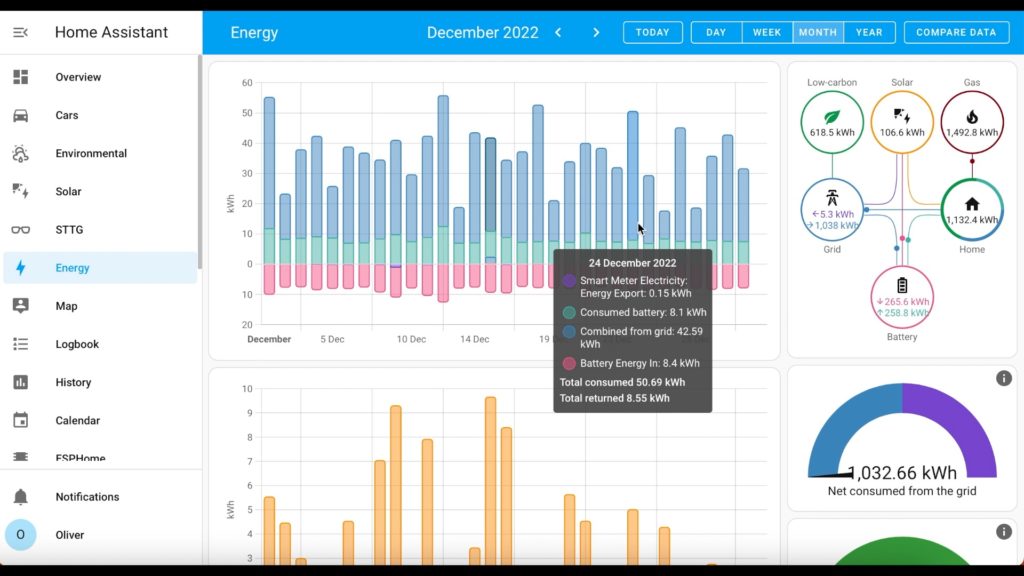
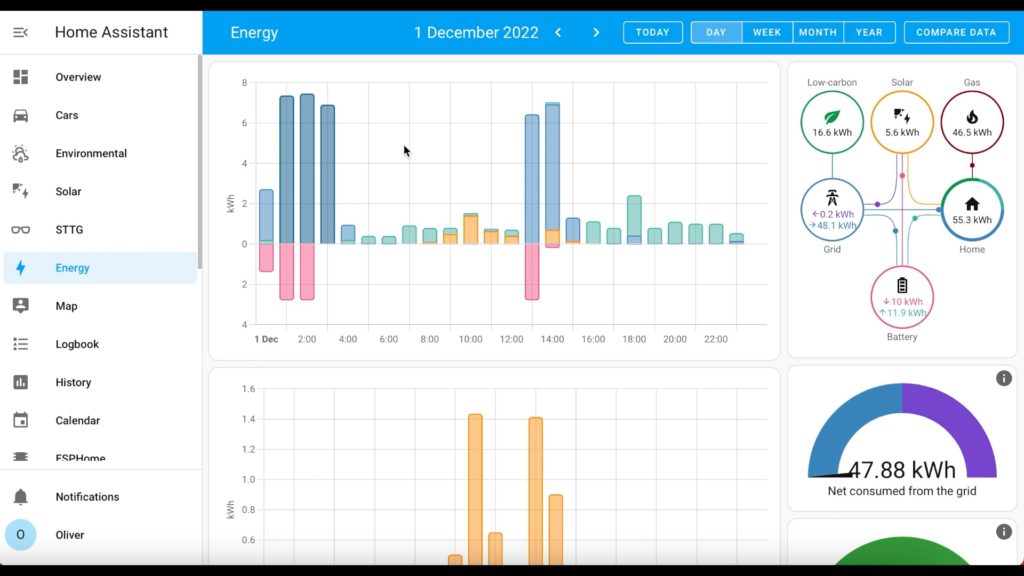
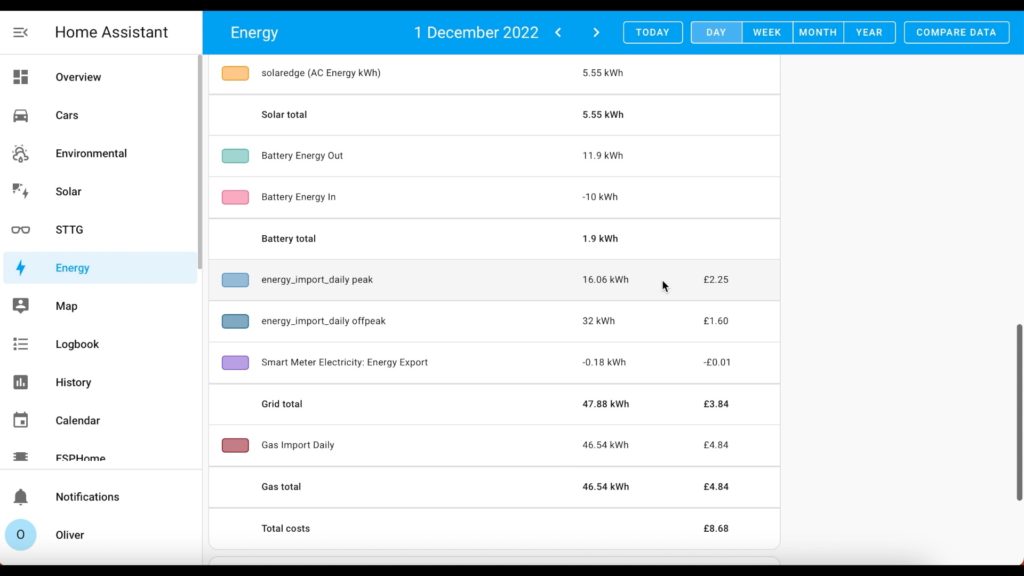
The screenshots above show my energy dashboard for December. You can see that each day has colour coded segments. Hovering over each day will give you a breakdown of how much energy each segment represents. If I zoom in to just one day, then look at the blue bars, you’ll see that there are two slightly different shades. The light blue represents the peak energy use, and the dark blue is off-peak. Scrolling down to the Sources table, you can see that it’s even keeping track of how much I spent peak and off-peak too.
Setting this up is really quite easy, but there are a few steps to follow in a very specific order. I’m going to assume that you already have some sort of energy sensor paired with Home Assistant so as you can see how much energy total you are importing. If you don’t have that, then you might want to check out something like the Glow display to get that data straight from your smart meter. You can also use CT clamp solutions if you like too, but just make sure you have that sorted before you carry on.
Octopus Energy using my referral link:
speaktothegeek.co.uk/energy

Existing customer? Find out how you can benefit too. T&Cs apply (only one switching offer per household)
Step 1: Time Helpers
First, we’re going to create two time helpers and we’re going to use them to store the start and end times of your off peak tariff.
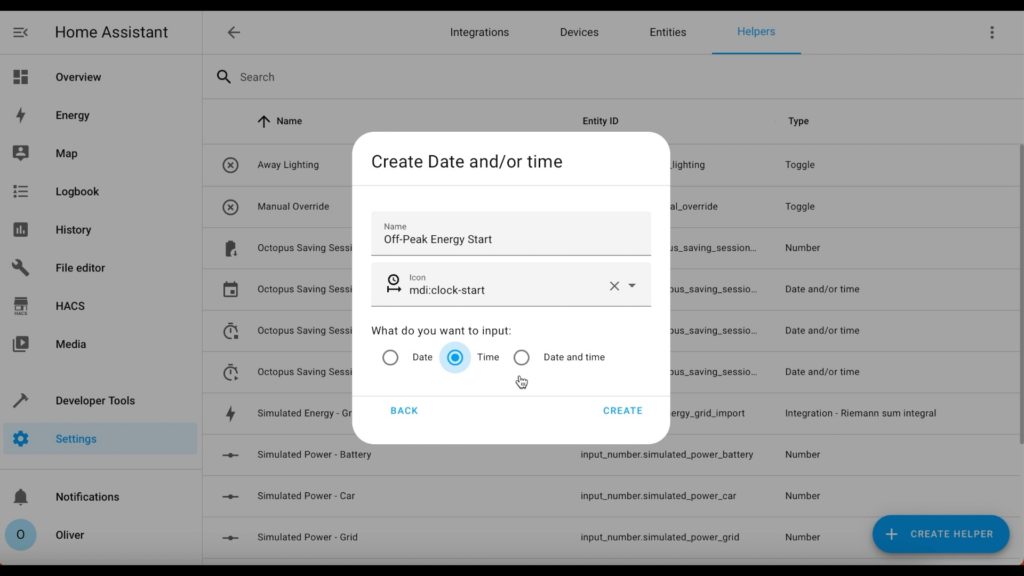
Navigate to Settings > Devices & Services > Helpers then click on the "Create Helper" button. Give it a name of "Off-Peak Energy Start" (note the exact wording here, that's important!). Make sure you select the 'Time' radio box so as this helper only stores a time (not a date, or date and time).
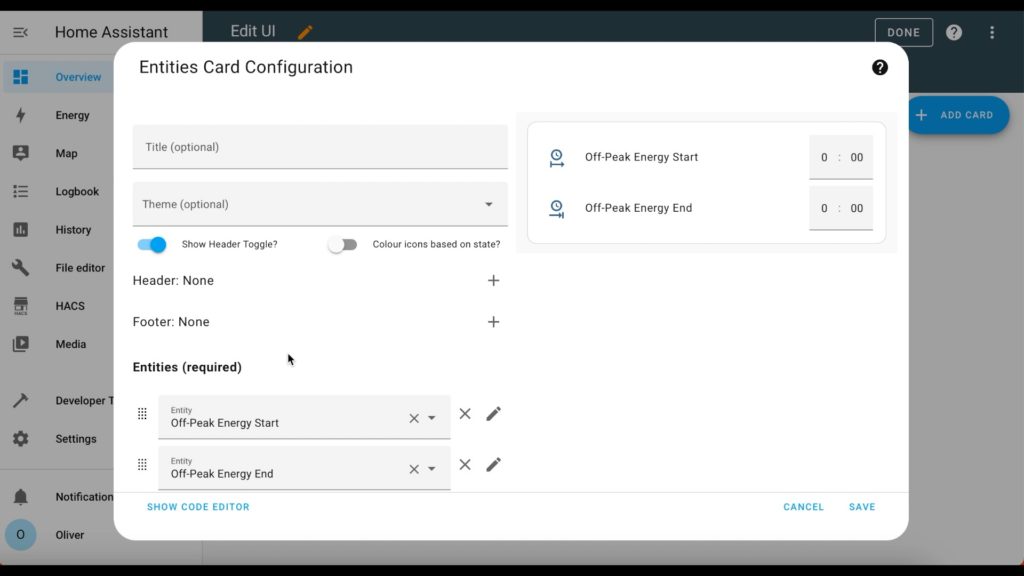
Repeat this process to create a second time-only helper called "Off-Peak Energy End". Edit your dashboard and add the two helpers to it, I suggest in an 'Entities' card, so as you can set the values to match your off-peak energy tariff hours. For example, if you're on Octopus go then you might set the Start time to 00:30 and the End time to 04:30.

Step 2: Utility Meter
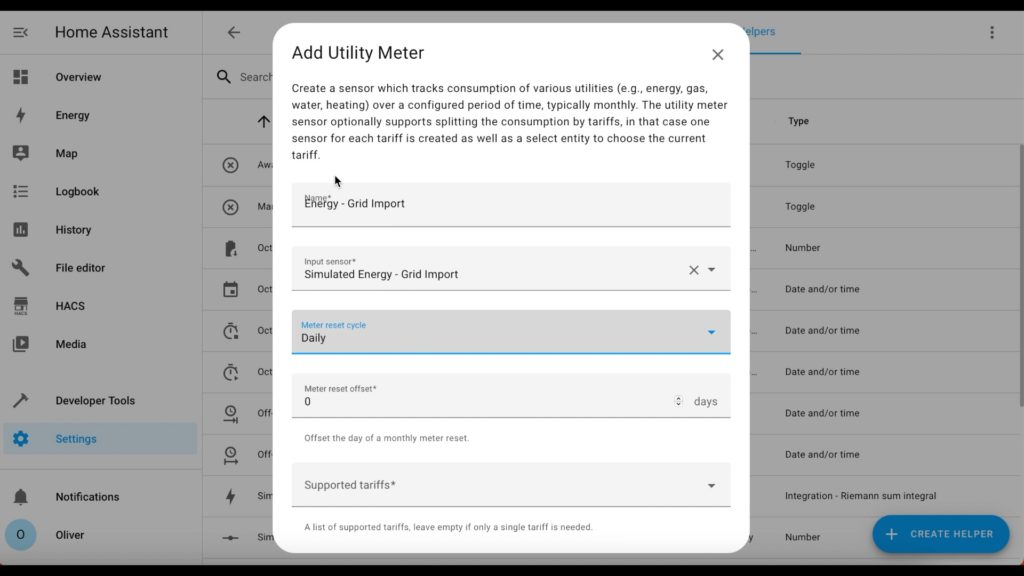
Next we will create a Utility Meter helper which will wrap your energy sensor up into a daily cycled sensor. Navigate to Settings > Devices & Services > Helpers then click on the "Create Helper" button again. Scroll down to the bottom of the list and select "Utility Meter".
Name it "Energy - Grid Import" (note that name again!) and in the sensor field you should select the energy sensor entity that is tracking your grid import energy.
Choose the cycle time period of 'daily', which will cause this sensor to reset to zero at midnight every day and only ever store the total consumed energy for the current day. I promise you, this will be the most useful option 🙂
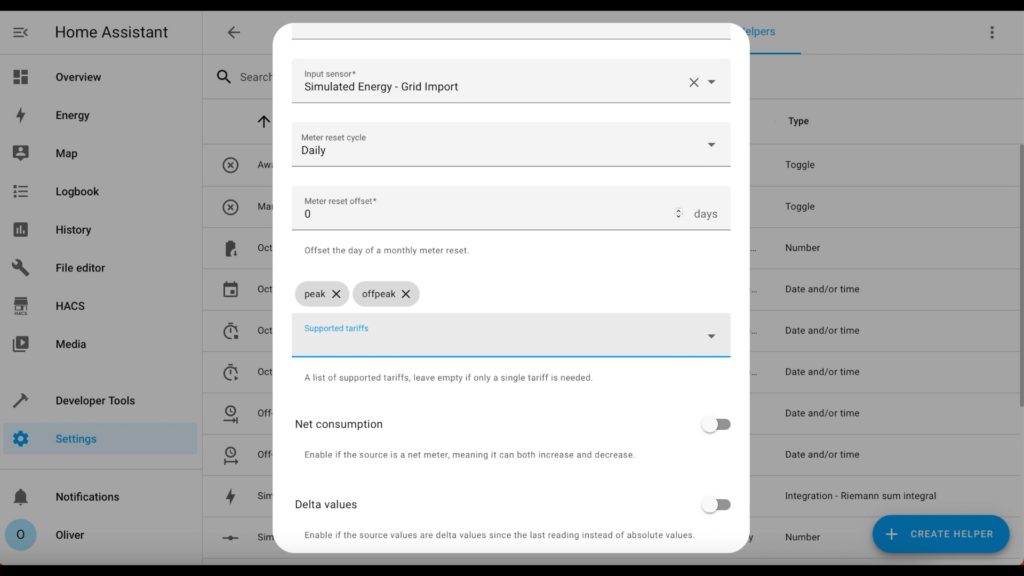
Now take a look at the 'supported tariffs' field and type in, without the quotes "peak" and press enter to submit it, then type in "offpeak" and press enter to add it. Note the spelling of both of those words - they need to match exactly as written here because they'll be referenced later on. Scroll down to the submit button to save.
Step 3: Automation
Now we need an automation that'll switch the utility meter between the peak and off-peak tariffs based on the times set in the time helpers. Navigate to Settings > Automations & Scenes, click on "Create Automation" and choose the option to "Start with an empty automation". Click on the three dots in the top-right hand corner to expand the options menu and choose "Edit YAML".
alias: "Energy: Peak and Offpeak Tariffs"
description: ""
trigger:
  - platform: time
    at: input_datetime.off_peak_energy_end
    variables:
      tariff: peak
  - platform: time
    at: input_datetime.off_peak_energy_start
    variables:
      tariff: offpeak
action:
  - service: select.select_option
    target:
      entity_id: select.energy_grid_import
    data:
      option: "{{ tariff }}"
mode: single

Paste in the above YAML configuration over the top of whatever is shown by default. If you named everything the same as I have in this guide, then you'll be fine, but if you've changed anything then you'll need to check the entities for input_datetime and select.energy_grid_import to make sure they match the ones you have created. Click on Save and accept the default name that it gives you.
Step 4: Energy Dashboard Configuration
Lastly, we’ll add this split-tariff utility meter to the energy dashboard so as all of those pretty graphs start being generated.
Navigate to Settings > Dashboards, then click on 'Energy' in the list. In the 'Electricity grid' section, we need to click on 'Add Consumption'. Select "Energy - Grid Import peak" in the Consumed Energy drop-down. You can also configure your energy tariff rate by selecting the 'Use a static price' and typing in your peak rate. Click on save once you're done, and then repeat the process but adding "Energy - Grid Import offpeak".
You'll now need to wait up to two hours, but eventually you should see your graphs being populated in the Energy Dashboard itself!