Booting Home Assistant from a USB SSD on a Raspberry Pi
If you run Home Assistant on a Raspberry Pi, or plan to run it on a Raspberry Pi, then you need to be aware that if you’re using a regular SD card then it may not be long before that card starts to fail. This is because Home Assistant is almost constantly writing data and will wear out your SD card very quickly. One way around this is to use a more robust solid state drive, like the ones you get inside laptops.
This guide is going to be split into two parts. I’m going to show you firstly how to do this with a Raspberry Pi 4, because that’s quite easy. That process will also work with the Raspberry Pi 3 model B+, but if you have an older Raspberry Pi 3 model B (not a plus) then you’ll need to put in a bit more effort and I’ll show you that afterwards.
Shopping List
In both cases you are going to need to get hold of a suitable SSD drive. You don’t really need much space to run Home Assistant unless you plan to use it for media streaming or something similar, but keep in mind that the Pi isn’t that powerful so you’re best off dedicating it to just running your automations. You can easily get away with 64GB of storage, but I’ve gone for a 120GB SSD as there wasn't much of a price difference.
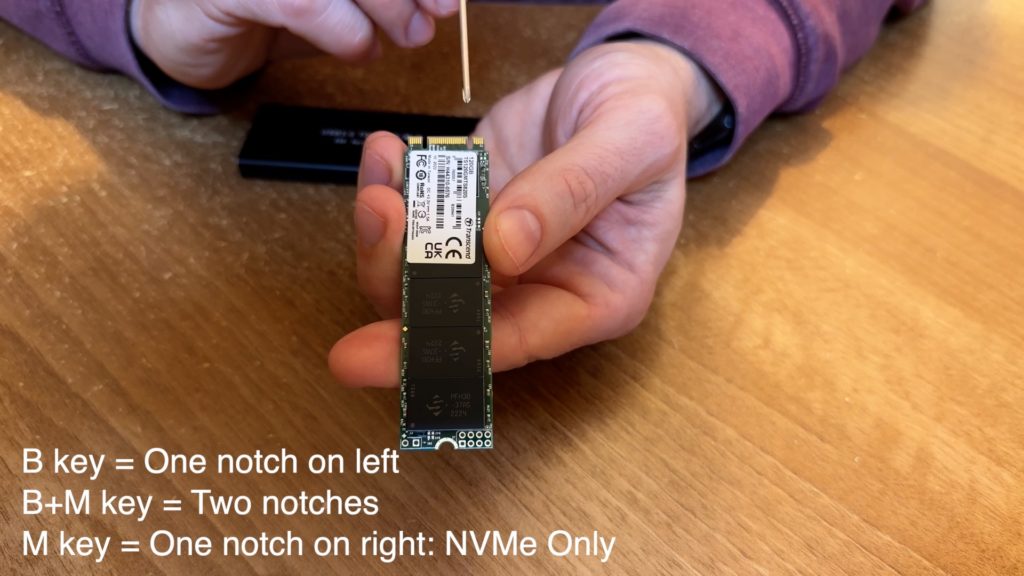
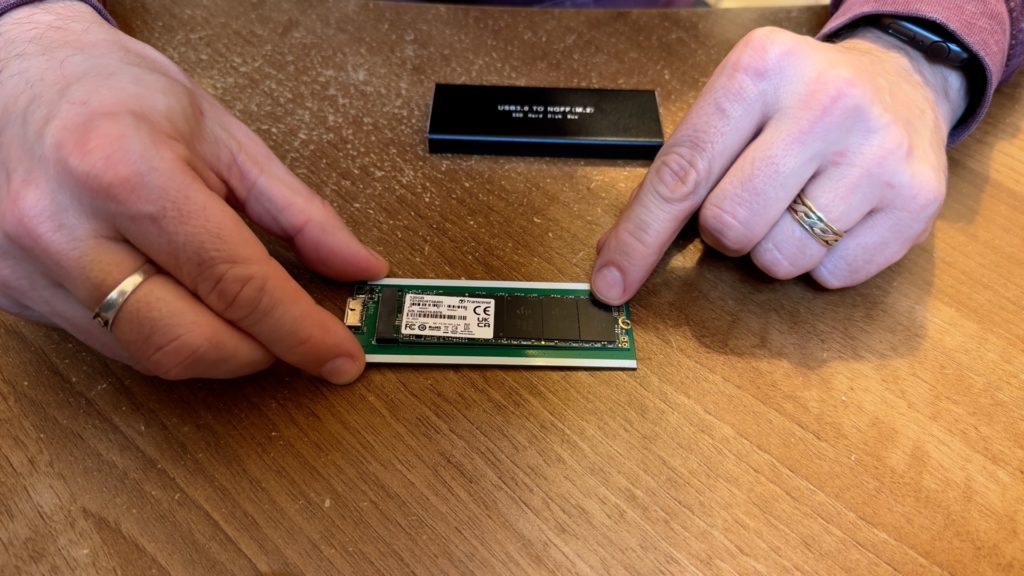
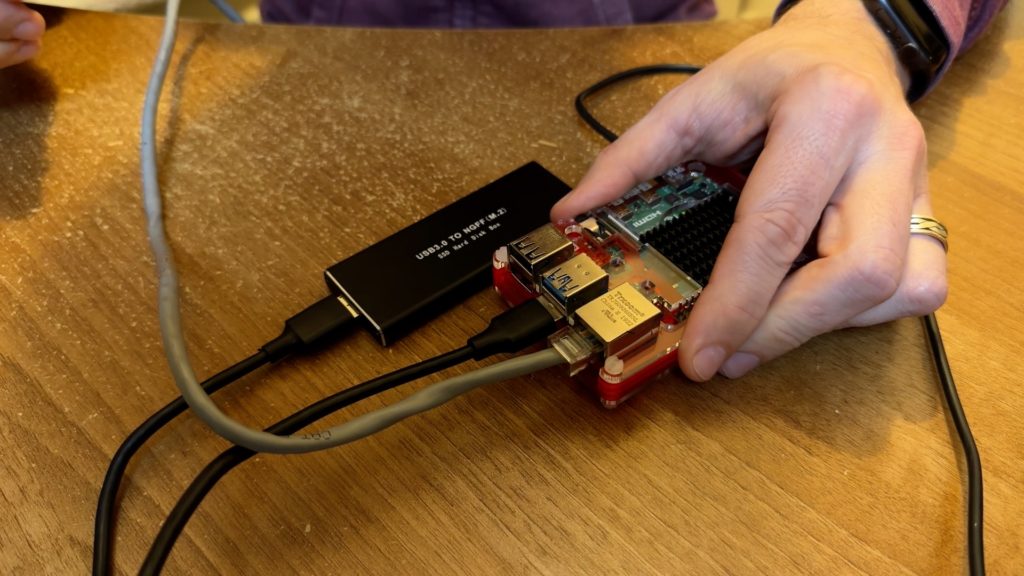
I'm using an M.2 SATA drive, made by Transcend. If you go looking for your own then it’s important to choose the correct type. There are two types of M.2 drives: NVMe and SATA. NVMe are much faster, but also more expensive, and seeing as we are plugging this into a USB 3 port they’re totally pointless in this scenario so save your money and get yourself a SATA one. You’ll also need a USB caddy, and you’ll need one specifically designed for M.2 SATA drives. Click here to view the one I went for on Amazon, but if you decide to look for yourself then you need to make sure that the keying, or notches, of the SSD match with the caddy. If you look at the SSD with the contacts at the top, SSD SATA drives use a B key where the cutout is on the left, or a B&M key, like on the Transcend SSD, with two notches. SATA drives will never have just an M key, which is a single notch on the right. With the caddy I have chosen, the SSD clips into the board from inside the caddy and screws in place, and then slides back into the caddy case itself. A front plate is then screwed in place to hold it all together.
You can choose to use other types of SSD drives if you like, or even old-fashioned hard drives, but I’ve chosen the M.2 drive because of its low power requirements. If you also want to attach other devices (such as radio transceivers) to the USB ports of the Pi then you’ll need to be aware of their power draw, so other types of drives might require a separate external power supply.
There’s one more thing that you’ll need and that’s an ethernet/network cable. This is because the Raspberry Pi will need to connect to your network using a wired cable at least to start with when Home Assistant boots. You can configure WiFi later if that’s what you prefer but to start with you must use a hard wired network cable.
Raspberry Pi 4
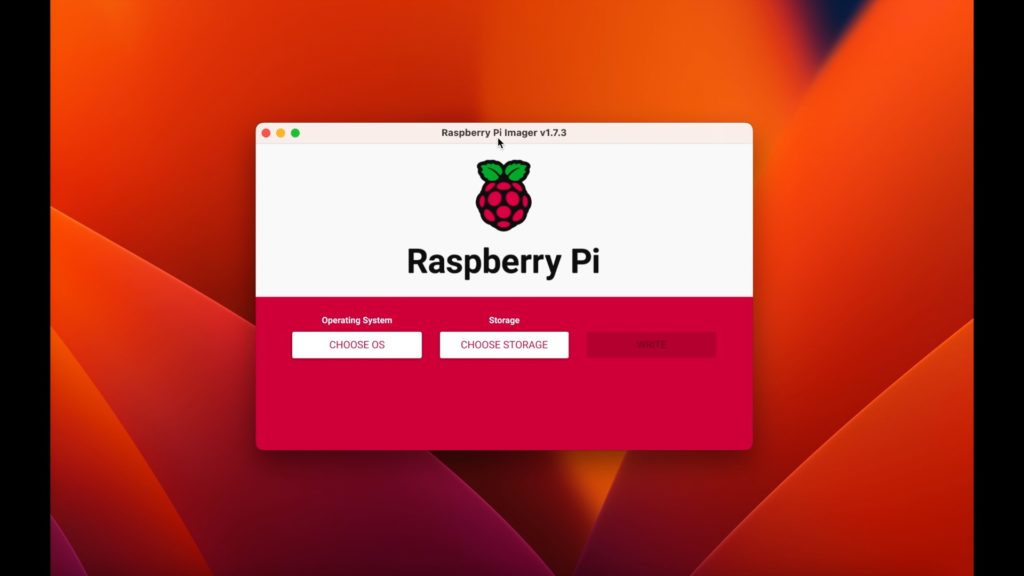
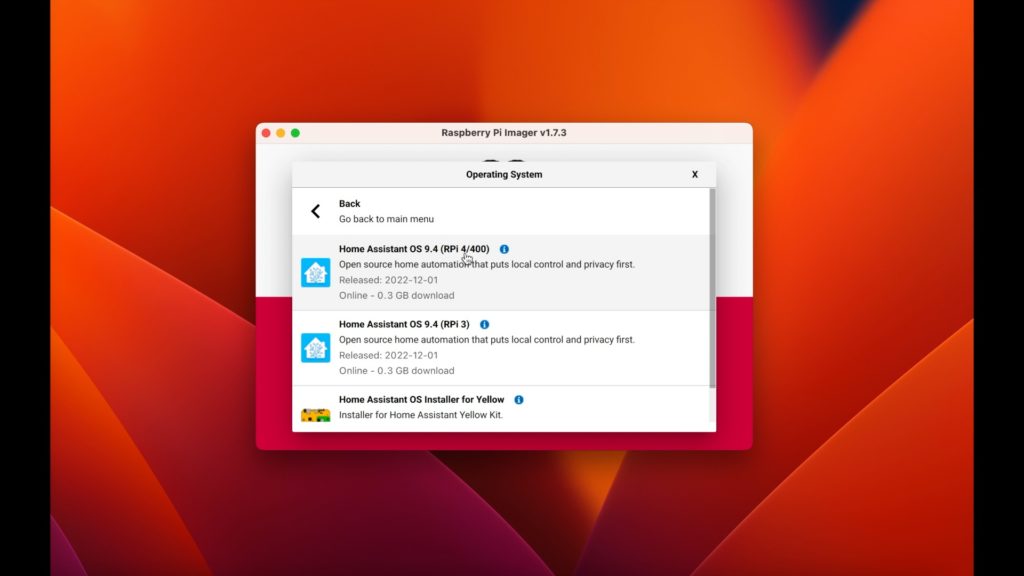
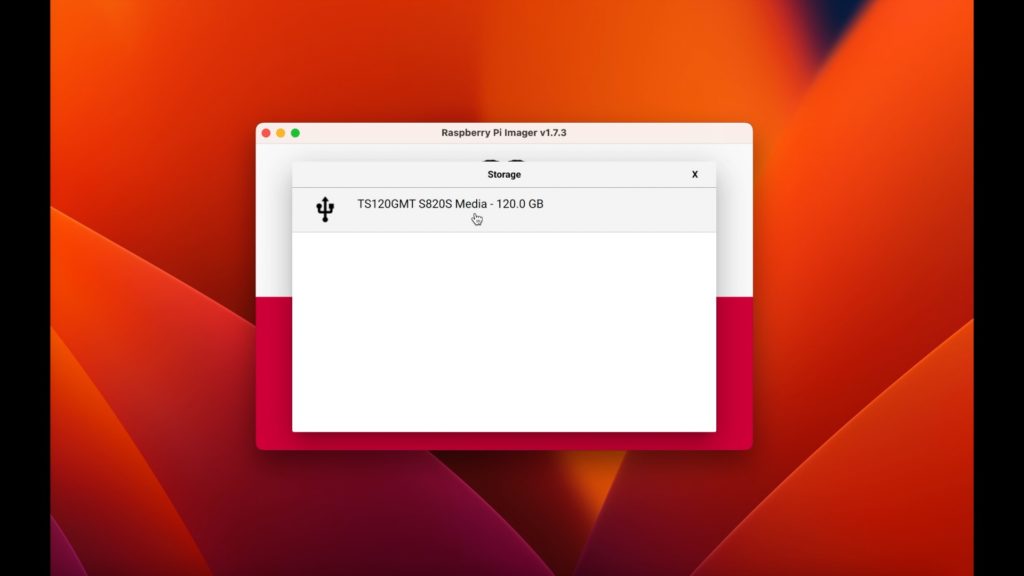
Prepare your SSD: Download the Raspberry Pi Imager from the official Raspberry Pi web site. Install it on your computer (not the Pi!) and run it, the click on the Operating System button and navigate through "Other specific purpose OS" > "Home assistants and home automation" > "Home Assistant" > "Home Assistant OS (RPi 4)"... or (RPi 3 if you have a 3+). Make sure the SSD is plugged into your computer and click on the Choose Storage button, selecting your SSD from the list. Lastly click on the 'Write' button and wait for it to finish.
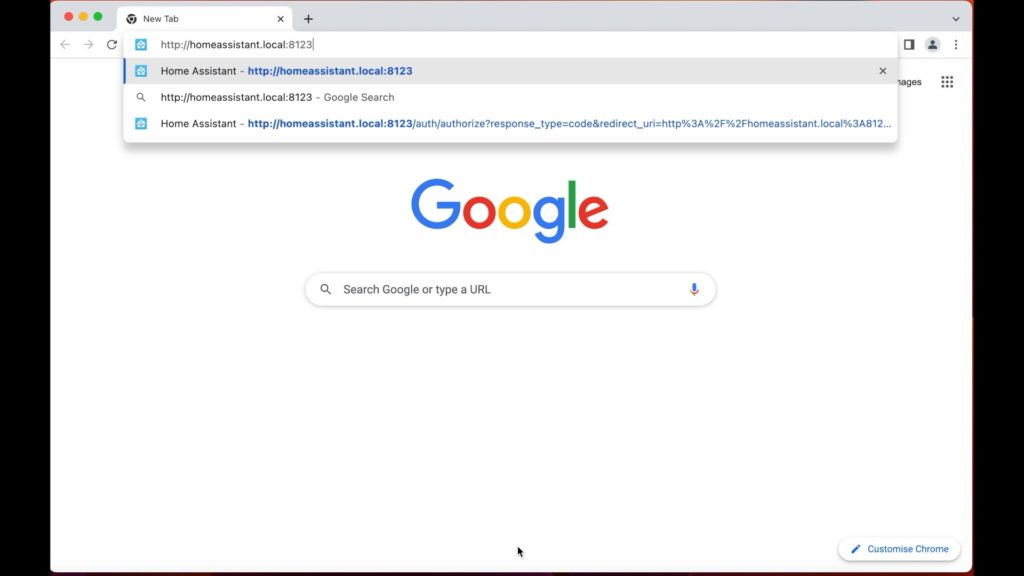
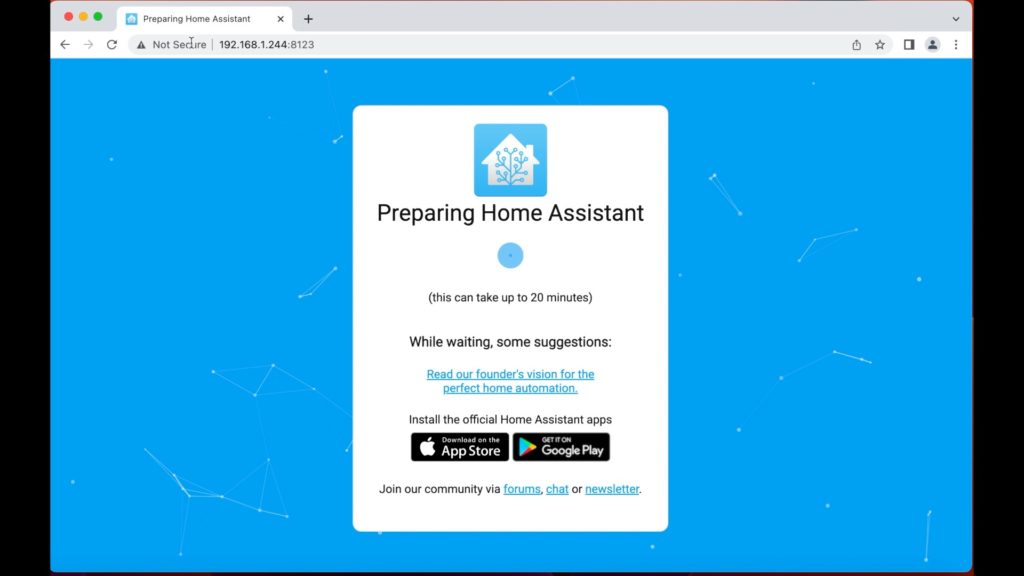
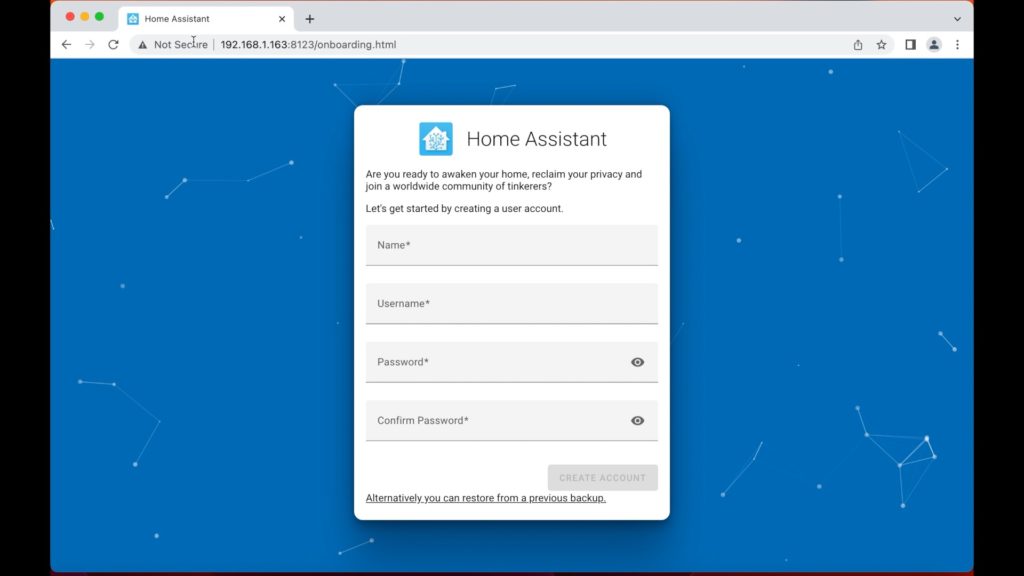
Unplug the SSD from your computer, plug it into your Raspberry Pi, make sure you also plug in your network cable, remove any other SD cards from the Raspberry Pi, then power it on. Give it a couple of minutes to boot up and then open your web browser and navigate to:
http://homeassistant.local:8123
If this is your only installation of Home Assistant on your network, then the above URL should work. Otherwise you may need to go hunting through your router's web interface to find out the IP address that's been assigned to your Pi. If all has gone well, you should see the Home Assistant initial configuration wizard.
Raspberry Pi 3
For the Raspberry Pi 3 there are a few more hoops you need to jump through to be able to boot from an external drive. You still need to image the SSD with Home Assistant, so follow the same steps as for the Raspberry Pi 4 only making sure you use the "Home Assistant OS (RPi 3)" image. Once you have written that image, unplug the SSD and put it to one side.
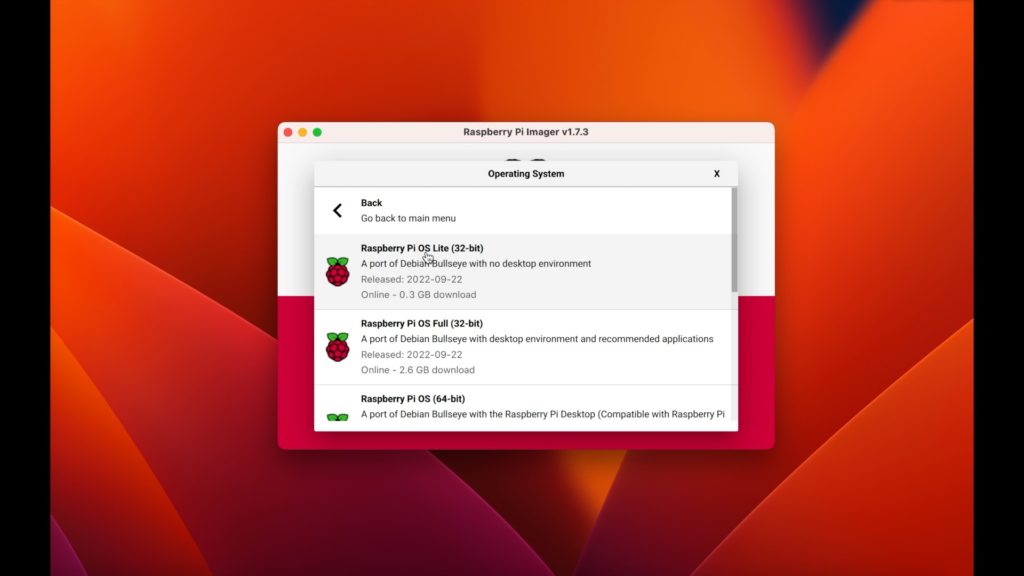
Nest you'll need to use a microSD card, like the standard one you normally boot your Raspberry Pi from. Slot it into a card reader connected to your computer, load the Raspberry Pi Imager software again and locate the "Raspberry Pi OS Lite (32-bit)" option from the "Raspberry Pi OS (Other)" section of the Choose OS button. Under "Choose Storage", select your SD card and then click on the cog icon of the main screen to access some additional settings.
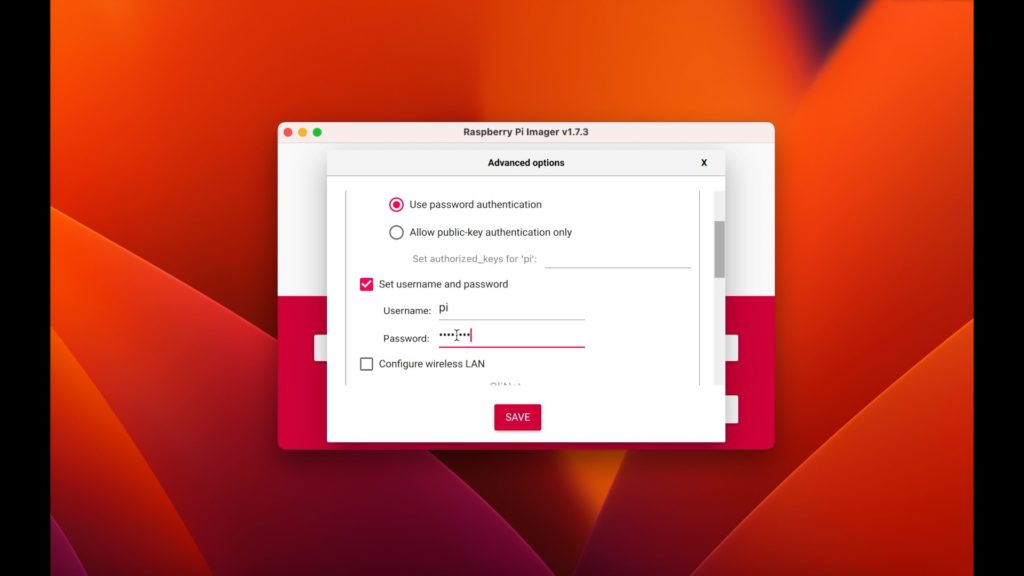
Set the hostname to something memorable. In my walkthrough here I'm going to use the name "testpi3.local". Tick the option to use SSH, making sure that password authentication is enabled, and then set a username and password. The default username is 'pi' so you can leave that as is, just make sure you set a suitable password. It doesn't need to be too secure because this is only a temporary installation. You can also optionally configure your WiFi settings here too, but personally I'd stick with using wired ethernet for now because you'll need to be using wired ethernet once Home Assistant is running anyway. Save those settings and then click on the 'Write' button.

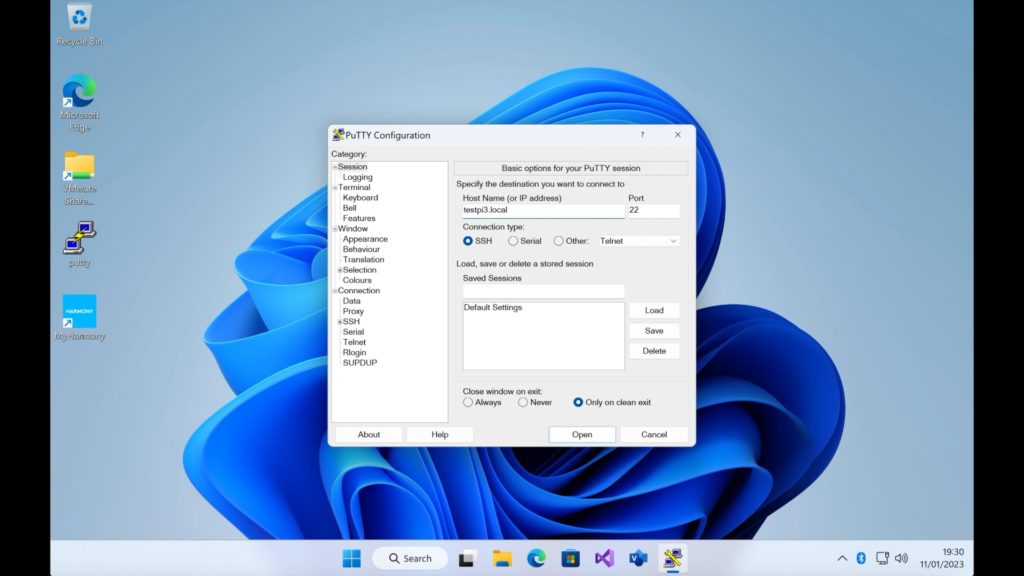
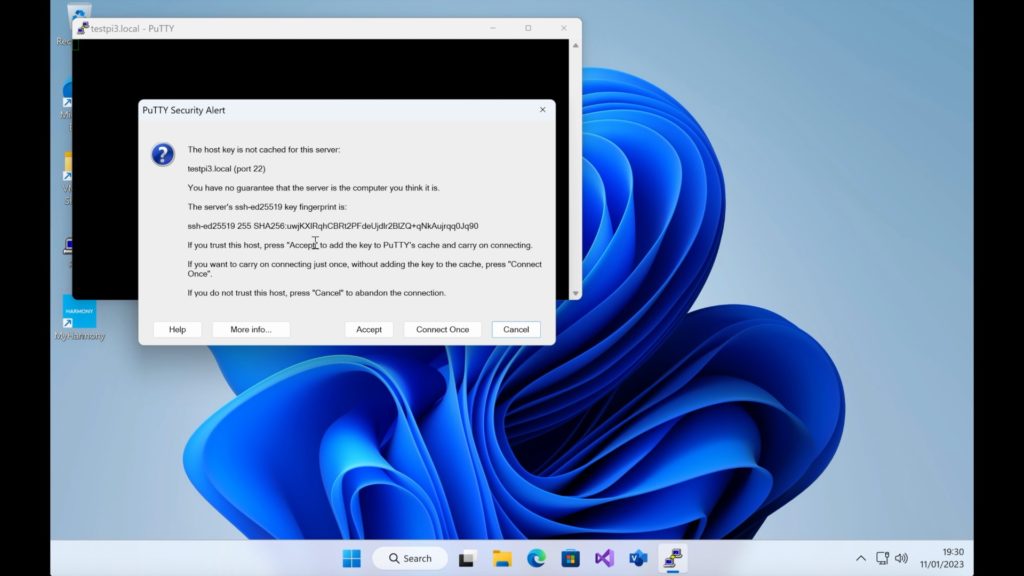
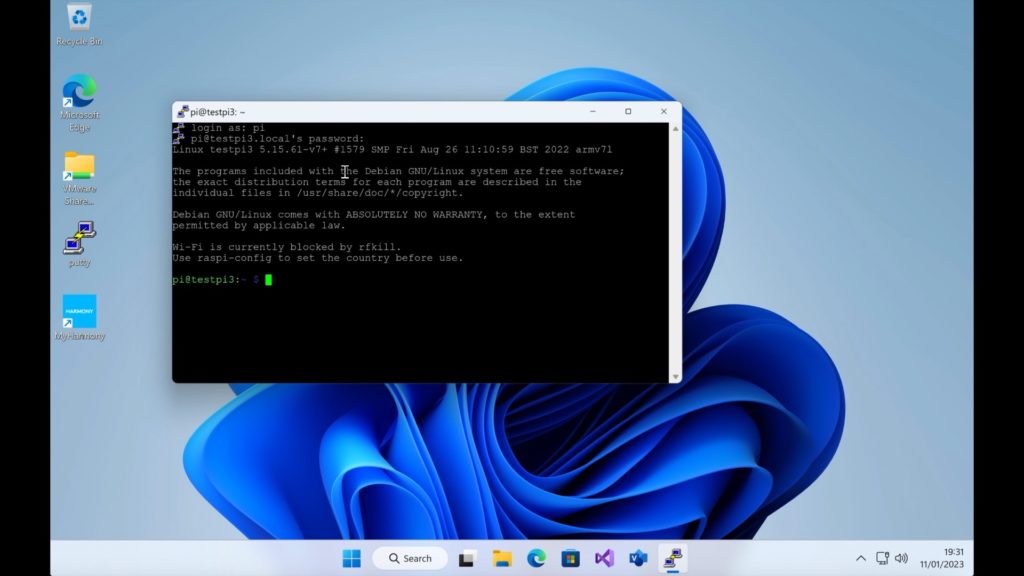
When that's finished imaging, you'll need to eject the SD card from your computer and insert it into the Raspberry Pi 3 instead. Plug in your network cable and power too and boot it up. If you're running Windows, I suggest you download the PuTTY application (to avoid obtaining dodgy software, go straight to the official page: https://www.chiark.greenend.org.uk/~sgtatham/putty/latest.html - I know it looks bare and functional, but I promise that's the original download location!). Run PuTTY and in the Host Name field type in testpi3.local and click on the Open button. The first time you connect you'll be given a warning about an unknown device fingerprint - Accept this to continue. You'll be prompted for a username and password which are the ones you set in the previous paragraph when imaging the SD card.
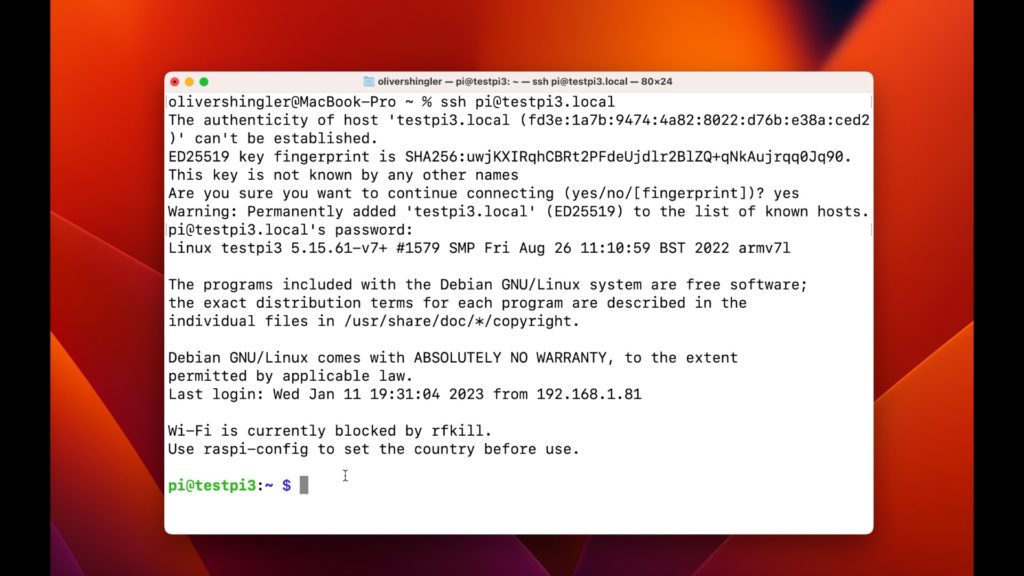
If you are on a Mac, you don't need to download anything additional. Open Launchpad and search for Terminal. Once Terminal is running, type:
ssh pi@testpi3.local
Note that 'pi' in the above command is the username you configured while imaging the SD card, and the default value was pi. Once you press enter after typing in that command, you'll probably get a warning about an unknown device fingerprint - type in yes and press enter to accept this, and then you'll be asked for the password you set too.
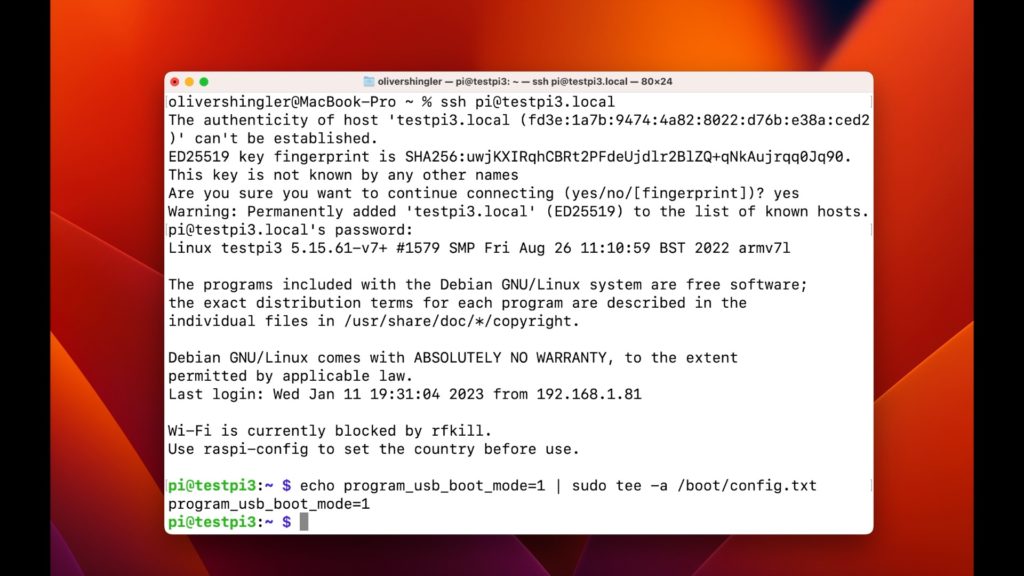
The following steps are the same regardless of whether you are using PuTTY on Windows or Terminal on Mac. Type in the following command which will configure the Raspberry Pi to boot from USB:
echo program_usb_boot_mode=1 | sudo tee -a /boot/firmware/config.txt
You'll then need to reboot the Raspberry Pi:
sudo reboot
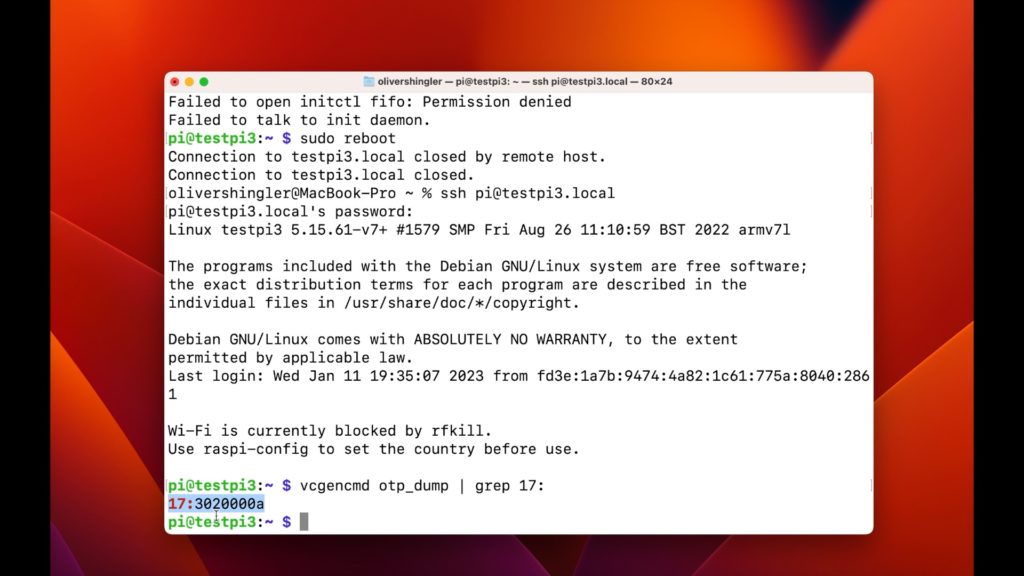
You will lose connection to the Raspberry Pi, so give it a minute or two to reboot and then connect using the command in Terminal, or by opening PuTTY again. Once back in, you must test to make sure that the process worked. Type in the following command:
vcgencmd otp_dump | grep 17:
You are looking for an output which says exactly "17:3020000a". If you see any other sort of output then the configuration change failed. You should repeat the original 'echo program_usb_boot_mode....' command, reboot, and test again. This has never failed for me, but I've heard that it happens often enough for it to be wise to check! If it worked, you can power off the Raspberry Pi, take out the SD card because you no longer need it, plug in the SSD drive to a USB port, make sure that the network cable is connected and power it all back on.
Same as with the Raspberry Pi 4, you should give it a couple of minutes to boot up, open your web browser and navigate to:
http://homeassistant.local:8123
And exactly the same as with the Raspberry Pi 4, that URL only works if this is your only instance of Home Assistant on your network. If not, you'll need to go searching in your router's web interface to find the IP address instead. You’ll probably find the Raspberry Pi 3 a bit slow for Home Assistant, well, I did, but everything should still work ok as long as you don’t push it with too many add-ons.