
Motion-Activated Lights with Lux using Home Assistant

You might have seen Home Assistant’s built-in Motion-Activated Lights blueprint which is great, but I found it a bit lacking in functionality, especially if you only want your lights to automatically turn on and off when it’s dark. I’ve tweaked that blueprint to give it a bit more flexibility.
The built-in Motion-Activated Light blueprint is functional but very basic. You can choose your motion sensor, pick the lights it’ll be targeting, and how long after motion has stopped that the lights will be turned off. It works reliably but does have some shortfalls.
But what if you have multiple motion sensors in a room? You’d need to group them together first as a template binary_sensor before you can use them, and if you only wanted the lights to turn on when it’s dark then you’d again have to create a template motion sensor that only triggers when it’s dark. It’s all a bit complicated so I set about adapting the blueprint to my own requirements. Start by copying and pasting my blueprint yaml code below and save it to a file called motion_light_lux.yaml. Alternatively, you should able to click on the 'Import Blueprint' button if you have My Home Assistant configured.

blueprint:
  name: Motion-activated Light with Lux Sensor
  description: Turn on a light when motion is detected and illuminance is below a given threshold.
  domain: automation
  input:
    motion_entity:
      name: Motion Sensor
      selector:
        entity:
          domain: binary_sensor
          multiple: true
    light_target:
      name: Light
      selector:
        entity:
          domain:
            - light
            - switch
          multiple: true
    override_switch_entity:
      name: Manual Override Switch
      description: The Manual Override switch disables ALL automations when on. This automation will only run if Manual Override is off.
      selector:
        entity:
          domain:
            - input_boolean
            - switch
    illuminance_entity:
      name: Lux Sensor
      selector:
        entity:
          domain: sensor
          device_class: illuminance
    lux_trigger_value:
      name: Required Lux Level
      description: Lux level required by the sensor, below which the automation will run.
      default: 700
      selector:
        number:
          min: 0
          max: 60000
          unit_of_measurement: lx
    no_motion_wait:
      name: Wait time
      description: Time to leave the light on after last motion is detected.
      default: 120
      selector:
        number:
          min: 0
          max: 3600
          unit_of_measurement: seconds

trigger:
  - platform: state
    entity_id: !input motion_entity
    from: 'off'
    to: 'on'
  - platform: state
    entity_id: !input motion_entity
    to: 'off'
    for:
      seconds: !input no_motion_wait
condition:
  - condition: state
    entity_id: !input override_switch_entity
    state: 'off'
  - condition: not
    conditions:
    - condition: state
      entity_id: input_select.home_mode
      state: Away
action:
  - choose:
    - conditions:
      - condition: state
        entity_id: !input motion_entity
        state: 'on'
      - condition: numeric_state
        entity_id: !input illuminance_entity
        below: !input lux_trigger_value
      sequence:
        - service: homeassistant.turn_on
          target:
            entity_id: !input light_target
    - conditions:
      - condition: state
        entity_id: !input motion_entity
        state: 'off'
      sequence:
        - service: homeassistant.turn_off
          target:
            entity_id: !input light_target
Upload the file to your blueprints\automations folder. I suggest using the File Editor add-on as usual, for simplicity. Just navigate to the blueprints folder in your config folder, and the automations folder in there. Click on the upload file icon, choose your file and click on Ok. Finally you need to reload your automations by clicking on Developer Tools and choosing the ‘Automations’ link under YAML Configuration Reloading.
Now these automations need a lux reading or illuminance level, and to get a lux reading you need a lux sensor! There are a number of options out there but I have a couple of suggestions that I use regularly.
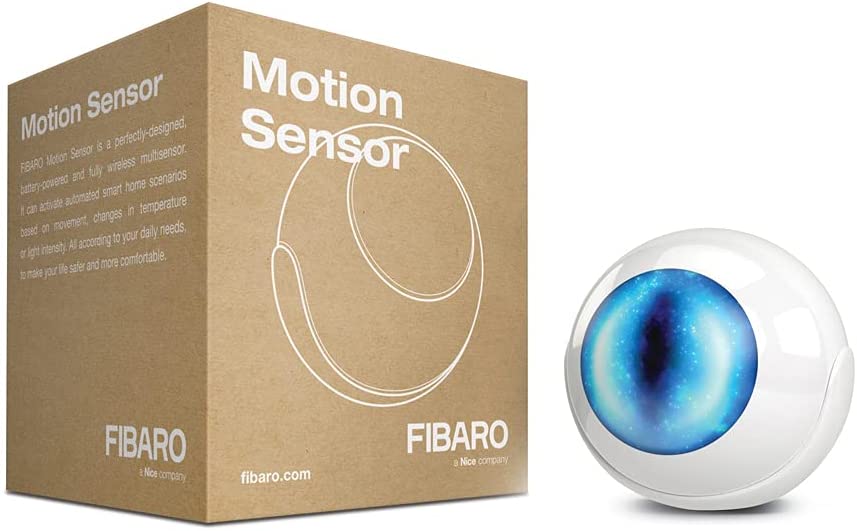
The first one is this Fibaro FGMS-001 eyeball-style multi-sensor. This is the Z-wave version but they also sell a Homekit version too. It is a motion sensor, temperature sensor, lux sensor, and even has accelerometers inside which can detect earthquakes! It’s pretty cool but also pretty expensive. If you’re going to make use of all of those sensors then it’s a good one to go for to save you having lots of devices stuck around your house.
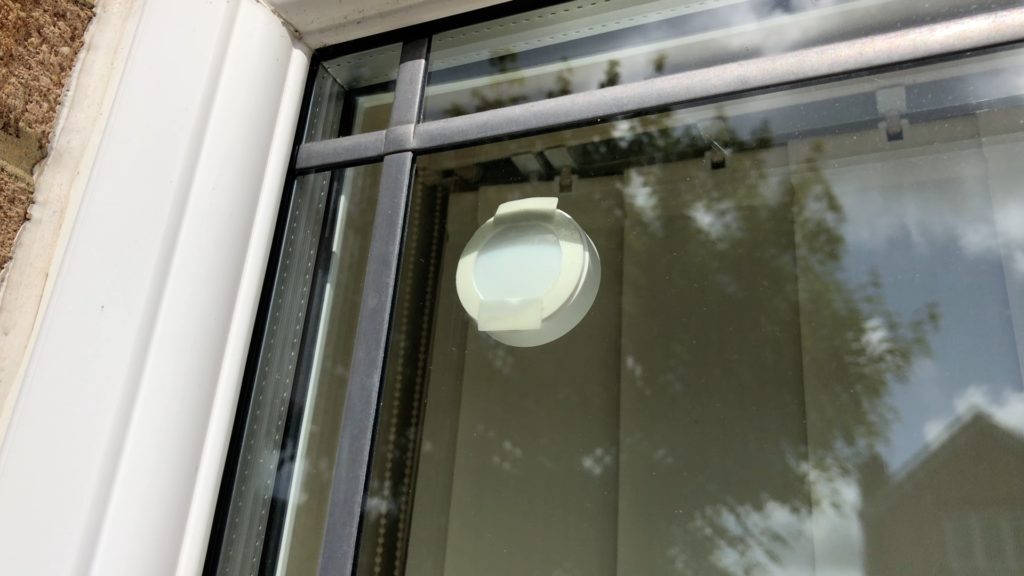
The second one I use is this little Xiaomi Mi Zigbee light sensor. It’s permanently stuck to the inside of a south-facing window in my house as you can see here and has been running off the same CR2032 battery that it came with for about 2 years now. These things are brilliant and only cost about a tenner, I don’t know how accurate they are but that doesn’t actually matter, they just need to be consistent so a lux value of 1000 on one day is the same brightness as 1000 lux the next day. Anyway once you’ve got your lux sensor working with Home Assistant you’re ready to create your automation.
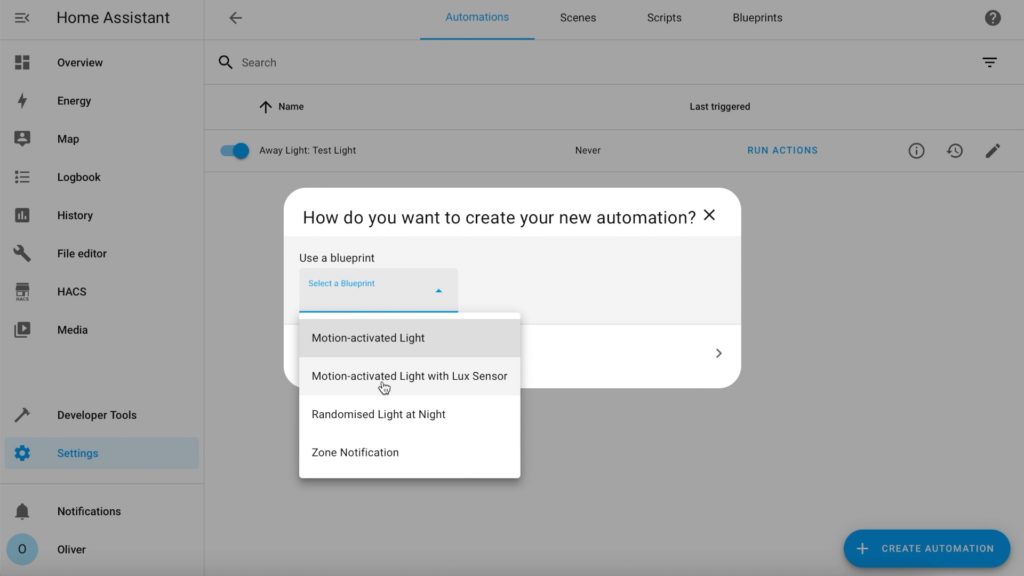
Click on Settings, Automations & Scenes, and the blue Create Automation button in the bottom-right.
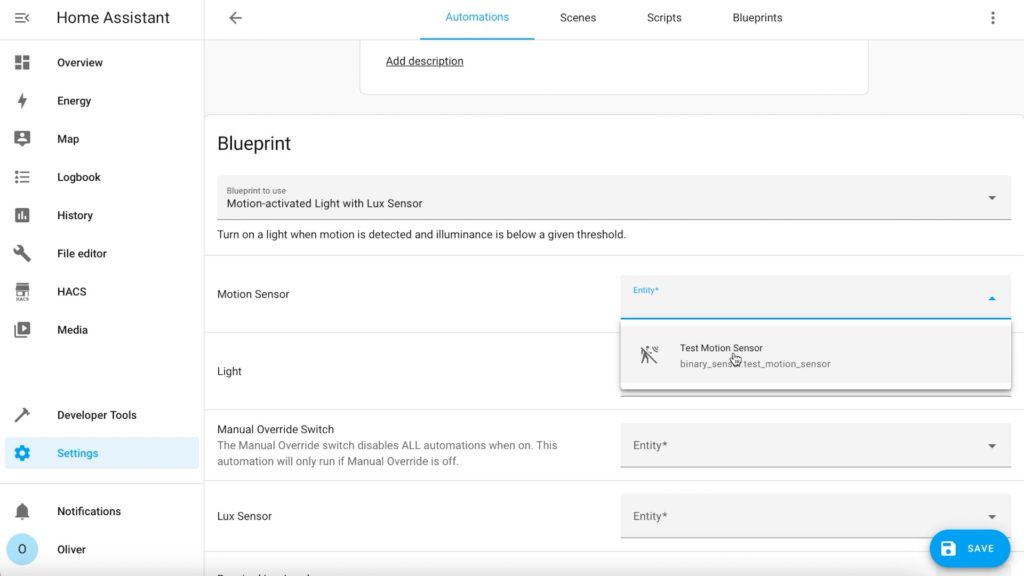
In the User a blueprint drop-down box you should see the new “Motion-activated Light with Lux Sensor” option. Give it a name, and then it’s time to choose your motion sensor.
You’ll notice that when you select your motion sensor from the entity list, another empty box appears - you can add multiple motion sensors to this blueprint.
Then choose your light, again, you can choose multiple lights.
Now you need to choose your Manual Override switch - I’ve mentioned this before, this is a kill switch which disables all of your automations if you enable it. It’s good practise to do this so if you haven’t done so already, go and create yourself a Toggle Helper for this.
Then you choose your lux sensor, and select the light level required for the automation to run. It’s important to remember that the automation will only run when the light level drops *below* this value, so if you want to test it during the day, set this quite high, but you’ll need to look at historical data from your sensor to know the best value to set this for in your specific situation.
Lastly there’s the wait time, this is the delay, in seconds, for the lights to stay on after the motion sensors have stopped detecting motion. In high traffic areas this can probably be set quite low, but if you’re using this in places like a kitchen or dining room where people could be sitting still for long periods of time, you’ll want to set this to quite a long time period.
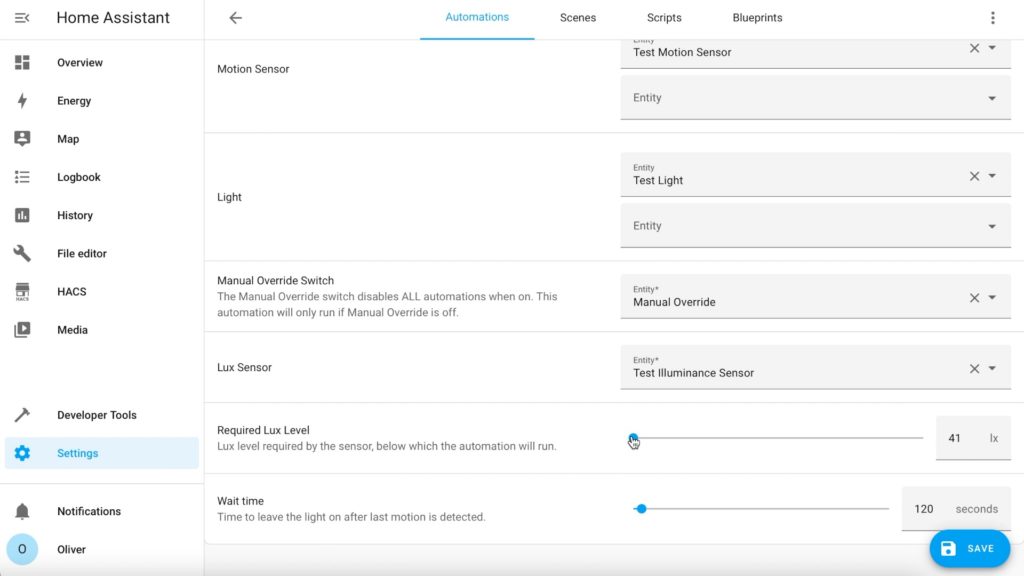
Click on Save, and then click on Automations again at the top and you should see your new automation appear in the list.
As I said, getting that lux level right for you is a tricky process - my Xiaomi sensor, the one pointing outside, is actually used by most of my automations so as they know if it’s dark or not. It’ll even kick in during the daytime if the weather is particular bad and it gets dark because of the clouds which is pretty handy.