
ESPHome WiFi Water Pistol

At the time of putting together this article, the UK is going through a heatwave. That got me thinking, what’s the geekiest way I could possibly keep cool in this weather? I thought it would be really good if I could somehow rig up a water pistol to spray on-demand. I’ve seen a number of other solutions online which tend to be based on finding a special electronic spray head and hacking into that.
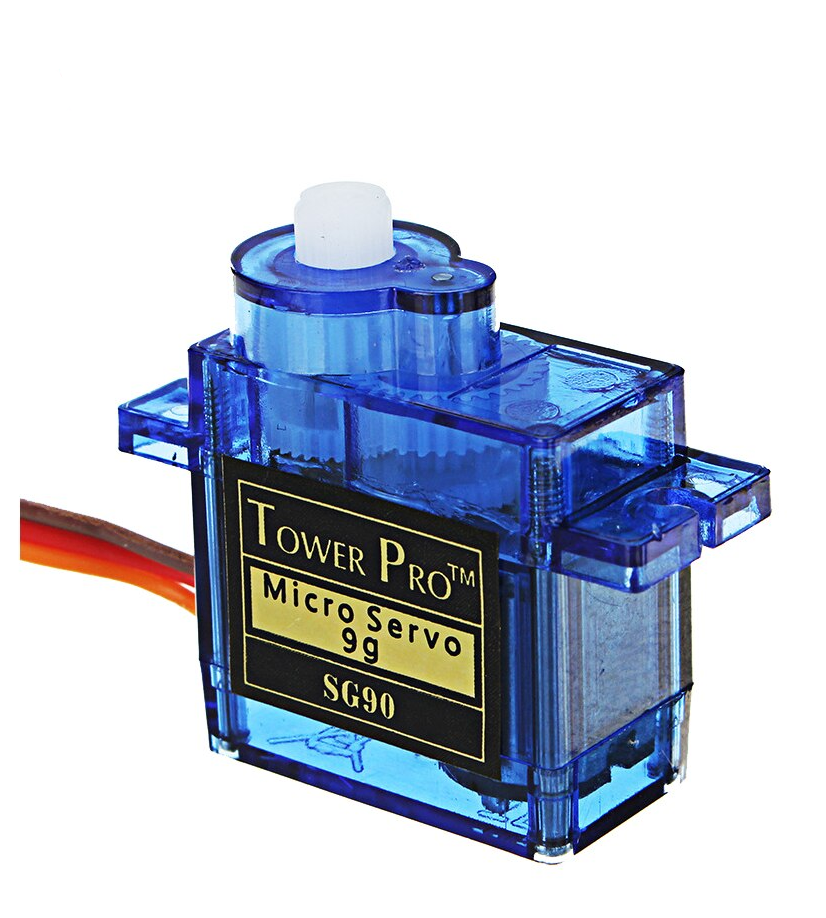
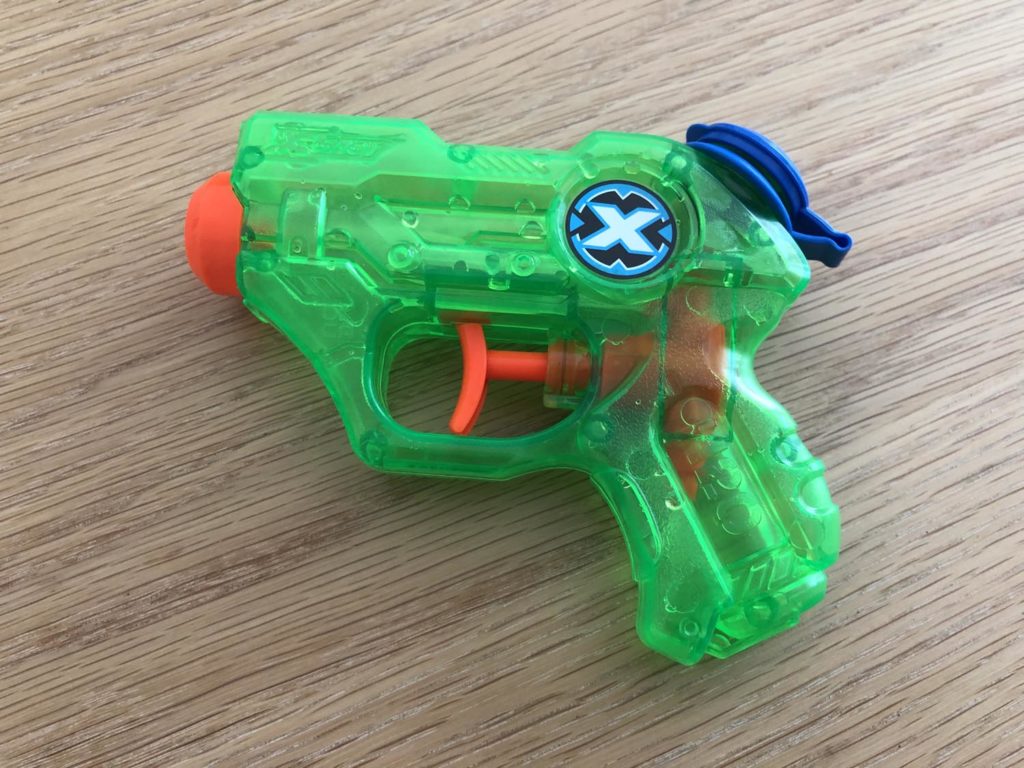
My solution however uses an off-the-shelf-in-Asda miniature water gun. It cost me £2! I then needed some way to pull the trigger and after a bit of research I found the SG-90 5v servo for £3.15 on eBay.
I’ve never used servos before so this is all new and exciting territory for me, and when it arrived I proceeded to hook it up to ESPHome using a faithful D1 Mini and the sample code from ESPHome’s web site. With that wired up and ready to go I had a quick test before moving on to the next stage.
I then needed to construct some sort of housing for all of these components, and the best prototyping material available is of course Lego! The servo on its own isn’t strong enough to directly pull or push the trigger so I needed to rig up a lever system, and I built the whole mechanism for this out of Lego.
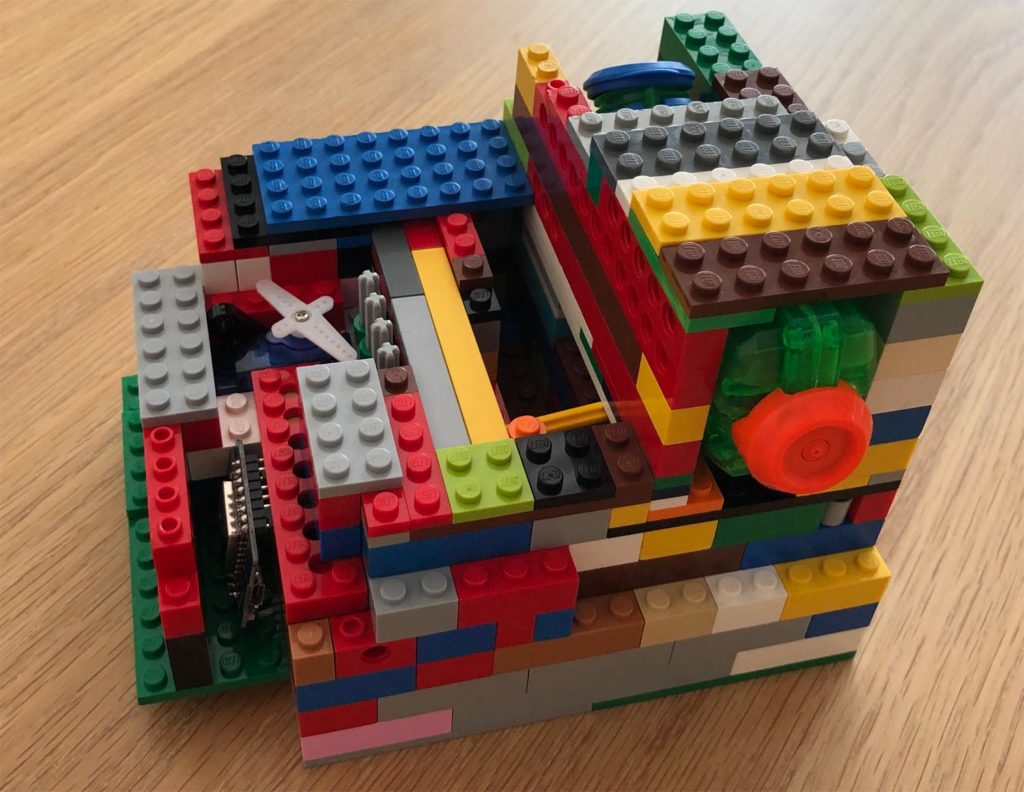

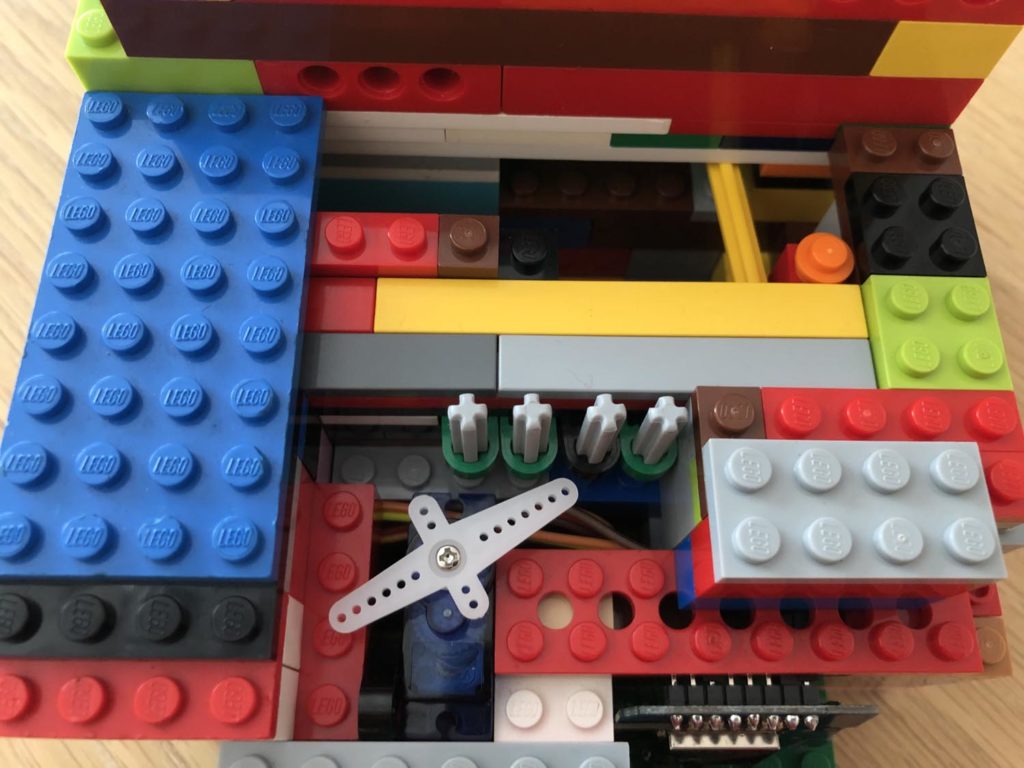
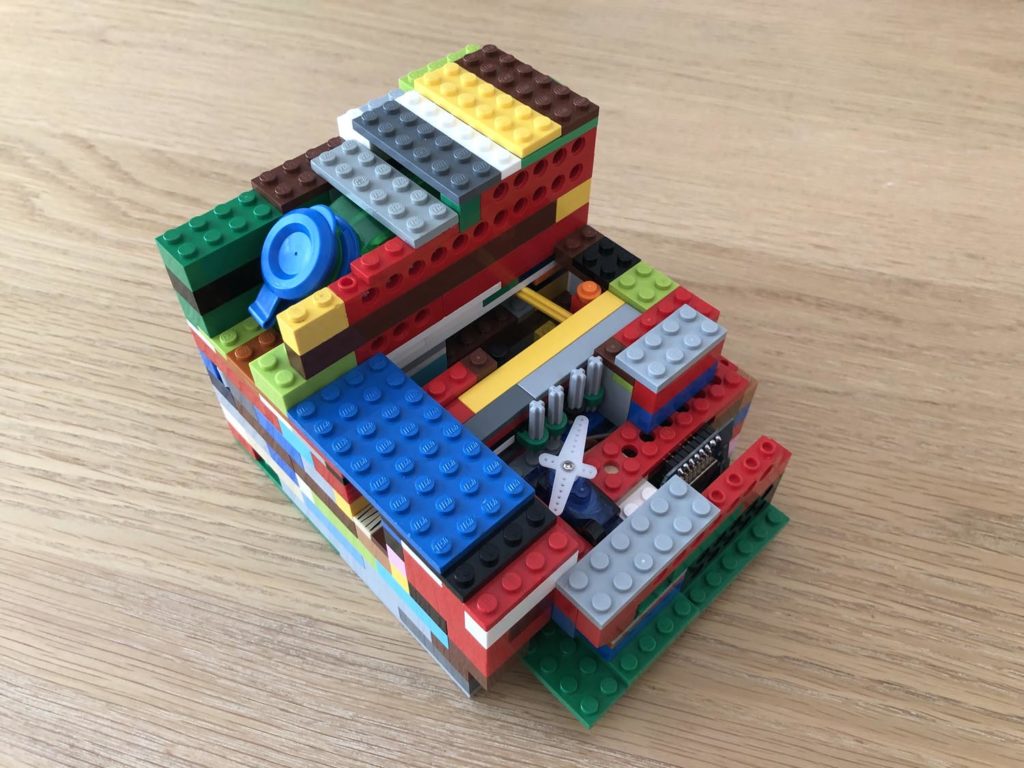
I started by creating a housing for the pistol itself, a structure that would hold it tight in place so as when the trigger is activated it won’t slide about at all. Hidden inside that section is a fulcrum for a lever which needs to be embedded within a strong group of blocks. The lever runs from the fulcrum and across the trigger, so when the rod is pulled backwards, it presses on the trigger.
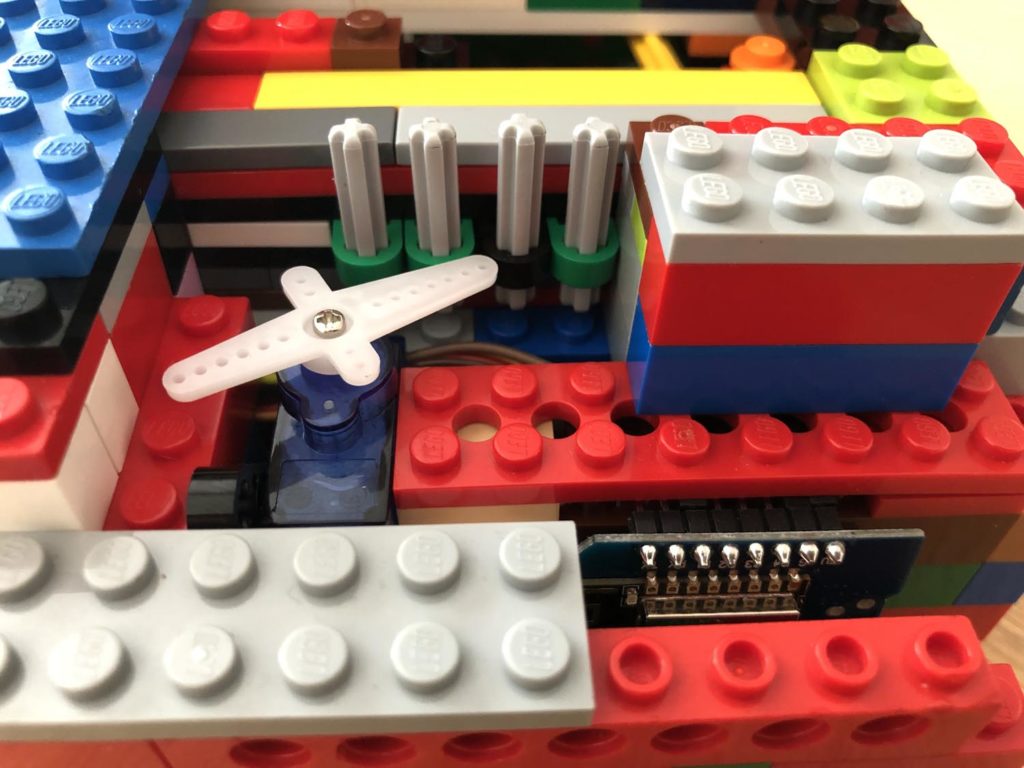
To pull that rod backwards, I needed to turn the rotary action of the servo into a linear action. A sliding piece of lego which can move back and forth - the end of the lever fits inside one end of the sliding block.
The servo has been wedged in alongside the sliding block, and the servo's head piece pushes against some lego rods fixed to the side of the sliding block allowing it to pull the block backwards.
The servo is wired up to the D1 Mini which I've hidden next to the servo, and is wired up like this:

And then there's the ESPHome configuration:
substitutions:
  device_name: water-pistol
  friendly_name: "Water Pistol"
  device_description: "Makes you less hot"

esphome:
  name: '${device_name}'
  comment: '${device_description}'
  platform: ESP8266
  board: d1_mini

# Enable logging
logger:

# Enable Home Assistant API
api:

wifi:
  ssid: !secret wifi_ssid
  password: !secret wifi_password

  # Enable fallback hotspot (captive portal) in case wifi connection fails
  ap:
    ssid: '${device_name}'
    password: !secret fallback_password

captive_portal:

ota:
  - platform: esphome

safe_mode:
  disabled: false
  reboot_timeout: 10min
  num_attempts: 5

output:
  - platform: esp8266_pwm
    id: pwm_output
    pin: D1
    frequency: 50 Hz

servo:
  - id: pistol_servo
    output: pwm_output
    restore: true

number:
  - platform: template
    name: Pistol Servo Control
    min_value: -100
    max_value: 100
    step: 1
    set_action:
      then:
        - servo.write:
            id: pistol_servo
            level: !lambda 'return x / 100.0;'

button:
  - platform: template
    name: Water Pistol - Fire
    id: water_pistol_fire
    icon: "mdi:liquid-spot"
    on_press:
      then:
        - script.execute: fire_pistol_once

  - platform: template
    name: Water Pistol - Rapid Fire
    id: water_pistol_rapid_fire
    icon: "mdi:liquid-spot"
    on_press:
      then:
        - script.execute: fire_pistol_once
        - delay: !lambda "return 300;"
        - script.execute: fire_pistol_once
        - delay: !lambda "return 300;"
        - script.execute: fire_pistol_once
        - delay: !lambda "return 300;"
        - script.execute: fire_pistol_once
        - delay: !lambda "return 300;"
        - script.execute: fire_pistol_once


script:
  - id: fire_pistol_once
    then:
      - servo.write:
          id: pistol_servo
          level: 87.0%
      - delay: !lambda "return 200;"
      - servo.write:
          id: pistol_servo
          level: 0%
To interface with the servo, you must first define an output which specifies which pin you'll be using, and that you'll be using pulse width modulation (pwm). In this case, I suggestion use pin D1, but it's your choice. Then you must create a servo object which uses that previously defined output.
The 'number' entity defined in this configuration is just for testing - you can leave this out unless you want to just test the servo manually.
I've defined two button entities: one called 'water_pistol_fire' which calls a script named 'fire_pistol_once'; and a second button called 'water_pistol_rapid_fire' which calls the same script five times but with a 300ms delay between each call.
The script itself, 'fire_pistol_once', sets the servo position to 87%, pauses for 200ms, and then sets the servo position back to 0%. You may need to experiment with those position values for your own scenario.