SolarEdge HD-Wave SE3680H and Home Assistant local integration

When I had solar PV installed on our home last December, the single most important thing at the top of my to-do list was to make sure I could monitor it using Home Assistant. Firstly I wanted all of the generated energy to be tracked in Home Assistant’s energy dashboard. At a glance I can see exactly how my solar generation is making a difference to my energy bill.
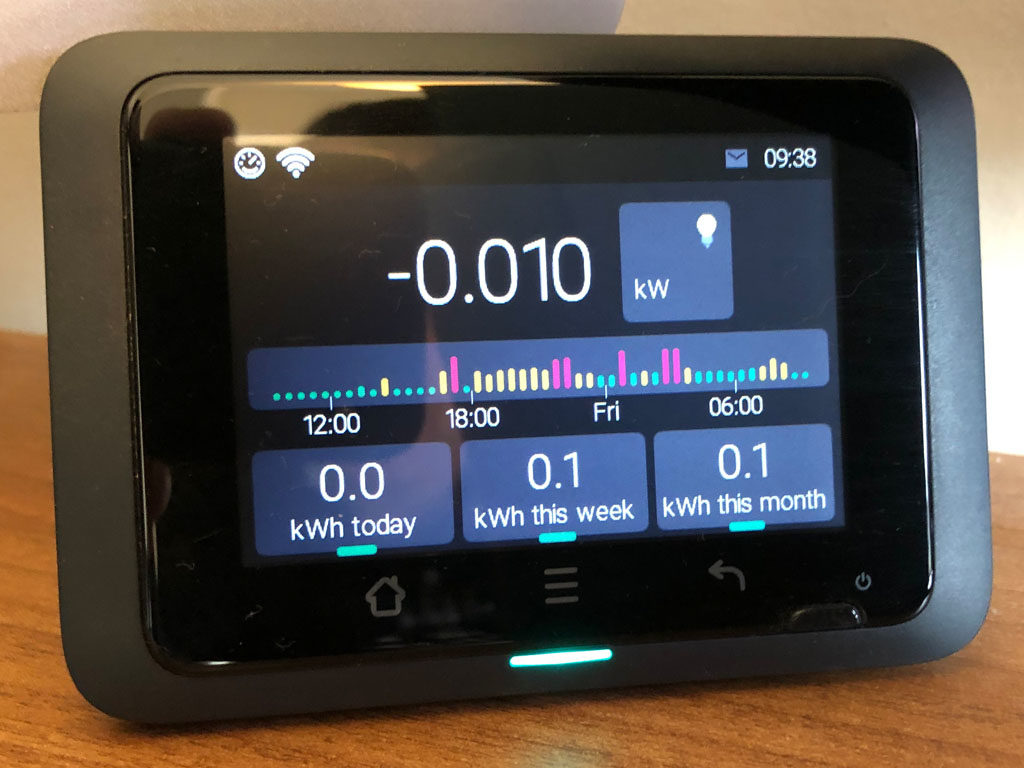
I’m already using the Hildebrand Glow IHD to monitor my import and export energy and power with the grid, and I’ll cover that gadget and how it integrates into Home Assistant in a future video/article.
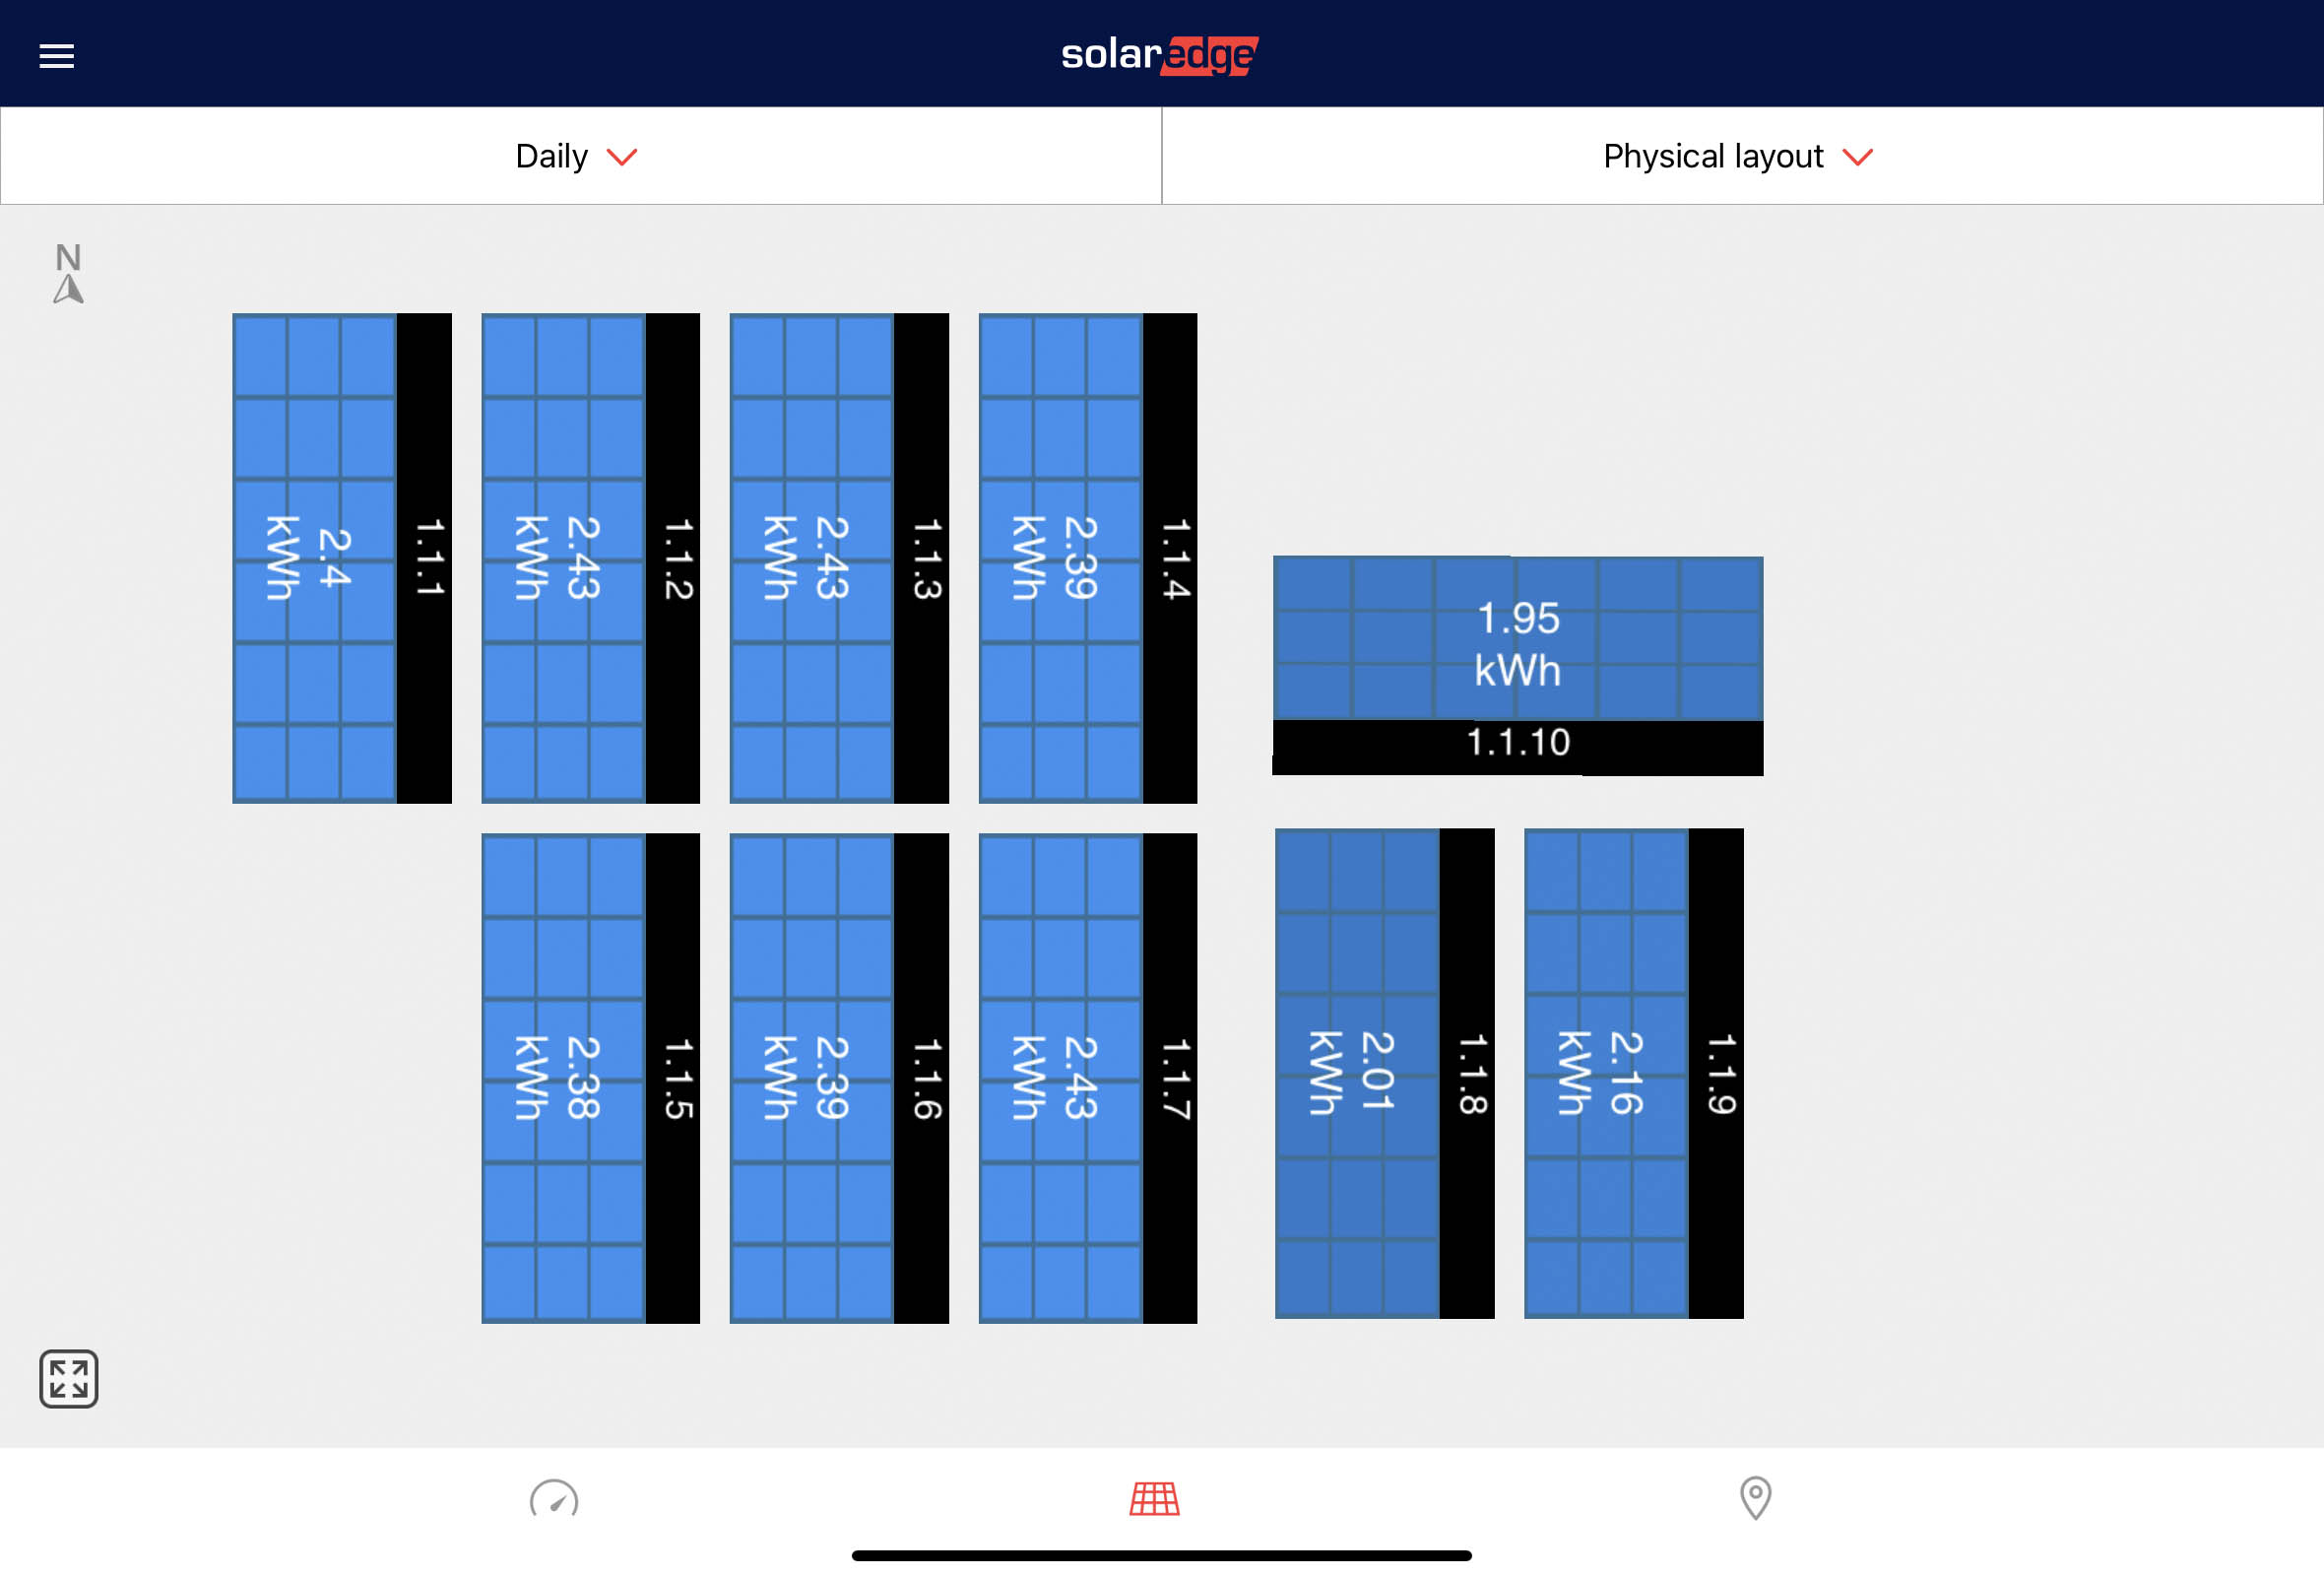
My solar installer selected the SolarEdge SE3680H inverter. This particular inverter is basically the largest you are allowed in the UK without having to apply to permission from your power distributor - you only need to inform them and therefore the process involves a lot less paperwork. Conveniently though, I don’t have enough space on my roof for that many solar panels so I couldn’t make use of a bigger inverter anyway. Each of my solar panels has a power optimiser attached to it. These little boxes ensure that any panels currently in the shade don’t create an impact upon the generation of the other panels. This system achieves a similar result to one that uses micro-inverters. I guess there’s an argument as to whether optimisers or micro inverters are better as both methods have their own pros and cons. With the SolarEdge and optimiser combination, you do still have the ability to monitor your system at a panel-level via the mySolarEdge app. If your installer has done their job properly, then you’ll find a physical layout of your panels within the app, see their individual generation at a glance, and be able to select them for more information. It’s useful to see this level of information for troubleshooting purposes so as you can see whether a panel is faulty or not. If you don’t have a physical view in the app, contact SolarEdge support. I found that they replied very quickly and were extremely helpful.
The one issue I have with SolarEdge here though is that this panel-level data is *only* available via their app. They have a web API for the inverter data but for some reason have chosen not to include panel-level data in that API, and it’s not available locally directly from the inverter either.
All of the SolarEdge HD-Wave inverters will work in a similar way regardless of which size model you have, and connecting them to Home Assistant is super easy. You can use the built-in SolarEdge integration if you like, but that is cloud-only and you are limited to an update once every 15 minutes. That’s not very useful if your automations are relying on live power readings. I prefer to directly connect the inverter to Home Assistant over my local network. I have my inverter connected to the network using a hard-wired ethernet cable. You can of course use wi-fi too if you wish, but ethernet will be more reliable and cause less congestion on your network which is something you should be aware of before continuing. The first thing you need to do is enable a feature on your inverter called MODBUS over TCP. You can ask your installer to enable this feature during commissioning, or you can do it yourself.
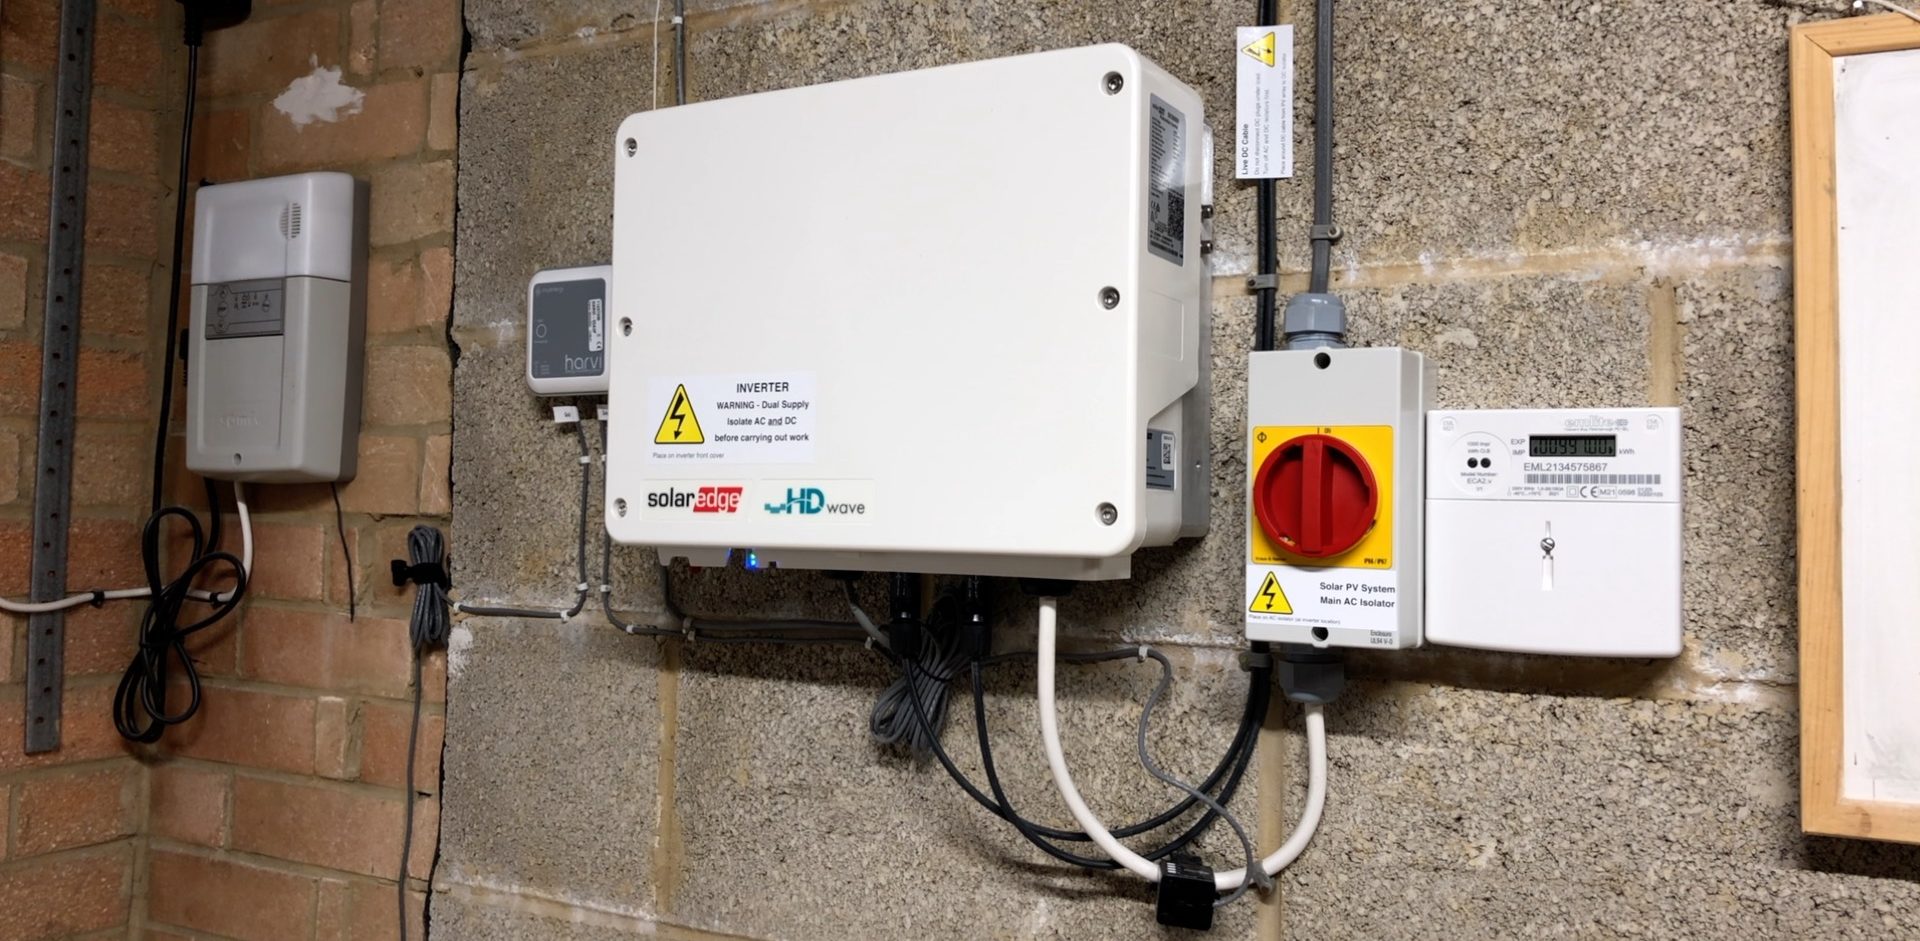
Underneath the inverter is a toggle switch. Move the switch to the position marked ‘P’, which should be to the left, and hold it there for about 3 seconds, then release. This puts your inverter into a wireless hotspot mode that you can connect to using your phone, laptop or tablet. Using your chosen device, look for a WiFi network starting with the letters SEDG and followed by a series of characters that are actually the serial number of your inverter. You’ll need a password for the Wifi network, and you’ll find this on a label usually on the right-hand side of the inverter handily titled “Wi-Fi Password”!.
Give it a good minute to connect, and then open your web browser and go to the URL http://172.16.0.1. It might take a few seconds to load the first time, but you should end up in the commissioning interface. When you’ve finished exploring (and I know you will!), go to the Site Communication section, MODBUS TCP, then enable MODBUS TCP.
Now you need to find the IP address that your inverter is using on your network. The easiest way is to use the commissioning interface while you’re in there already: go to Site Communication > Ethernet or WiFi depending on how your inverter is connected to your network, and your IP address should be displayed on that page for you. Make a note of this. You could also check your router to get the IP address, but that’s difficult to walk you through because every type of home router is different.
Back over in Home Assistant, you are going to be using HACS and I’m going to assume that you know what it is and how to use it! Under HACS Integrations, explore the repositories and search for SolarEdge Modbus. There will be a couple of results, but choose the one worded exactly like this. Once installed, reboot Home Assistant, and then head back to Configuration and add this component as an integration.
When adding the integration, you'll be asked for some parameters: the IP address will be the one you made a note of earlier; the port can be left as default (unless you changed it in the commissioning interface); and for polling, I set this to 10 seconds, which is responsive enough for my needs.
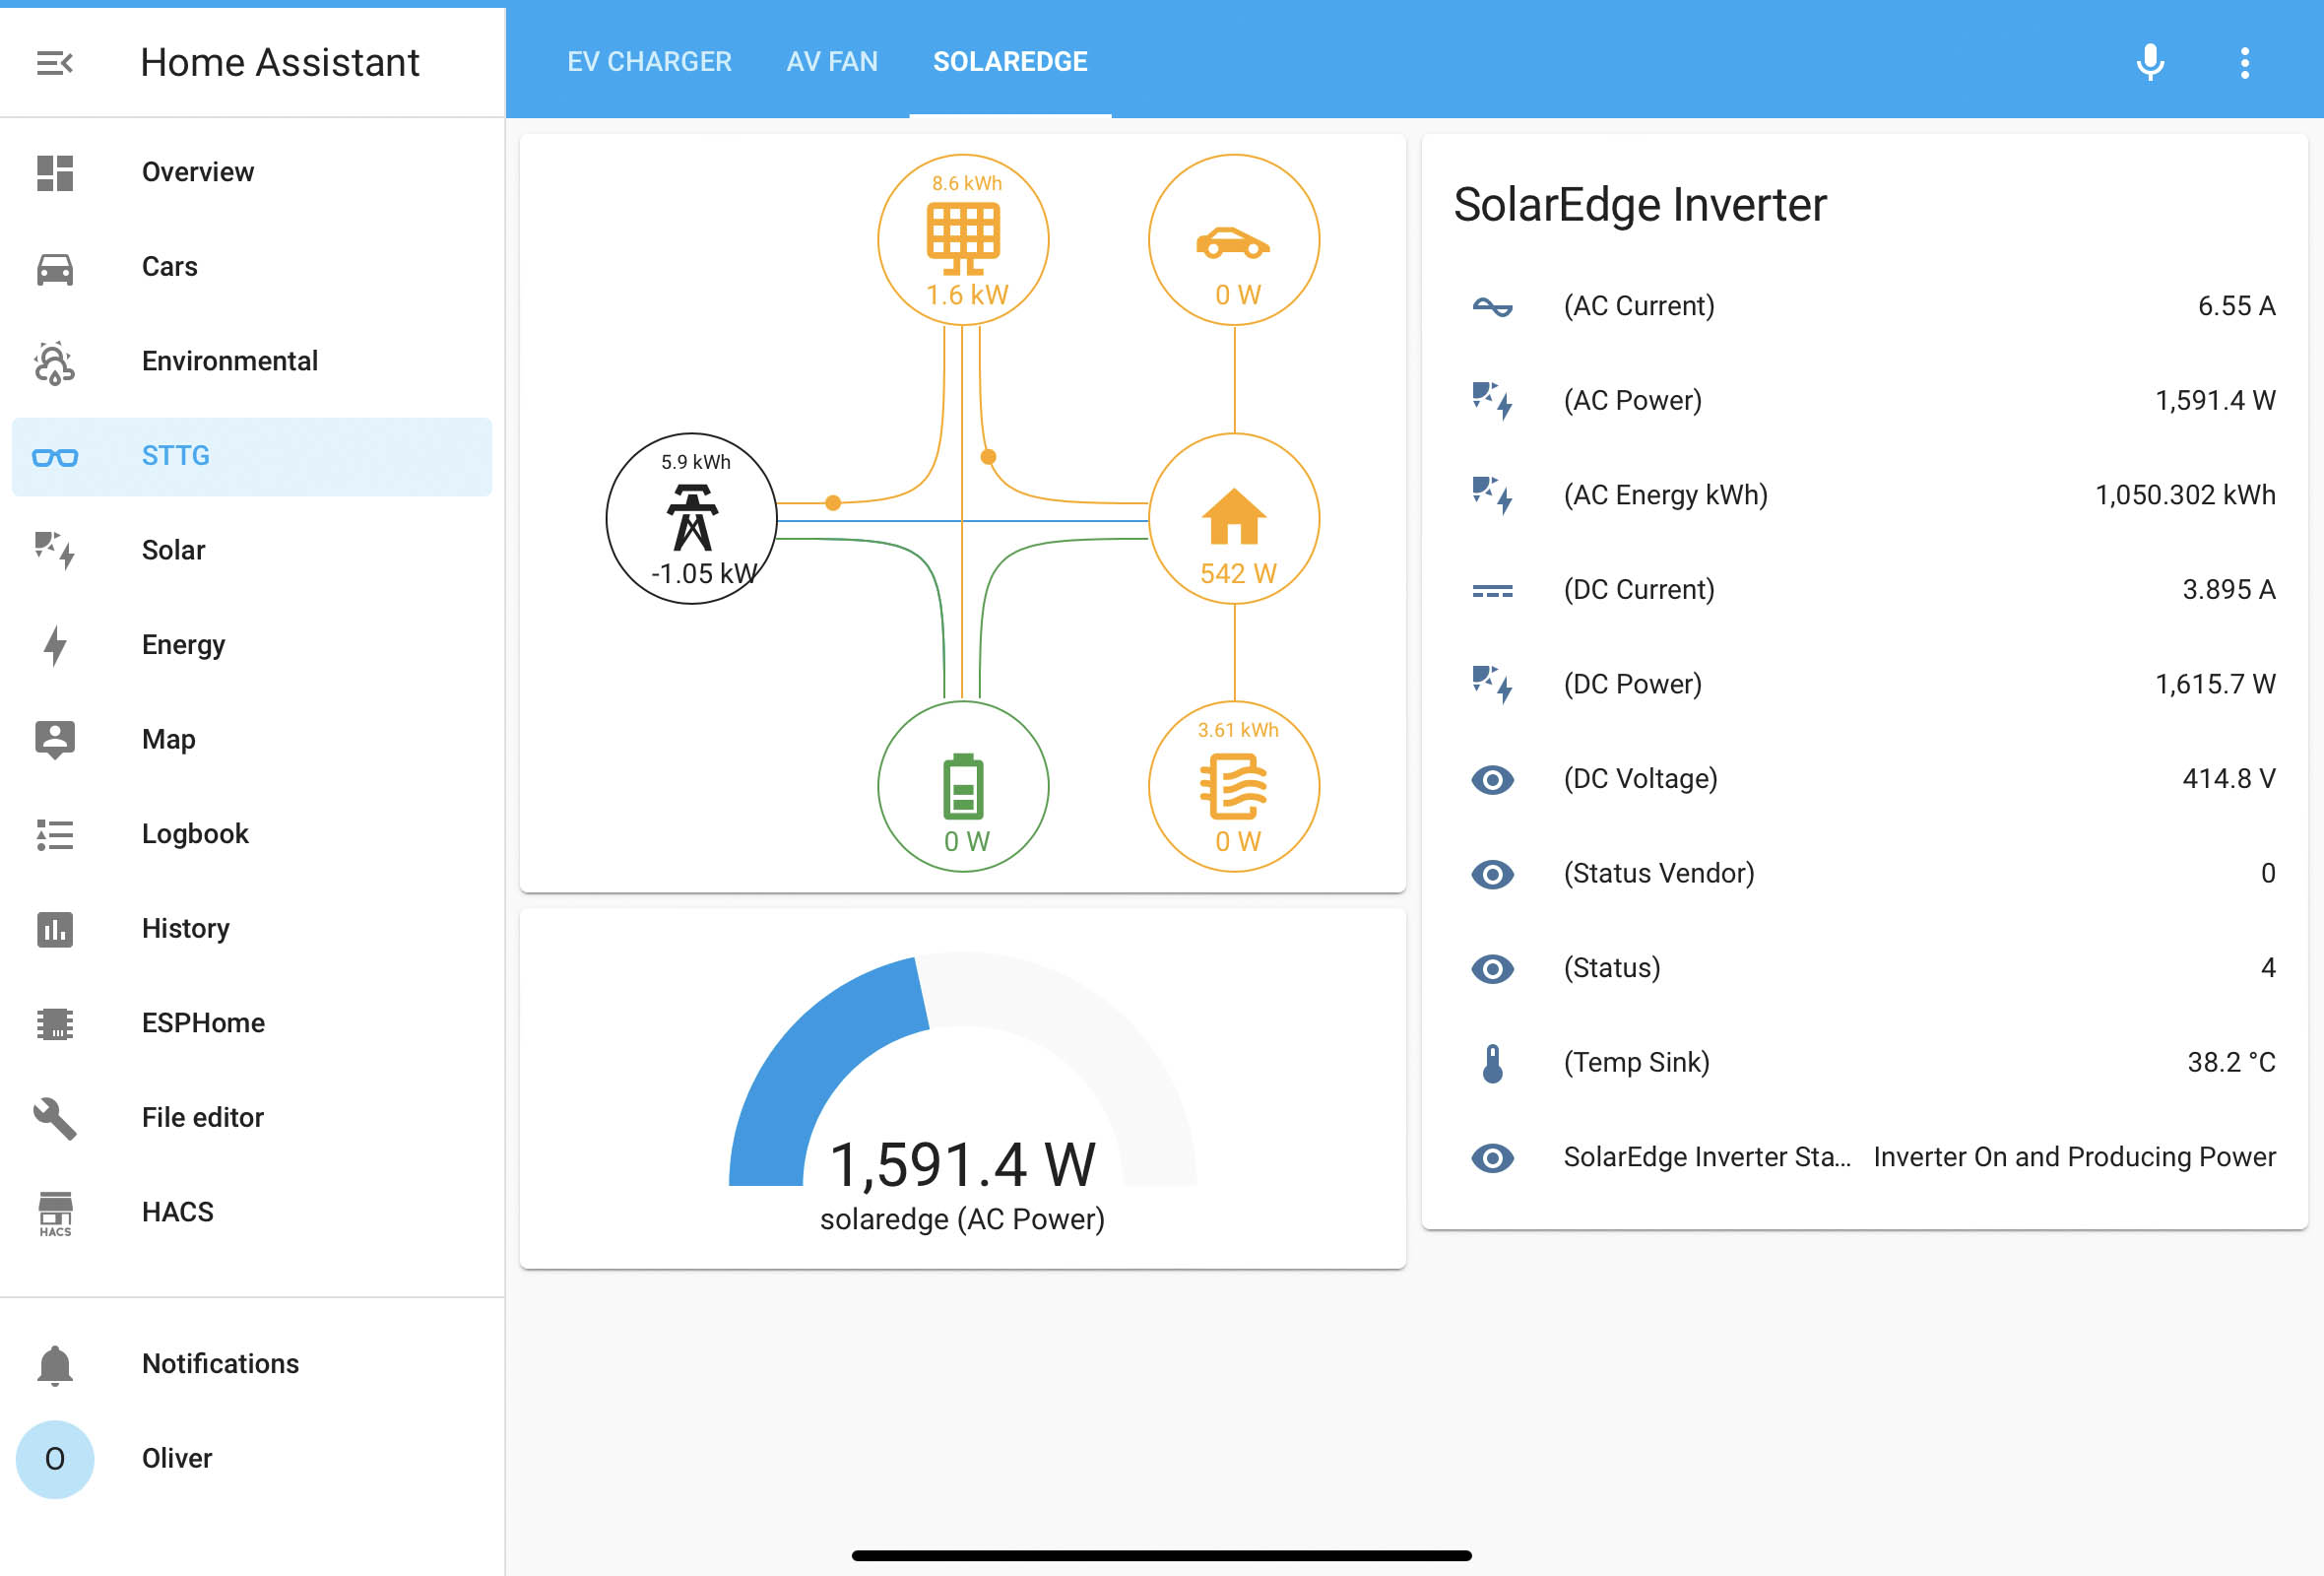
You need to be aware that when setting the polling value you might have to make a trade-off between how live your data is, how the traffic impacts your network, and how much data Home Assistant is storing. That last issue can be mitigated against to some extent because this integration will create over 20 entities. For most people with a single-phase installation, you can immediately disable all of the three-phase entities, and I’d argue that you probably don’t need historical AC current or frequency data either. For me, the important entities here are the AC power and the AC Energy.
That AC Energy entity can be used directly in the Energy Dashboard, and that live AC power entity can be used in an active gauge card, or my personal favourite, as part of the Tesla-style Power Card. I love this card because it looks great and at a glance gives you tons of live information. I will cover this card in a future article/video once I have my battery installed - I don’t want to present a half-finished solution.
And that’s it, quite a simple way to get live solar generation data into Home Assistant, requiring no jumps to the cloud or other people’s servers.