
Hildebrand Glow Smart Meter Display and CAD

(Note: updated article discussing local MQTT is here - https://www.speaktothegeek.co.uk/2022/06/hildebrand-glow-update-local-mqtt-and-home-assistant/)
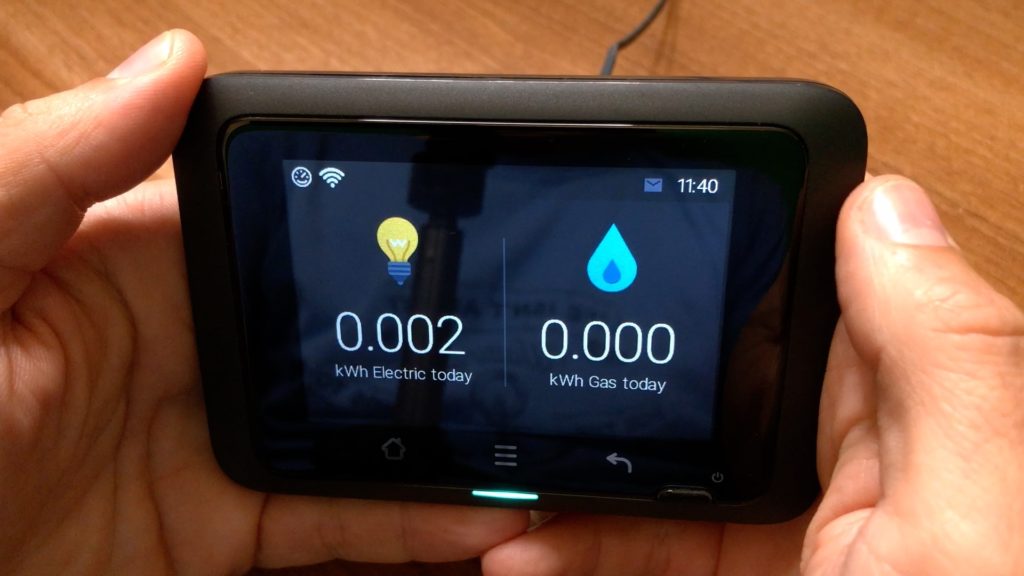
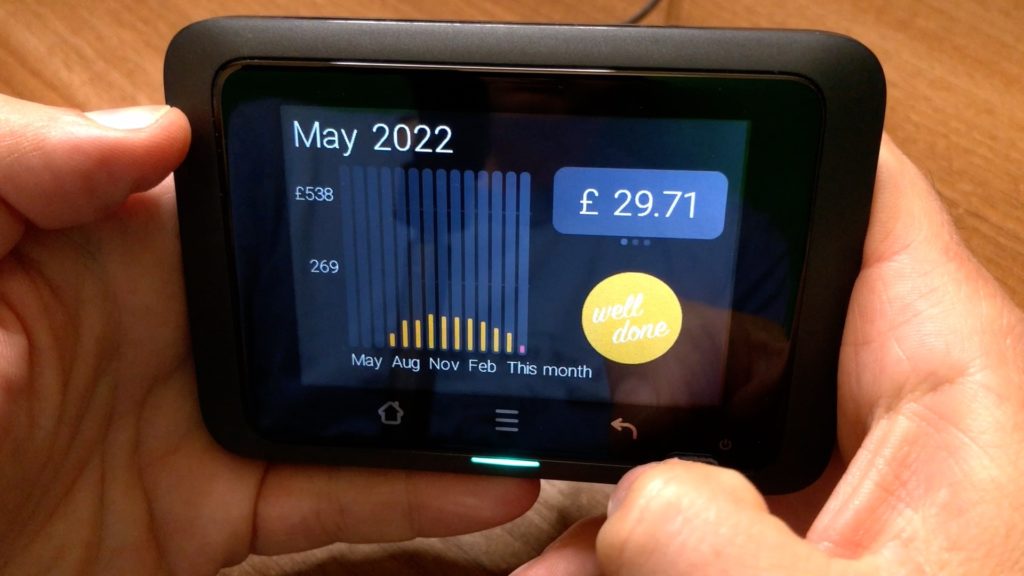
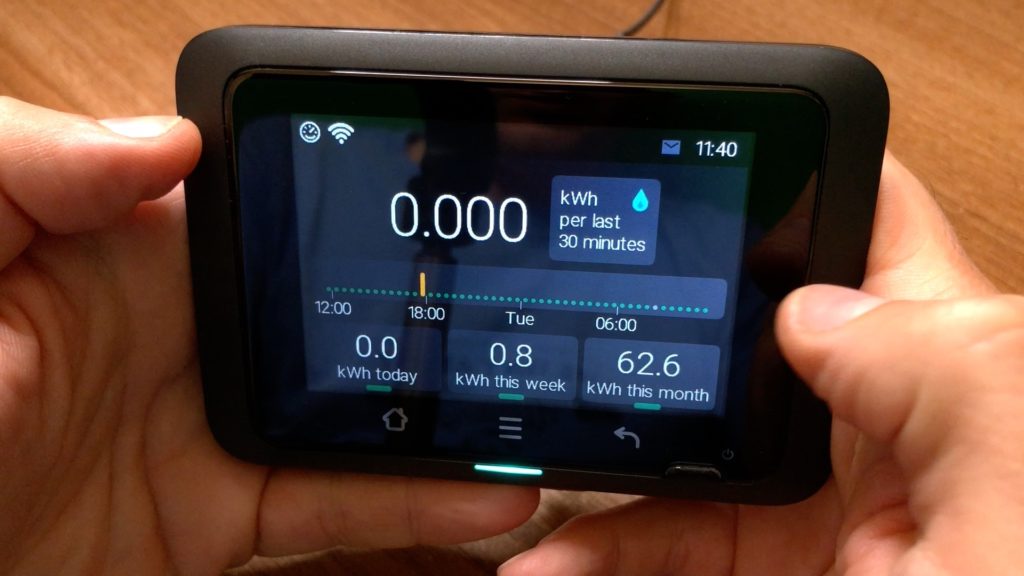
On the face of it, Hildebrand Glow display and CAD (available from here) is just a regular smart meter in-home display. It connects to your SMETS2 smart meter, and Hildebrand will set that up for you, and displays your live power usage, your historical energy usage on a graph in thirty minute intervals for both electricity and gas, and if your supplier’s tariff is supported, it’ll also display how much money you’ve been spending.
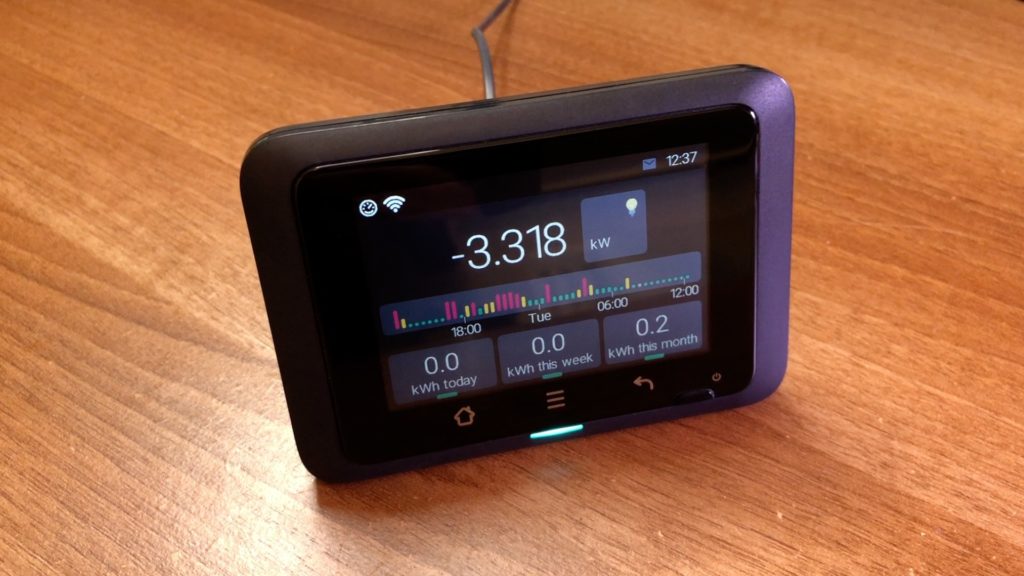

So why should you spend over £70 (including postage...) on this smart meter display? Well, it’s all about those last three letters in the product name, CAD, which stands for Consumer Access Device. If you want live access to the data coming out of your smart meter, you need a CAD, and if you’re in the UK then this Glow display is currently your one and only option as an ordinary consumer. The display connects to your Wifi network and sends live data from your smart meter to the Glow servers somewhere in the cloud.
You can then use the Bright app to view your live power consumption. Without the CAD, you only get delayed historical energy consumption data in the app. But what makes Glow invaluable to home automation is that all of this data, live and historical, is accessible via the Glow cloud API and even an MQTT feed. This is brilliant because it means you can create automations that make use of live power consumption updated approximately every 6 seconds or so. The energy data you get from the API or MQTT feed can be used in the Home Assistant energy dashboard, and both the energy and power readings that you get from Glow, which come directly from your smart meter, will be far more accurate than any CT clamp solution such as Myenergi Harvi which essentially estimates your energy usage based on your power consumption over time. There are two ways of integrating Glow into Home Assistant.
The first way is supposed to be the easiest: you install a custom component via HACS (https://github.com/unlobito/ha-hildebrandglow/). However, that custom component is currently archived by the developer and I couldn’t personally get it to work. Instead I opted for the difficult method - manually connecting Home Assistant to Glow’s MQTT feed. I can’t take credit for the method I’m about to show you, I found it on Github at this location (https://gist.github.com/ndfred/5bb51b567f8cfaf2bb06da6393169321), although I have made a few minor tweaks.
As soon as you have ordered your Glow display you should contact their support and ask them to confirm that MQTT has been enabled on your account. If you don’t do this, you may find yourself going around in circles trying to figure out what is wrong. Now you can just go ahead and connect Home Assistant straight to Glow’s MQTT broker if you wanted to, but the problem with doing that is Home Assistant has a limitation of only supporting a connection to a single MQTT broker. MQTT is used by lots of other components too such as Zwave2MQTT and Zigbee2MQTT, so to work around this we have to use a local MQTT broker to bridge a connection to Glow’s MQTT broker.
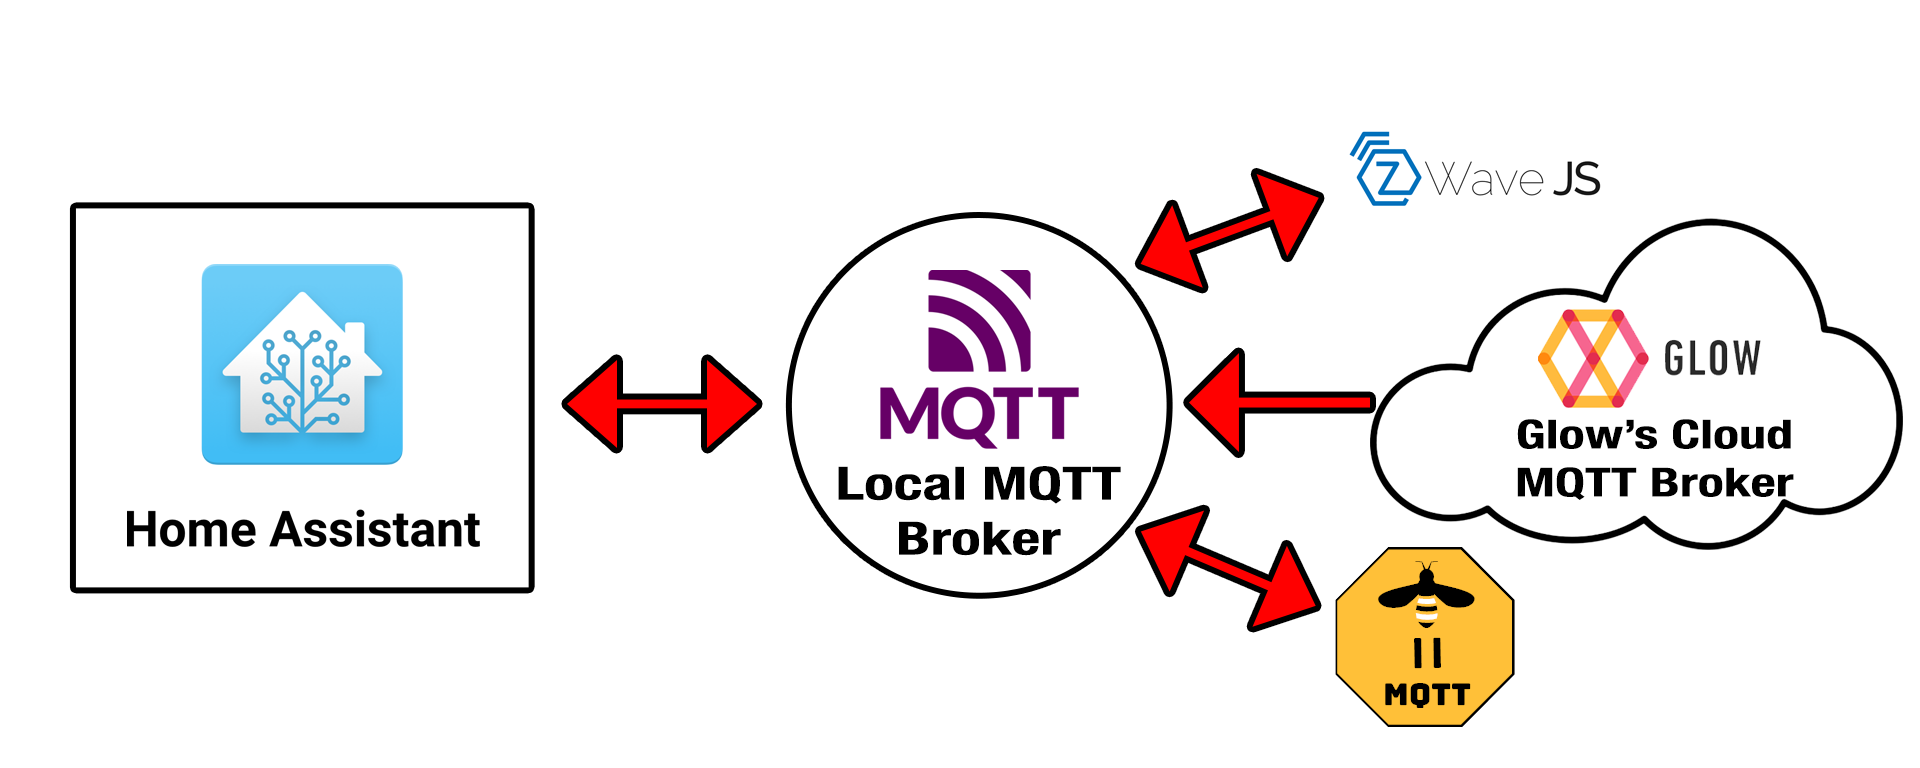
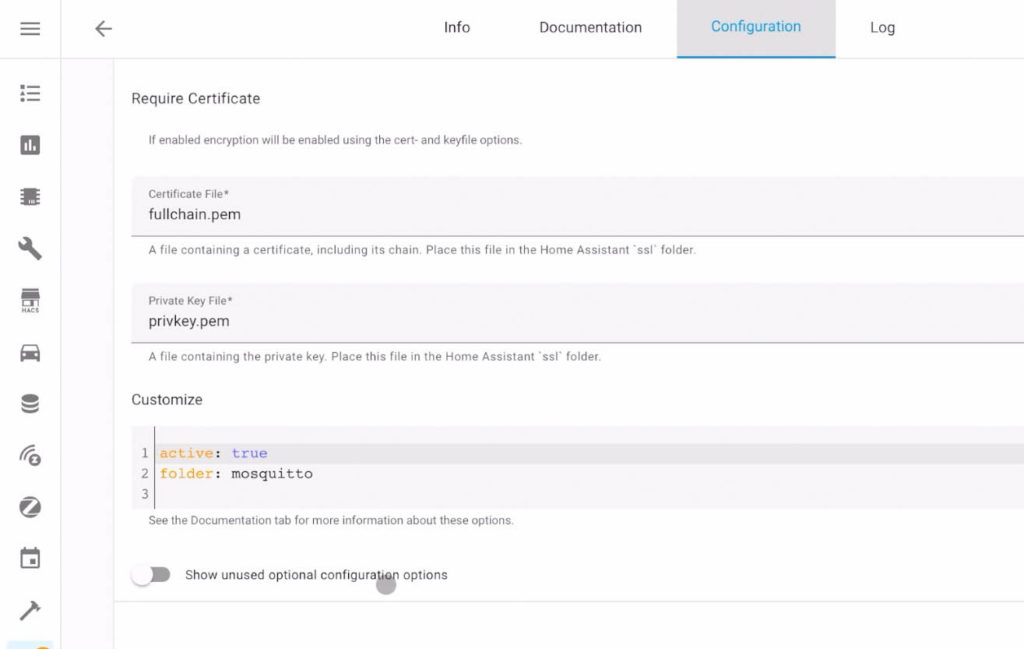
Now you need to make sure that you have an MQTT broker running somewhere on your local network. If you already know what you’re doing with this and have one running already, then great, but if you don’t, then I suggest you go to Home Assistant’s add-on store and install the Mosquitto add-on. When setting up the add-on, make sure that the customise section has a parameter called active set to true, and a folder parameter with a value of mosquitto. This tells Mosquitto to read additional configuration files in another location.
Next, you need to connect to a share on your Home Assistant server itself called ‘share’. You may have come across the Config share already where most data is kept, but we need to access one called ‘share’ this time. You can use normal network browsing, authenticating with your Home Assistant credentials, which is my preferred route, or you can use the Filebrowser add-on and browse your server’s file system from the web interface. Whichever way you do it, you need to create a folder within share called ‘mosquitto’ (note the lower case and double-t). In that folder you create a new file called ‘glow.conf’. If you’re using the web interface, you’ll probably need to create this file locally on your computer and upload it to the correct location. The contents of that glow conf file should look like this:
connection glowmqtt1
address glowmqtt.energyhive.com:8883
remote_username YOUR_GLOW_USERNAME
remote_password YOUR_GLOW_PASSWORD
bridge_capath /etc/ssl/certs/
topic SMART/HILD/YOURDEVICEID in 0
The first line is just a name for the connection, the address is the remote MQTT broker you are connecting to, then the next two lines are your Glow credentials. The last line, topic, will be the unique MQTT name used by all of the published data and you’ll need this to create your sensors later. That twelve-character number in the topic is your Glow display ID so make sure you get that right. Once the file is in place, restart the Mosquitto server or add-on, and it should in theory be ready to go.
Now we need to create some sensors in Home Assistant and this is where I diverge quite a bit from the Github page I showed you earlier. We need to manually edit our configuration yaml file, find the sensor section and add several new sensors. For electricity, I wanted to know the instantaneous power reading, total energy imported, and the total energy exported values. With that power reading, if I used the configuration from that Github page, then whenever I exported power the value would go crazy due to the use of base 16 values. So, I adapted it to ensure that imported power values are positive, and exported power values are negative.
(Update 2022-06-08: My previous YAML has been deprecated. Instead of including MQTT platform sensors in the 'sensor:' section, we use the 'mqtt:' section and create a series of sensors in there.)
mqtt:
  sensor:
    - name: "Smart Meter Electricity: Power"
      state_topic: "SMART/HILD/YOURDEVICEID"
      unit_of_measurement: 'W'
#      - value_template: "{{ value_json['elecMtr']['0702']['04']['00']|int(base=16) }}" # doesn't like export power values
      value_template: |-
        {% set value = value_json['elecMtr']['0702']['04']['00']|int(base=16) %}
        {% if (value > 0x80000000) %}
          {{ ((0xFFFFFFFF - value) * -1) | int }}
        {% else %}
          {{ value | int }}
        {% endif %}
      icon: 'mdi:flash'
      device_class: 'power'
      state_class: 'measurement'

    - name: "Smart Meter Electricity: Energy Import"
      state_topic: "SMART/HILD/YOURDEVICEID"
      unit_of_measurement: 'kWh'
      value_template: |-
        {{ value_json['elecMtr']['0702']['00']['00']|int(base=16) * value_json['elecMtr']['0702']['03']['01']|int(base=16) / value_json['elecMtr']['0702']['03']['02']|int(base=16) }}
      icon: 'mdi:flash'
      device_class: 'energy'
      state_class: 'total_increasing'

    - name: "Smart Meter Electricity: Energy Export" #Meter reading (export)
      state_topic: "SMART/HILD/YOURDEVICEID"
      unit_of_measurement: 'kWh'
      value_template: |-
        {{ value_json['elecMtr']['0702']['00']['01']|int(base=16) * value_json['elecMtr']['0702']['03']['01']|int(base=16) / value_json['elecMtr']['0702']['03']['02']|int(base=16) }}
      icon: 'mdi:gauge'
      device_class: 'energy'
      state_class: 'total_increasing'

    - name: "Smart Meter Gas"
      state_topic: "SMART/HILD/YOURDEVICEID"
      unit_of_measurement: 'm³'
      value_template: |-
        {{ value_json['gasMtr']['0702']['00']['00']|int(base=16) * value_json['gasMtr']['0702']['03']['01']|int(base=16) / value_json['gasMtr']['0702']['03']['02']|int(base=16) }}
      icon: 'mdi:fire'
      device_class: 'gas'
      state_class: 'total_increasing'

    - name: "Smart Meter Gas: kWh Daily"
      state_topic: "SMART/HILD/YOURDEVICEID"
      unit_of_measurement: 'kWh'
      value_template: |-
        {{ value_json['gasMtr']['0702']['0C']['01']|int(base=16)  * value_json['gasMtr']['0702']['03']['01']|int(base=16) / value_json['gasMtr']['0702']['03']['02']|int(base=16) }}
      icon: 'mdi:flash'
      state_class: total_increasing
      device_class: energy
sensor:
  - platform: mqtt
    name: "Smart Meter Electricity: Power"
    state_topic: "SMART/HILD/YOURDEVICEID"
    unit_of_measurement: 'W'
#    value_template: "{{ value_json['elecMtr']['0702']['04']['00']|int(base=16) }}" # doesn't like export power values
    value_template: "{% set value = value_json['elecMtr']['0702']['04']['00']|int(base=16) %}{% if (value > 0x80000000) %}{{ ((0xFFFFFFFF - value) * -1) | int }}{% else %}{{ value | int }}{% endif %}"
    icon: 'mdi:flash'
    device_class: 'power'
    state_class: 'measurement'
  - platform: mqtt
    name: "Smart Meter Electricity: Energy Import"
    state_topic: "SMART/HILD/YOURDEVICEID"
    unit_of_measurement: 'kWh'
    value_template: "{{ value_json['elecMtr']['0702']['00']['00']|int(base=16) * value_json['elecMtr']['0702']['03']['01']|int(base=16) / value_json['elecMtr']['0702']['03']['02']|int(base=16) }}"
    icon: 'mdi:flash'
    device_class: 'energy'
    state_class: 'total_increasing'
  - platform: mqtt
    name: "Smart Meter Electricity: Energy Export" #Meter reading (export)
    state_topic: "SMART/HILD/YOURDEVICEID"
    unit_of_measurement: 'kWh'
    value_template: "{{ value_json['elecMtr']['0702']['00']['01']|int(base=16) * value_json['elecMtr']['0702']['03']['01']|int(base=16) / value_json['elecMtr']['0702']['03']['02']|int(base=16) }}"
    icon: 'mdi:gauge'
    device_class: 'energy'
    state_class: 'total_increasing'
  - platform: mqtt
    name: "Smart Meter Gas"
    state_topic: "SMART/HILD/YOURDEVICEID"
    unit_of_measurement: 'm³'
    value_template: "{{ value_json['gasMtr']['0702']['00']['00']|int(base=16) * value_json['gasMtr']['0702']['03']['01']|int(base=16) / value_json['gasMtr']['0702']['03']['02']|int(base=16) }}"
    icon: 'mdi:fire'
    device_class: 'gas'
    state_class: 'total_increasing'
  - platform: mqtt
    name: "Smart Meter Gas: kWh Daily"
    state_topic: "SMART/HILD/YOURDEVICEID"
    unit_of_measurement: 'kWh'
    value_template: "{{ value_json['gasMtr']['0702']['0C']['01']|int(base=16)  * value_json['gasMtr']['0702']['03']['01']|int(base=16) / value_json['gasMtr']['0702']['03']['02']|int(base=16) }}"
    icon: 'mdi:flash'
    state_class: total_increasing
    device_class: energy
For gas, I wanted both the cubic metres value, which is what my physical meter values represent, and the kWh value, which is what I’m billed in. For my meter, getting the cubic metres value was easy, just make sure you use the superscript ³ not a regular 3 in the unit of measurement field. But, getting kWh in a useful format was trickier. I can only get the current daily energy usage figure. The values are delayed by half an hour which means that the energy consumption for the whole day is actually reported at midnight, and then it resets. The problem here is that if you try and use this in Home Assistant’s energy dashboard, you get a reasonable usage throughout the day, even if it’s delayed by 30 minutes, but then at midnight the dashboard switches over to the next day and you end up with the previous day’s total consumption logged for the midnight to half-past midnight time period, effectively double-accounting your gas usage. I haven’t found a way around this because currently there’s no way of passing data to Home Assistant and telling it that it’s actually supposed to be for a different time period to that which it was received in. After much scratching of my head, I gave up and went back to monitoring it as cubic metres. Anyway, add the sensors you need to your configuration, check the YAML for errors then restart Home Assistant and your sensors should appear for you to use. And that’s it!
Finally I can’t end this article until I talk about what’s wrong with this device, because it isn’t perfect. What is annoying is the reliance on Glow’s cloud servers. Those servers are working for most of the time, but there have been at least three outages that I’ve experienced during the seven months so far that I’ve been using it. And the thing is, it really shouldn’t be a problem because a device like this should really allow you to access it locally. It does seem pointless to send this data out from my home to their servers only for me to then have to go back out to their servers to bring it back locally again. I know many other users on their forum feel the same way and have been pressuring Hildebrand to provide a local API or MQTT feed through a firmware update. They have responded and are releasing a CAD, without a display, that will support local access to your data at release. You need to contact them and ask to go on a waiting list if you want one though because they’re not available yet through the shop. When I heard about this new CAD with local access, I sent another email to the ever-patient Jane from Hildebrand asking if local access will ever come to the Glow Display that I have. She replied very diplomatically to say that yes, it will eventually, but there are no timeframes for it. This is good news for me, and a sensible decision for Hildebrand because the more users who access their data locally, the lower the load is on their servers and, in theory, the more reliable their product is because there are fewer things to go wrong for a certain percentage of their users at least.
With that bad point out of the way, I’d still suggest you get one of these if you need to monitor your power and energy usage in Home Assistant. There is no real alternative product that I’m aware of that can do this so they’ve really cornered the market.