ESPHome Ultrasonic Motion Sensor

One of the most commonly used sensors within home automation has to be the motion sensor, which is usually used to detect human presence in a room in order to turn things on or off. If you use motion sensors to turn lights on and off then you’ve probably already come across a problem with them. Most use infrared and they’re not so great at detecting the presence of someone in a room who isn’t moving. So you walk into your living room, it detects you walking in, you sit down for a while to watch TV and the sensor turns your lights turn off. Well, I have a solution - an ultrasonic sensor that can detect if you’re still sitting on your sofa even if you’re not moving.
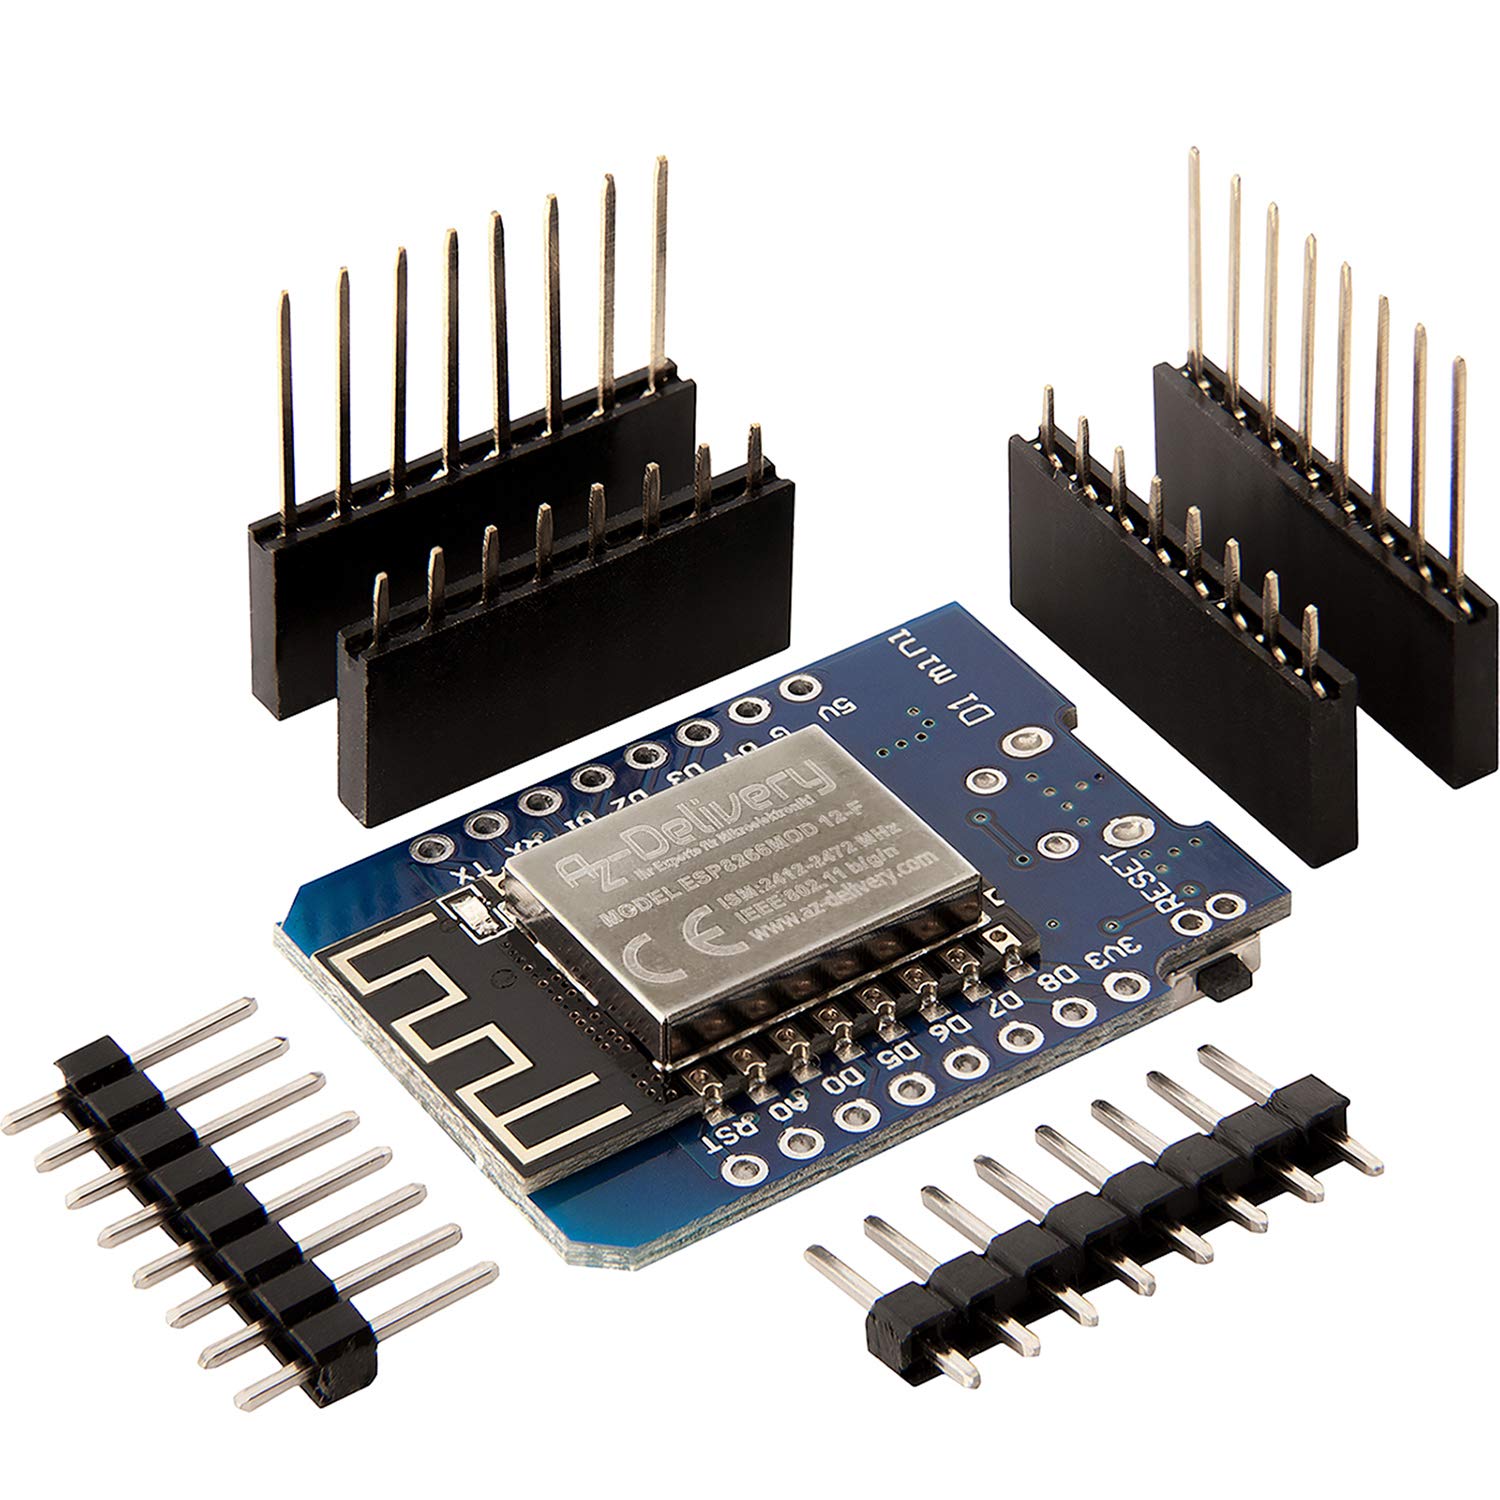
Ultrasonic sensors detect distance and are used in things like car reversing sensors. They only cost a couple of quid each, and I’ve put together an ESPHome device that takes that distance reading and publishes a presence sensor to Home Assistant. I’m building this using a D1 Mini microcontroller because they’re small and cheap - you can use your preferred board, but you’ll need to adjust your wiring and configuration accordingly. I quite like the AZ Delivery ones from Amazon, but I’ve also used cheaper ones from China with no issues if you don’t mind waiting several weeks for them.
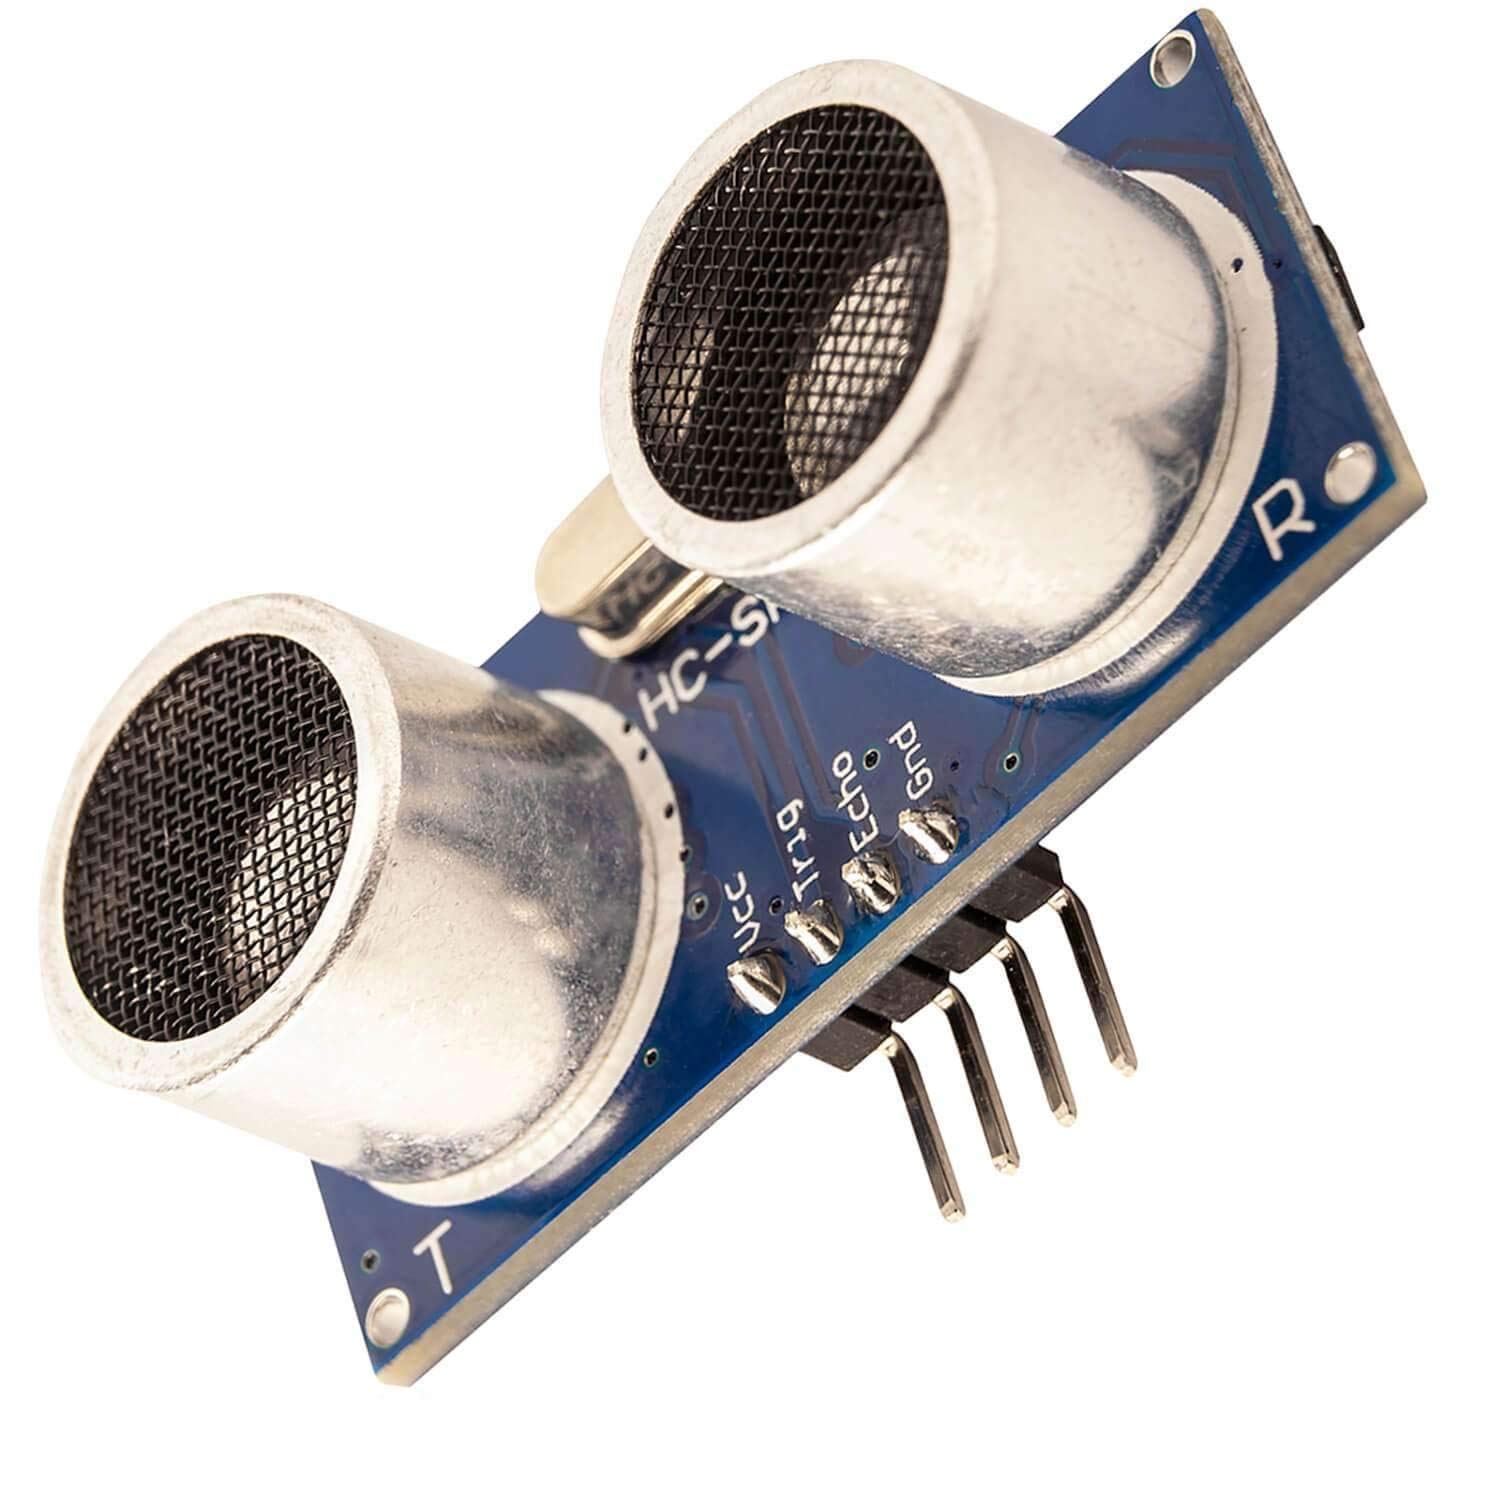
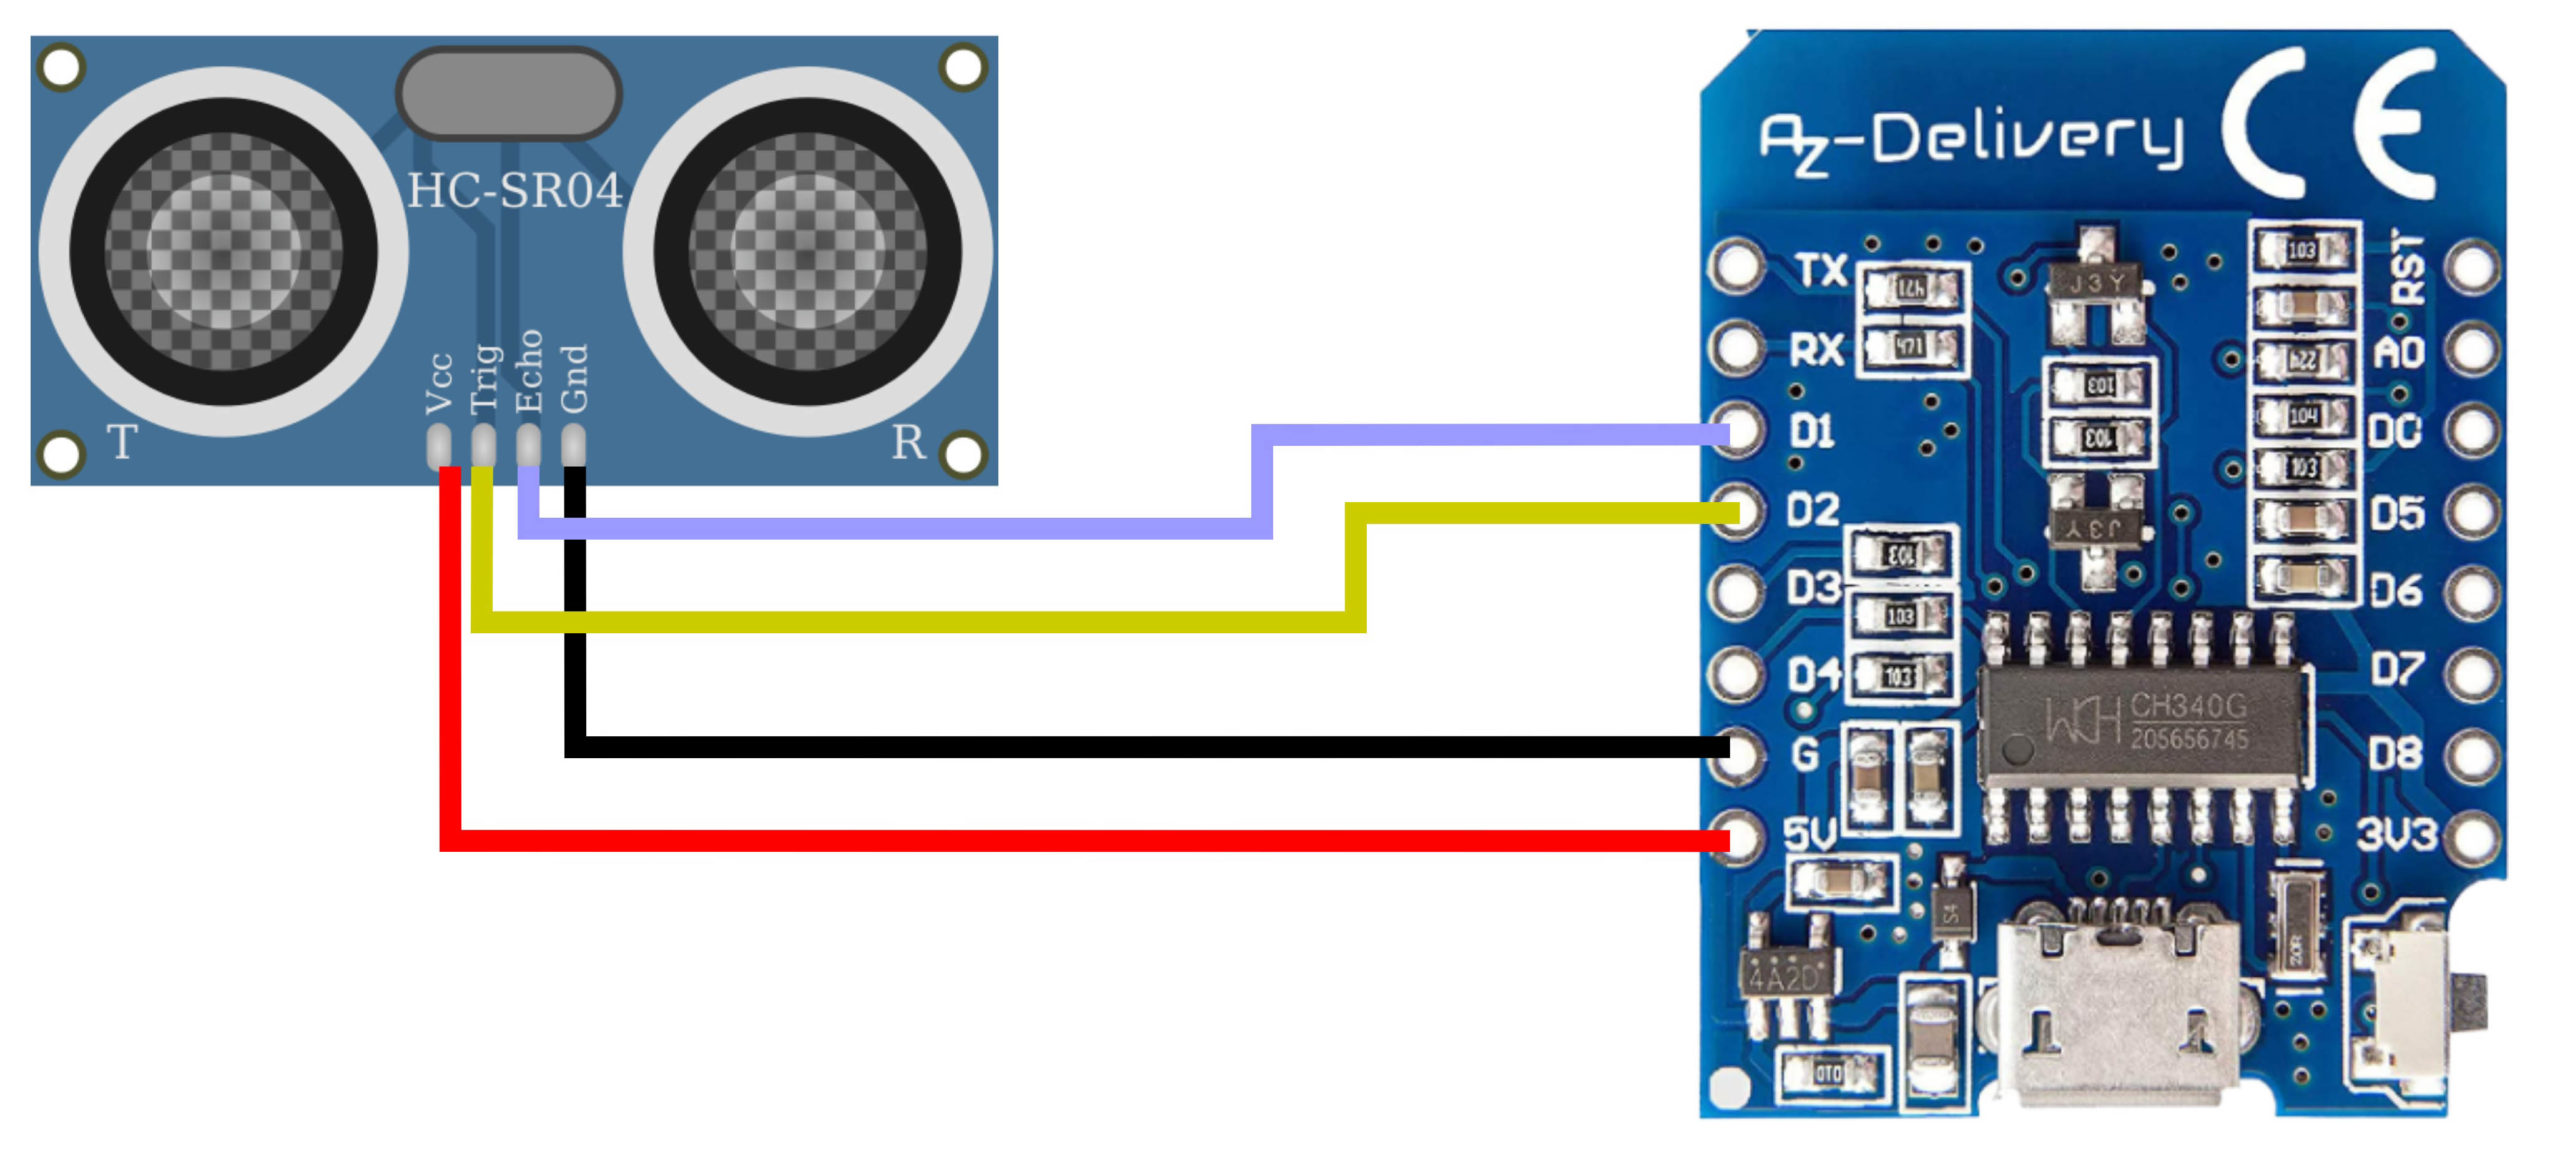
You do tend to have to solder your own header connections to them, but if you search around you can get pre-soldered ones for a bit more money. The wiring for this sensor is super-simple - there are just four wires. You must connect the sensor to the 5v pin on the D1, plus a ground, and then there’s a connection for sending a trigger signal and another for receiving the echo response.
Once you’ve wired it all up, connect it to your computer via USB, and use the ESPHome interface to upload the configuration to it. This time I managed to get the web serial interface to work via the Chrome browser which has made programming these things a lot easier.
substitutions:
  device_name: ultrasonic-motion
  friendly_name: "ultrasonic-motion"
  device_description: "Ultrasonic Motion Sensor"

esphome:
  name: '${device_name}'
  comment: '${device_description}'
  platform: ESP8266
  board: d1_mini

# Enable logging
logger:

# Enable Home Assistant API
api:

wifi:
  ssid: !secret wifi_ssid
  password: !secret wifi_password

  # Enable fallback hotspot (captive portal) in case wifi connection fails
  ap:
    ssid: '${device_name}'
    password: !secret fallback_password

captive_portal:

ota:
  - platform: esphome

safe_mode:
  disabled: false
  reboot_timeout: 10min
  num_attempts: 5

web_server:
  port: 80
  auth:
    username: !secret esphome_web_username
    password: !secret esphome_web_password

globals:
 # Set this to the distance detected by the ultrasonic sensor. Default is 2m.
 - id: maximum_distance
   type: float
   initial_value: '2.0'
 # How many distance readings to detect before reporting value (smooth false positives)
 - id: reporting_interval
   type: int
   initial_value: '5'
 # Do not change the following globals
 - id: detected_readings
   type: int
   restore_value: no
   initial_value: '0'
 - id: previous_reading_nan
   type: boolean
   restore_value: no
   initial_value: 'true'
 - id: previous_reading
   type: float
   restore_value: no
   initial_value: '20.0'


sensor:
  # This is the physical sensor, not published to Home Assistant
  - platform: ultrasonic
    trigger_pin: D2
    echo_pin: D1
    name: "Ultrasonic Distance Raw"
    update_interval: 1s
    id: ultrasonic_distance_raw
    internal: true
  # This is a virtual sensor to smooth the false positive readings
  - platform: template
    id: ultrasonic_distance
    name: "Ultrasonic Distance"
    update_interval: 1s
    lambda: |-
      ESP_LOGD("Ultrasonic", "Got %d readings in a row", id(detected_readings));
      if (id(ultrasonic_distance_raw).state < id(maximum_distance)) {
        // We have a reading... don't use it, just remember that we got one, but not if we're already at the limit of how many we need
        ESP_LOGD("Ultrasonic", "We have a reading... don't use it, just remember that we got one.");
        if(id(previous_reading_nan) == true) {
          id(previous_reading_nan) = false;
          id(detected_readings) = 0;
        }
        if( id(detected_readings) < id(reporting_interval) ) {
          id(detected_readings) += 1;
        }
      }
      else {
        // We got a NAN reading (out of range). Reset the readings counter
        if(id(previous_reading_nan) == false) {
          id(previous_reading_nan) = true;
          id(detected_readings) = 0;
        }
        if( id(detected_readings) < id(reporting_interval) ) {
          id(detected_readings) += 1;
        }
        ESP_LOGD("Ultrasonic", "We got a NAN reading (out of range). Reset the readings counter");
        id(previous_reading_nan) = true;
      }

      if( id(detected_readings) >= id(reporting_interval)) {
        // We have gathered enough readings in a row to report
        if(id(previous_reading_nan) == false) {
          id(previous_reading) = id(ultrasonic_distance_raw).state;
          return id(ultrasonic_distance_raw).state;
        }
        else {
          ESP_LOGD("Ultrasonic", "We have gathered enough readings in a row to report: %f", id(maximum_distance));
          id(previous_reading) = id(maximum_distance);
          return id(maximum_distance);
        }
      }
      return id(previous_reading);


binary_sensor:
  - platform: template
    name: "Ultrasonic Presence"
    lambda: |-
      if (id(ultrasonic_distance).state < id(maximum_distance)) {
        // Presence is detected
        return true;
      } else {
        // No presence detected.
        return false;
      }
    filters:
      - delayed_off: 5000ms
As for the yaml configuration for this sensor, it’s not quite so straightforward. I started off with my usual template which enables Wifi over-the-air updating and a useful web interface too. Then comes a section of global variables. The first variable named maximum_distance determines the maximum distance that the sensor can detect. If you know what you’re doing, you can change this value and you’ll also need to change the physical sensor value too further down in the configuration. I won’t be covering that because there’s a lot of maths involved in calculating echo response times! By default, ESPHome uses a maximum detection distance of two metres. The reporting_interval variable sets how many readings in a row are required before the motion sensor is turned on or off. This is required because the ultrasonic sensors tend to randomly pick up quite a few false distance readings, and by making sure that we have, for example, five close proximity readings in a row before declaring that we have presence or no presence detected, we make this sensor a lot more reliable. You can change this value if you find that your sensor is performing differently to mine. But the higher this value, the longer it takes for the motion sensor to react.
Ignore the other variables - they’re just used within the code further on in this configuration file, and move on to the sensor section. Here we have configuration for the physical ultrasonic sensor. You can see that the pin values correspond with the physical pins that we wired the sensor to, the sensor updates every one second, and the ‘internal’ parameter is set to true. This stops the sensor from appearing directly in Home Assistant because it’s really the next two sensors that we’re interested in. This second sensor is for my special smoothed distance reading. It takes the value from the previous physical sensor and attempts to remove the false readings. Yes, there’s a lot of logic to get your head around there, so feel free to just copy and paste it!
Finally there’s a binary_sensor created by watching the state of the smoothed distance sensor. It works by checking to see if that distance value is within the maximum range of the ultrasonic sensor and if so, turns it on. If it isn’t it turns the sensor off. There’s also a delay of 5 seconds applied when the sensor turns off in order to stop it from bouncing on and off too rapidly. You can customise this if you like because again it’s just a suggestion that worked for me.
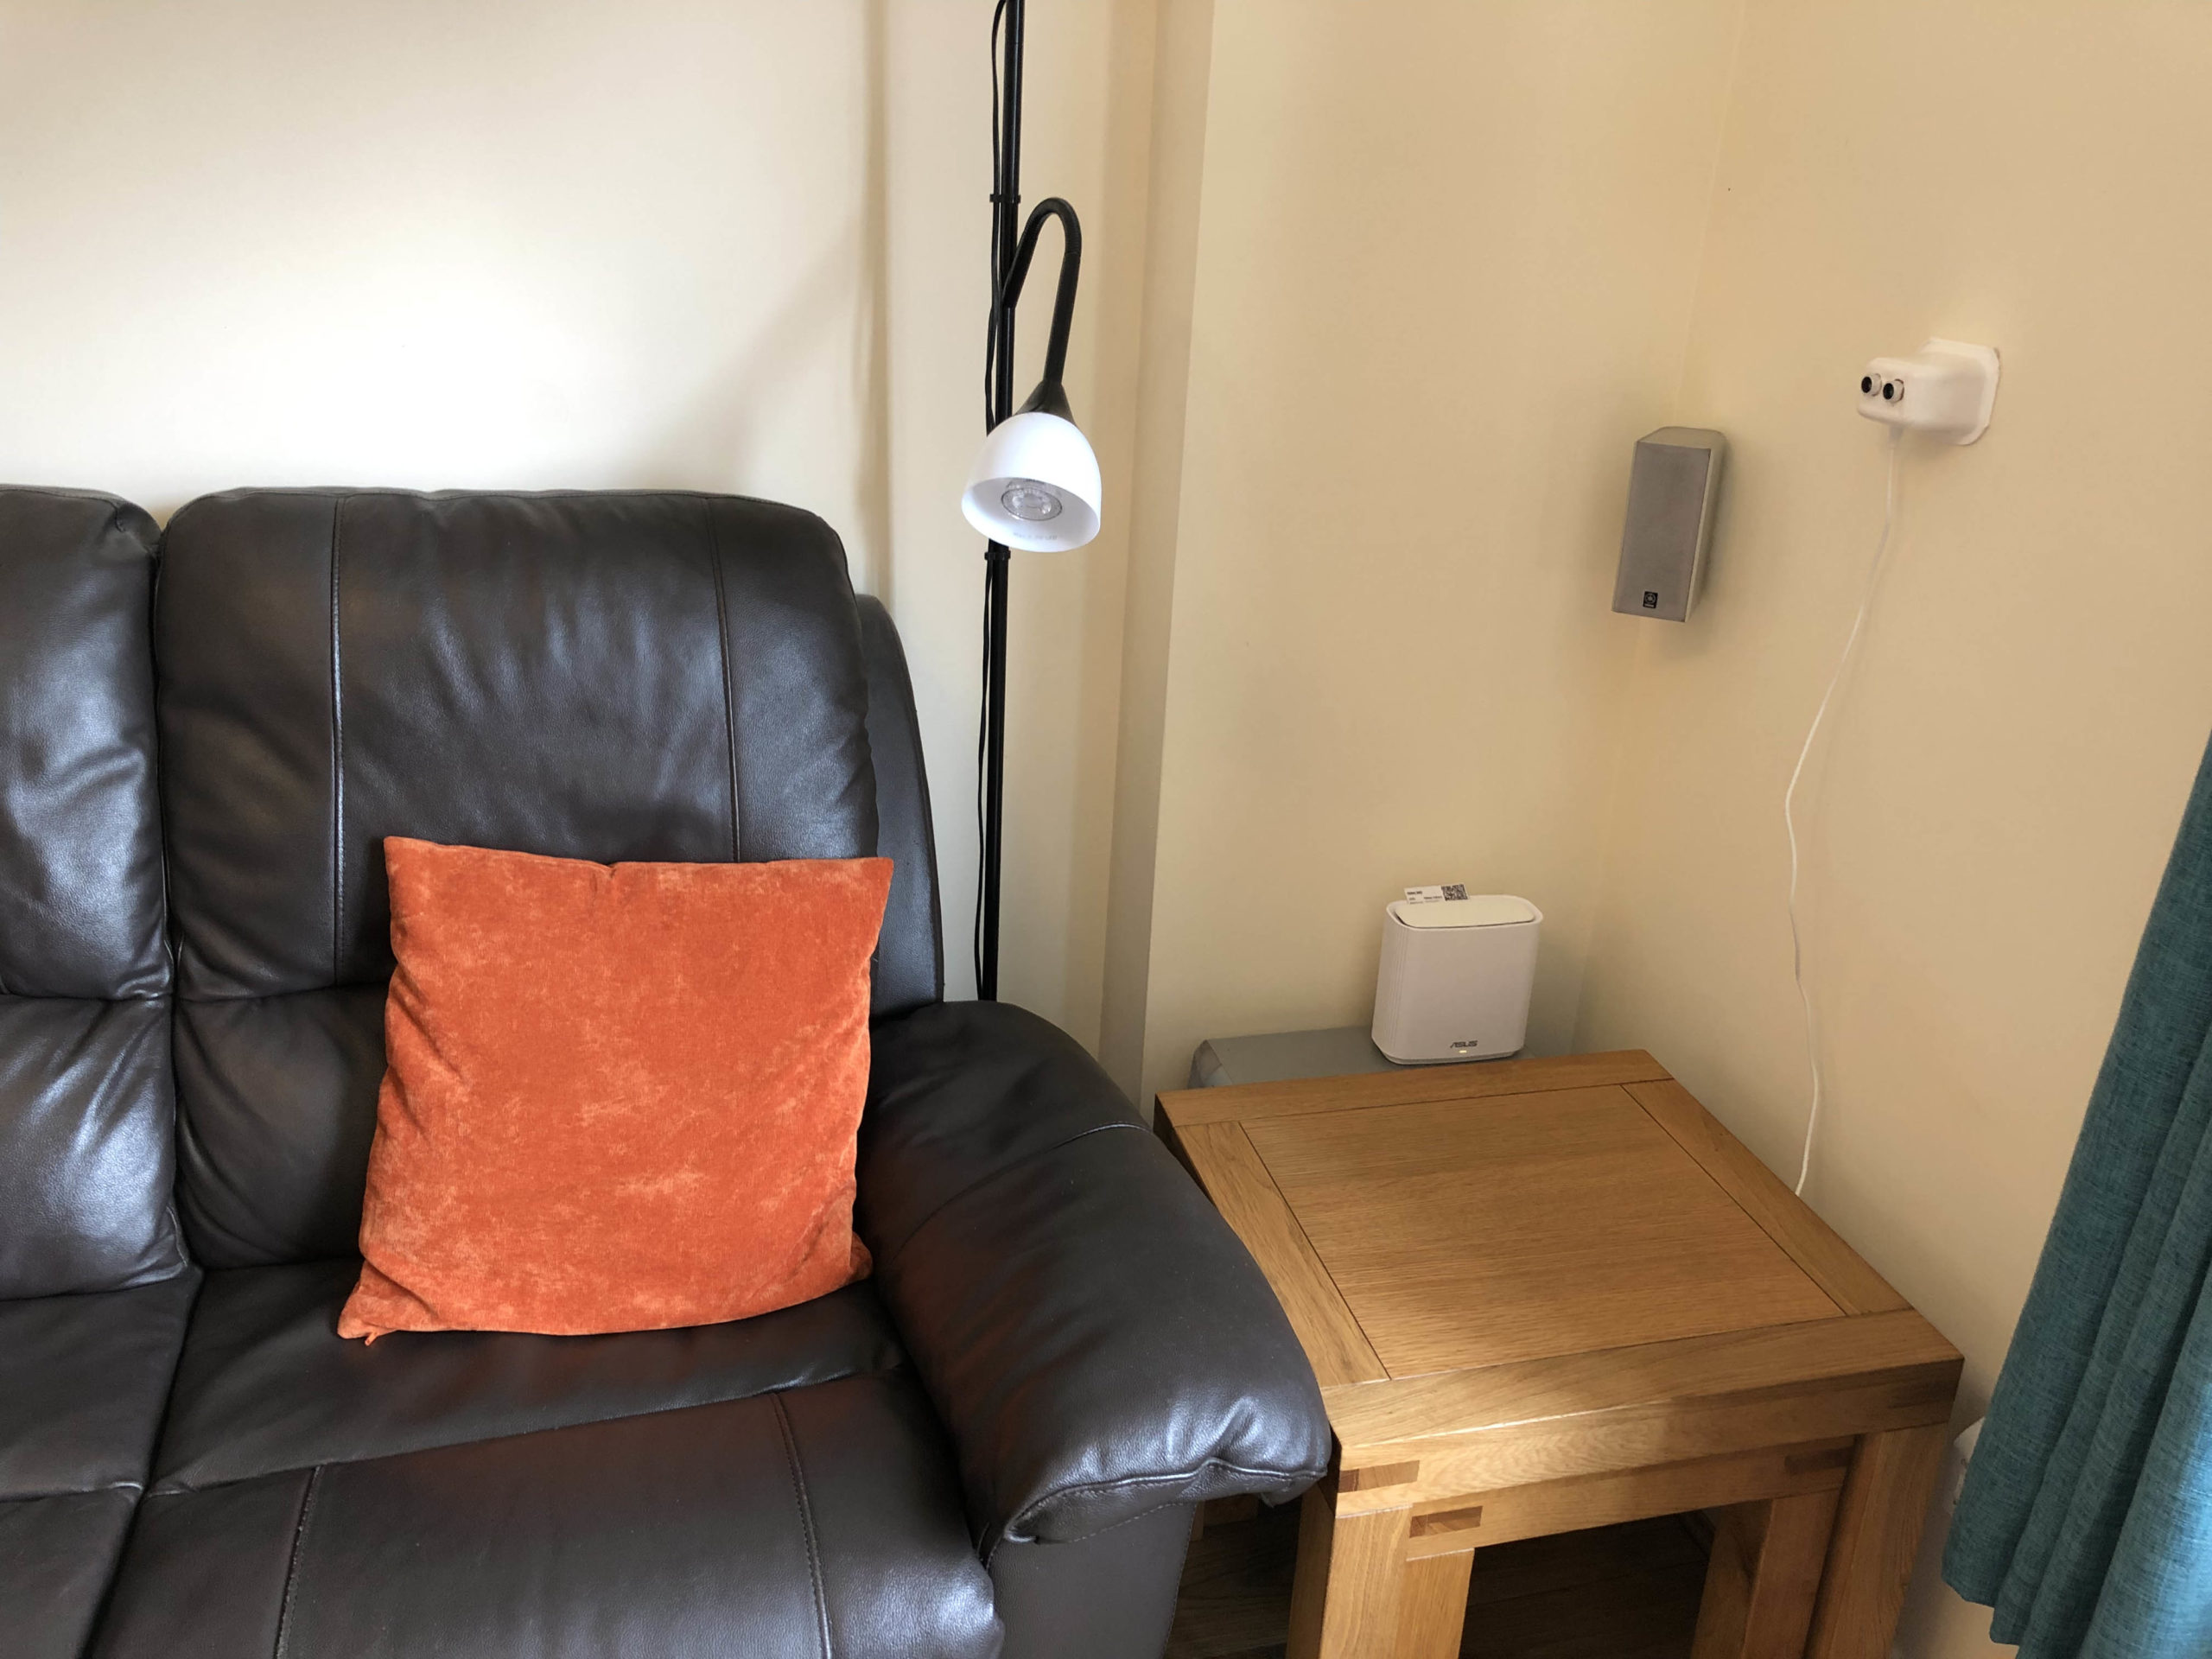
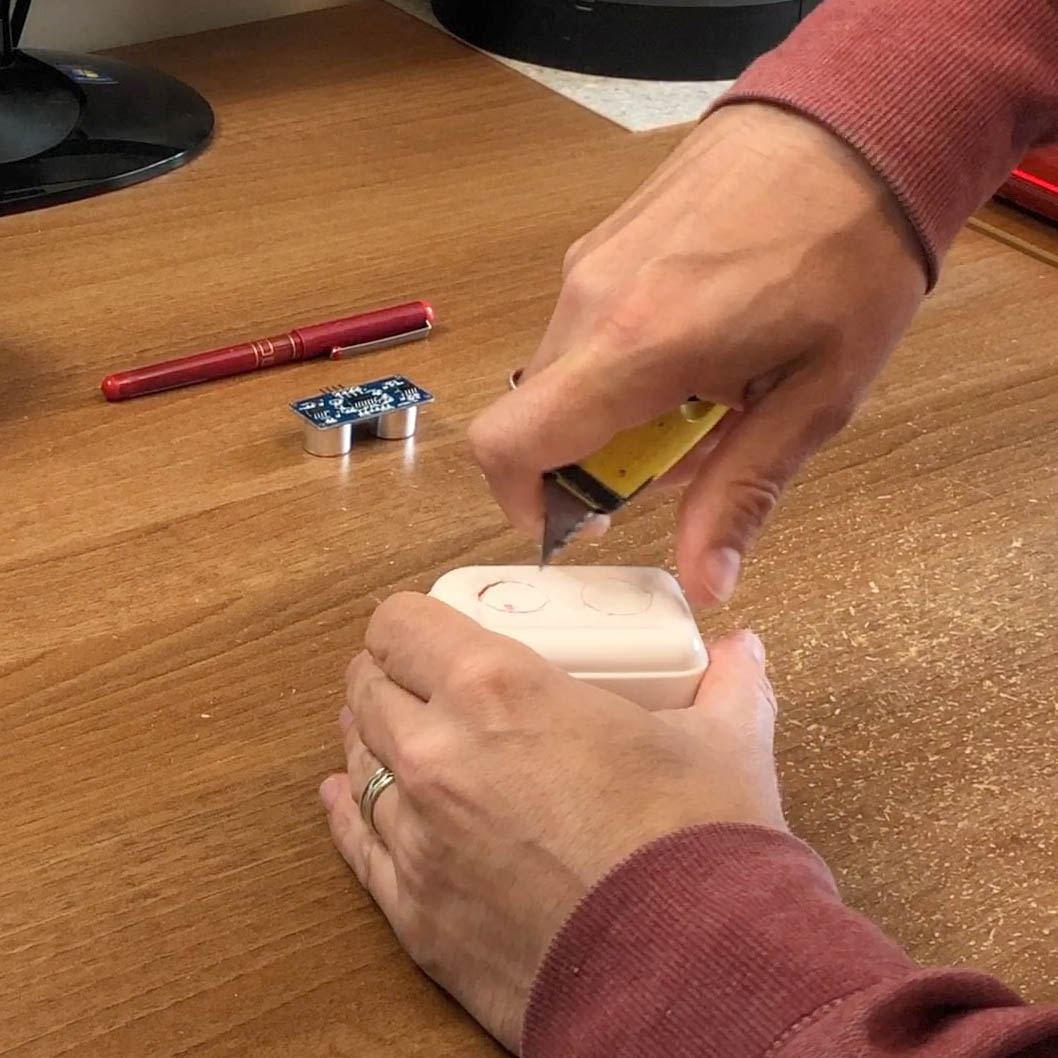
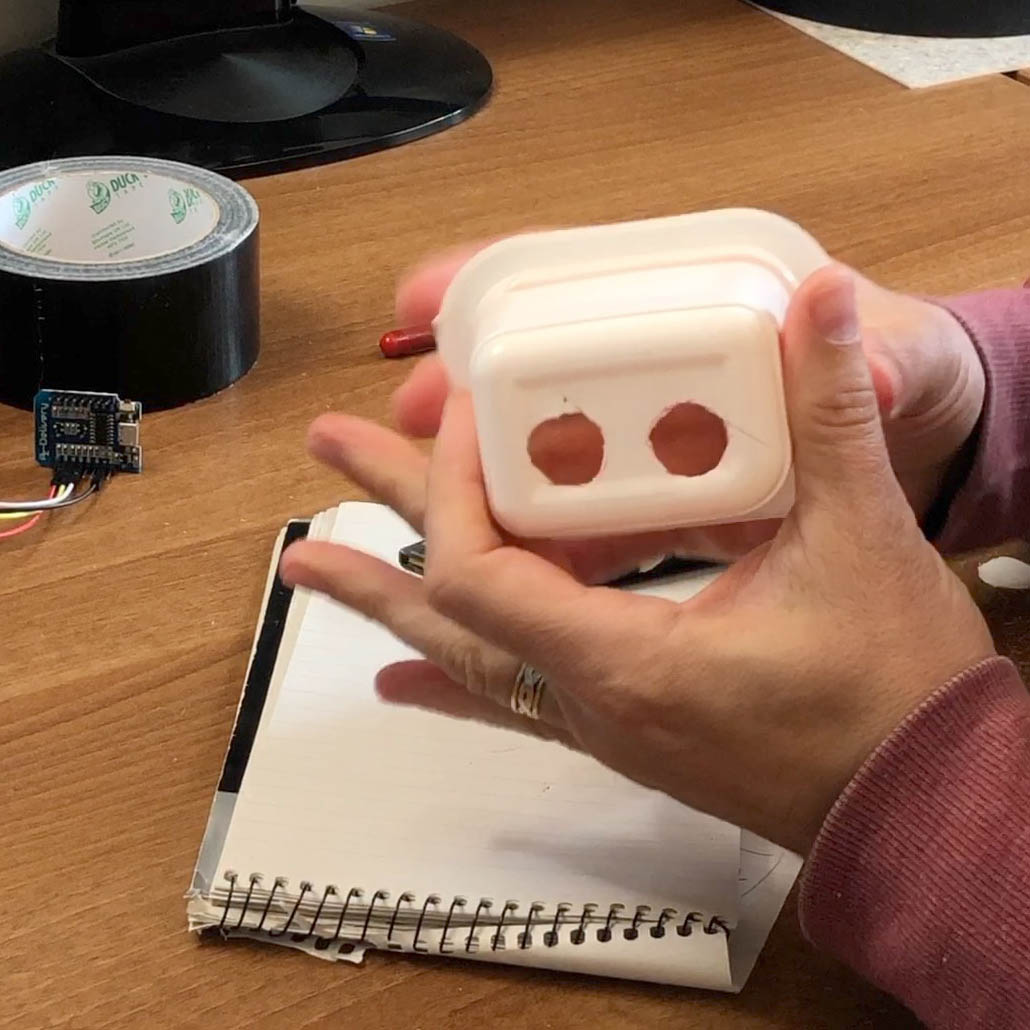
Back to the physical sensor that we’re building, in order to try it out, we need to house the components in a case. As this is just a prototype, I found that a plastic baked bean pot was ideal to put in it. You just open it up, empty out the baked beans, mark an outline of the ultrasonic sensor on the bottom of it, and carefully cut out a couple of holes. The sensor should fit nicely inside even with the wires attached and it shouldn’t need anything else to hold it in place. Cut another hole for the USB power cable to fit through in what will become the bottom of it, and then use some blue tack or putty to hold the D1 mini in place.
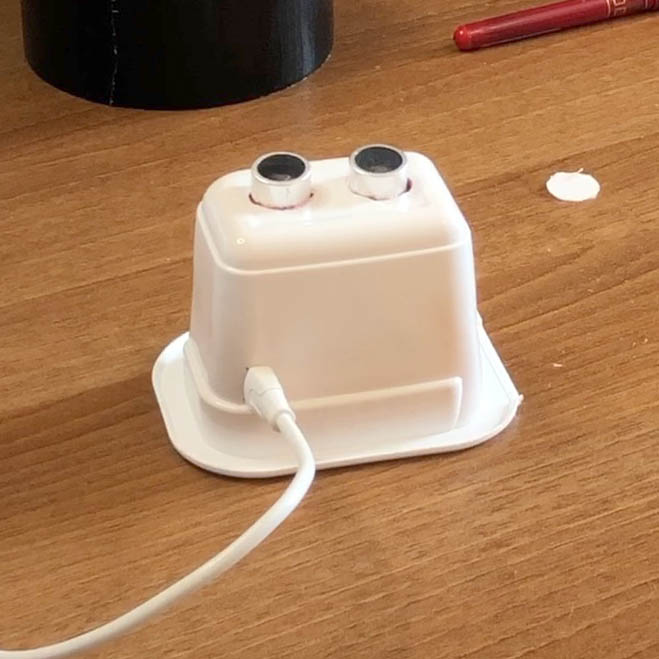
I then stuck it to the wall in my living room using a bit more putty, pointing across the length of my sofa. It took a bit of experimentation to get it in an optimal position, but once I got that right, it reacted quite quickly and reliably. This is obviously just a prototype that I’m testing and I need to make it look a bit prettier and maybe even get it working from a battery.